Our custom round home control panels
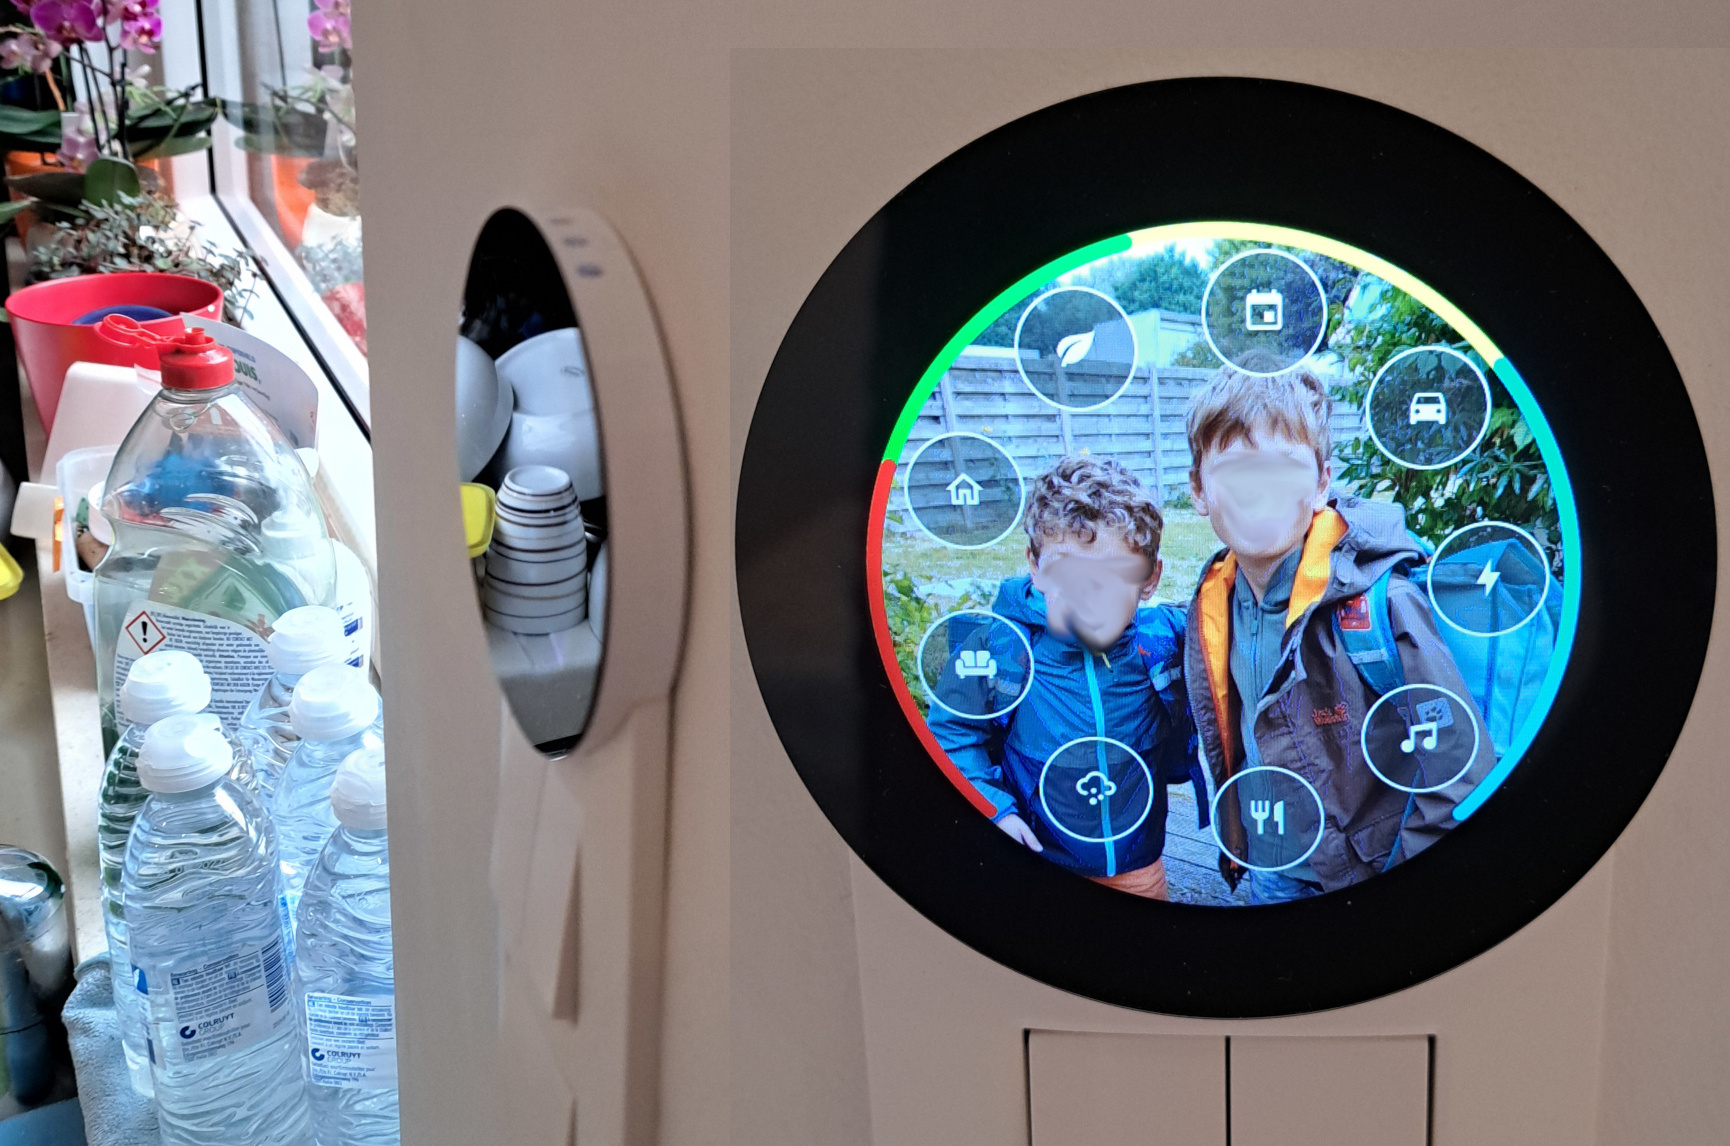
Side and front view of the touch screen. Arc lines indicate 3kW of solar is going to the car, while 2.5kW is pulled from the grid.
This affordable ESP32 based touch panel with IPS capacitive screen made me reconsider not putting home automation screens in the house.
Its round shape is perfect for showing power curves on its circumference and makes it slightly more organic than the rectangular light boxes we immediately recognise as phones or computers.
I ended up designing and 3D printing an enclosure for it and combining OpenHASP with some python code to integrate it with the Home Assistant setup.
Note
This page is still a work in progress, I already wanted to share this project and will add more details and source code references in the future.
Impressions
The Lilygo T-RGB-2.8 device is about the right size to blend into the row of existing light switches on our kitchen wall.
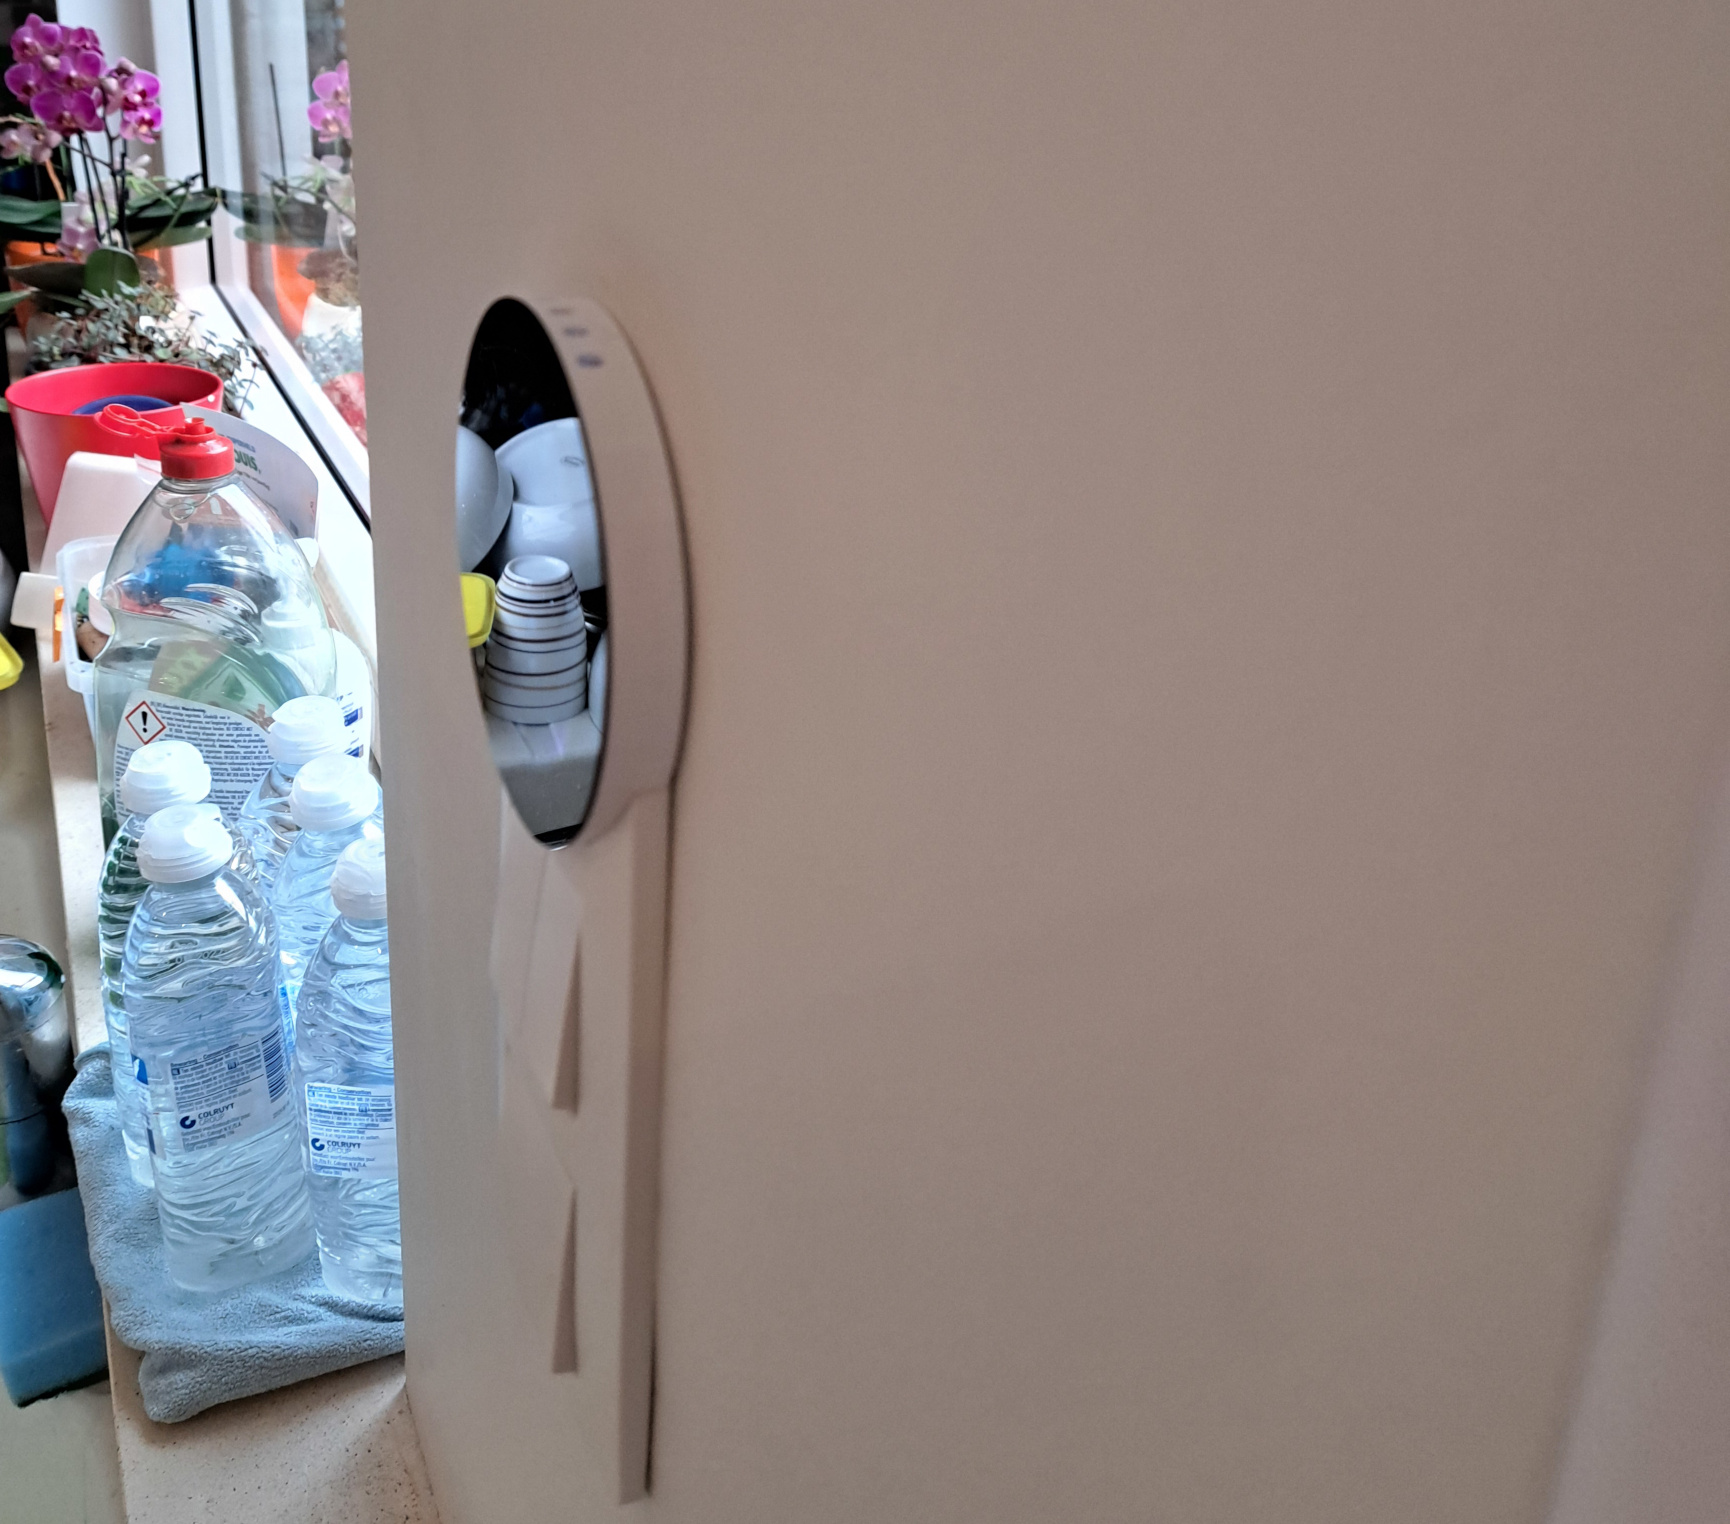
Photo of the panel installed on the kitchen wall next to the sink.
The IPS resolution is the basis of a proper picture frame, and adding translucent shortcut icons over the picture allows it serve form as well as function. The display module's capacitive touch screen and PSRAM memory give it the feel and performance of a high end product.
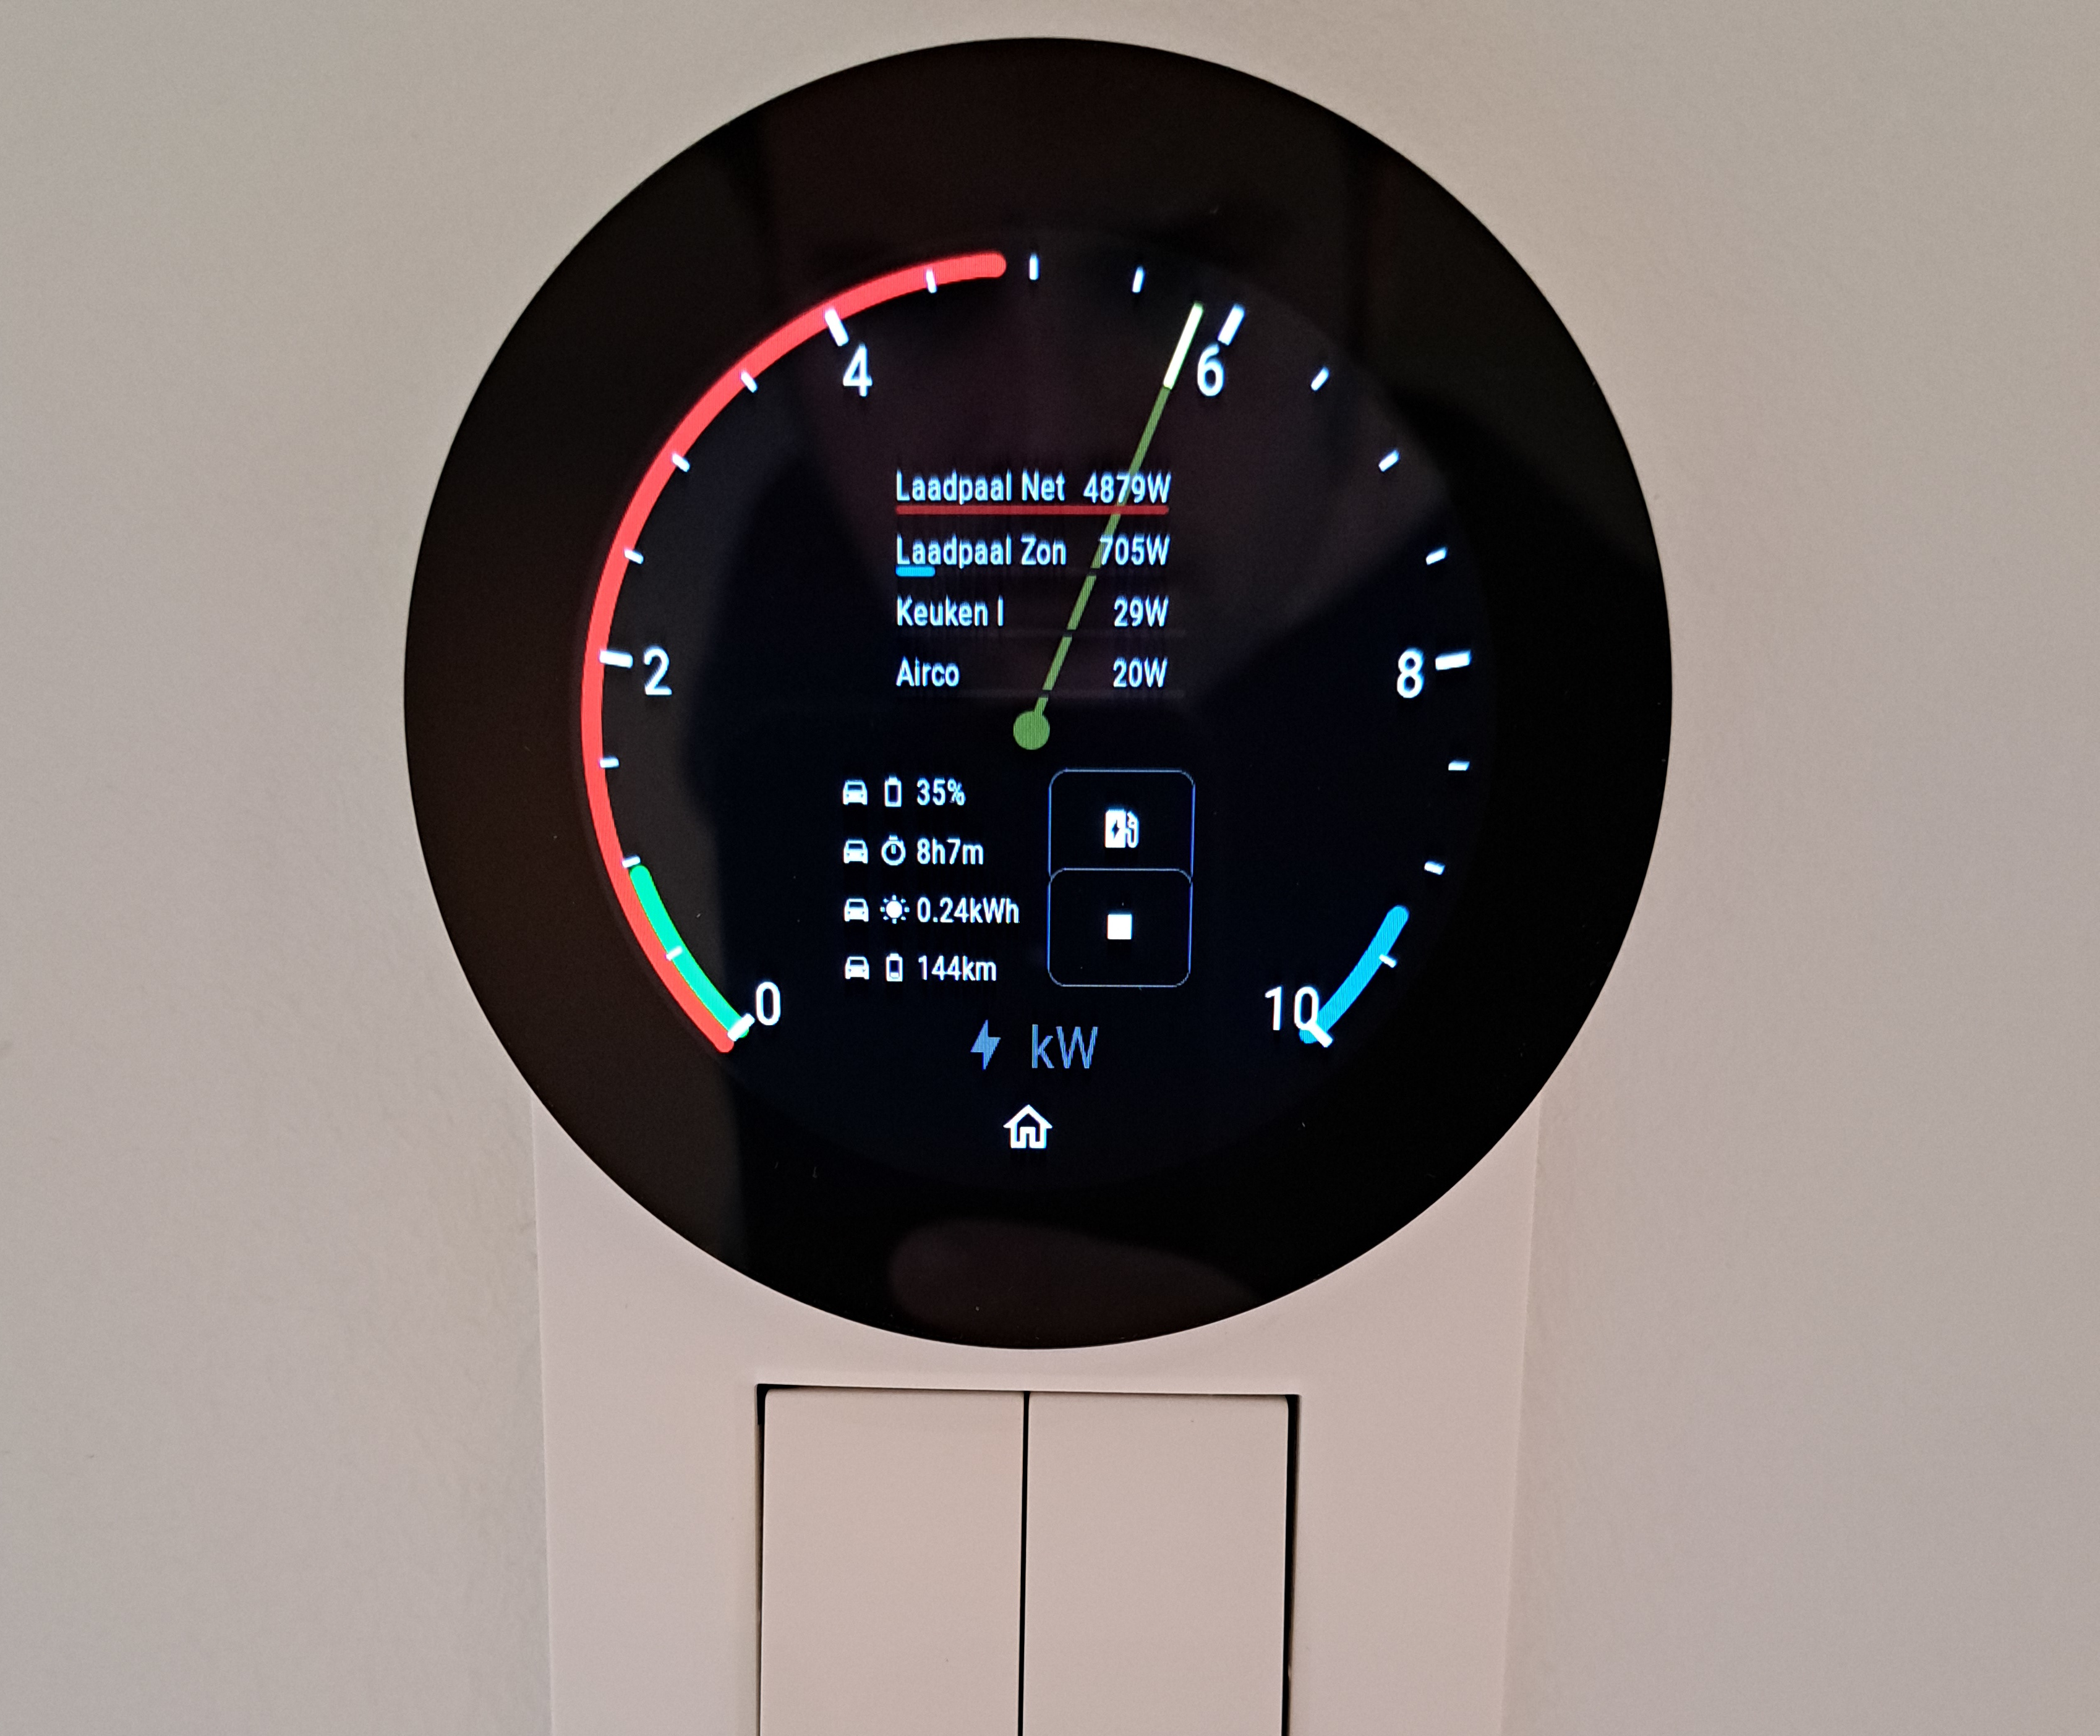
The panel is showing power use on a needle gauge, in the middle some the power of some individual devices is shown.
Some of the core house infrastructure only has proper control via phone Apps, like the upstairs Airco indoor units, the central ventilation (a C+ extraction system actually), the car charger and car (preheat shortcuts). A wall panel would also allow easy control of motorized window shutters on different floors and show a glance on the actual energy consumption.
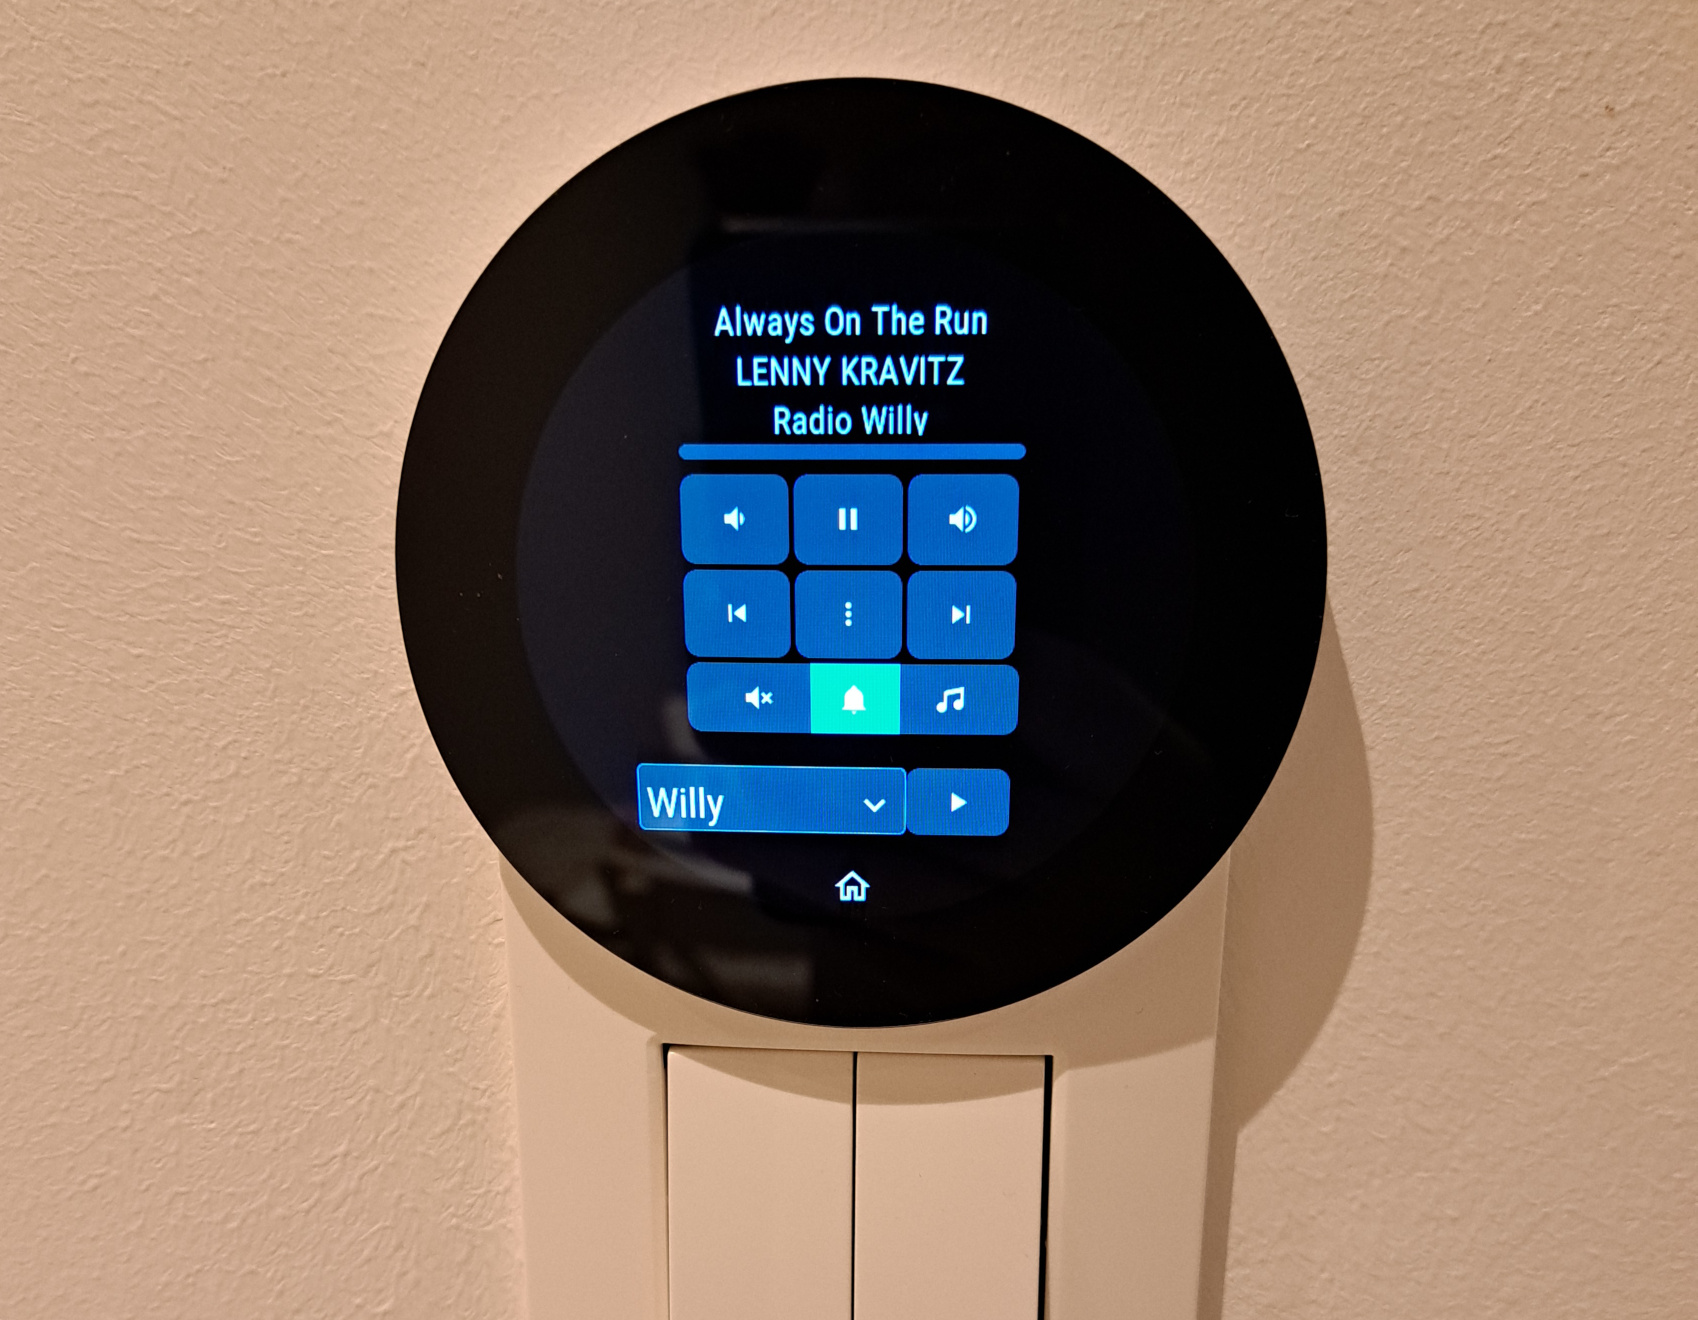
The panel is showing a media player controlling the living room speakers.
Architecture
The OpenHASP firmware is configured by hand and the widgets are defined using a custom crafted pages.jsonl file that defines the page and widget layout.
I use AppDaemon to host python scripts that react to MQTT and Home Assistant websocket events. AppDeamon allows you to spin up instances of automation crafted in Python using a YAML file. In my case I created media player and thermostat controller classes that are referenced in the YAML file for each thermostat control that appears on the touchscreens.
In some sense it mimics the MVC architecture:
- Model: Home Assistant offering a data model (state) and allows service calls to trigger device actions.
- View: OpenHASP presents LVGL widgets and sending input events to the local MQTT server.
- Controller: the AppDaemon automation in Python is updating Home Assistant and OpenHASP widget state
Mechanics
I created a 3D design using OpenSCAD that fits onto a Niko switch coverplate. It looks like the display is part of the switch plate (to me at least) and since the display is very thin, it allows me to install the display without creating extra holes in the wall.
This mechanical adaptor piece which I call the 'saddle' (since it sits on top of a curved surface) features
- ventilation holes
- alignment studs for the display backlight and Niko coverplate
- a slight recess on the top for double sided adhesive tape.
- the volume of the Niko coverplate substracted
Its diameter matches the display so that no extra border is visible around the display.
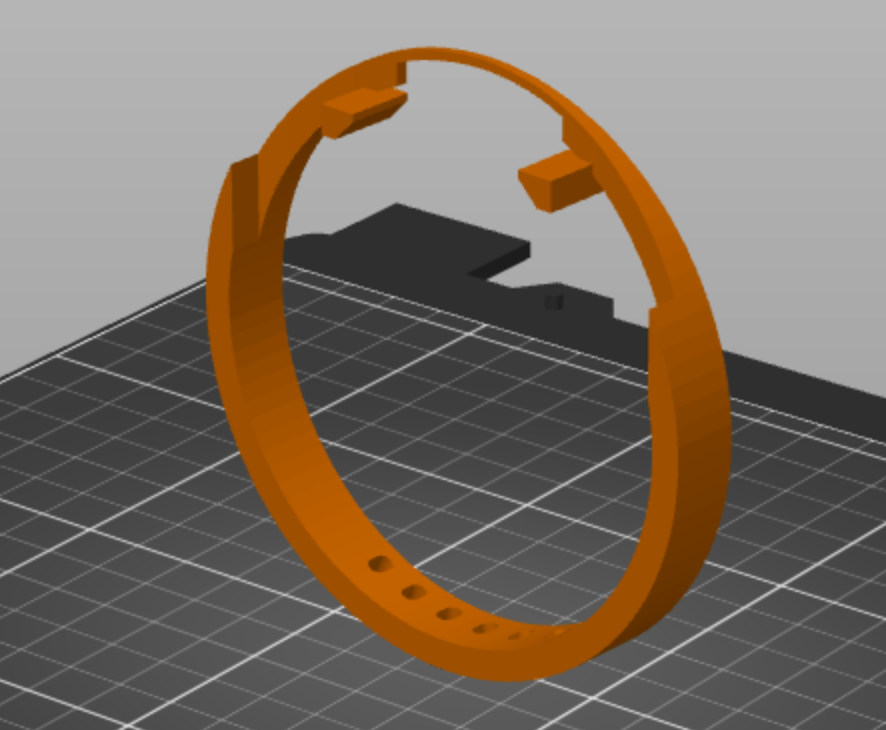
Display 'saddle'
You can find the files here:
|
|
 saddle.stl saddle.stl
|
Assembly
Preparation
Start with a new Niko switch coverplate that is one size bigger than the one that is currently installed, the saddle is placed onto it.
A marker is used to mark a cut-line. After marking, a Dremel or Stanley knife can be used to remove the excess plastic. Superglue is used to fix the saddle onto the Niko plate.
marking where to cut the plastic
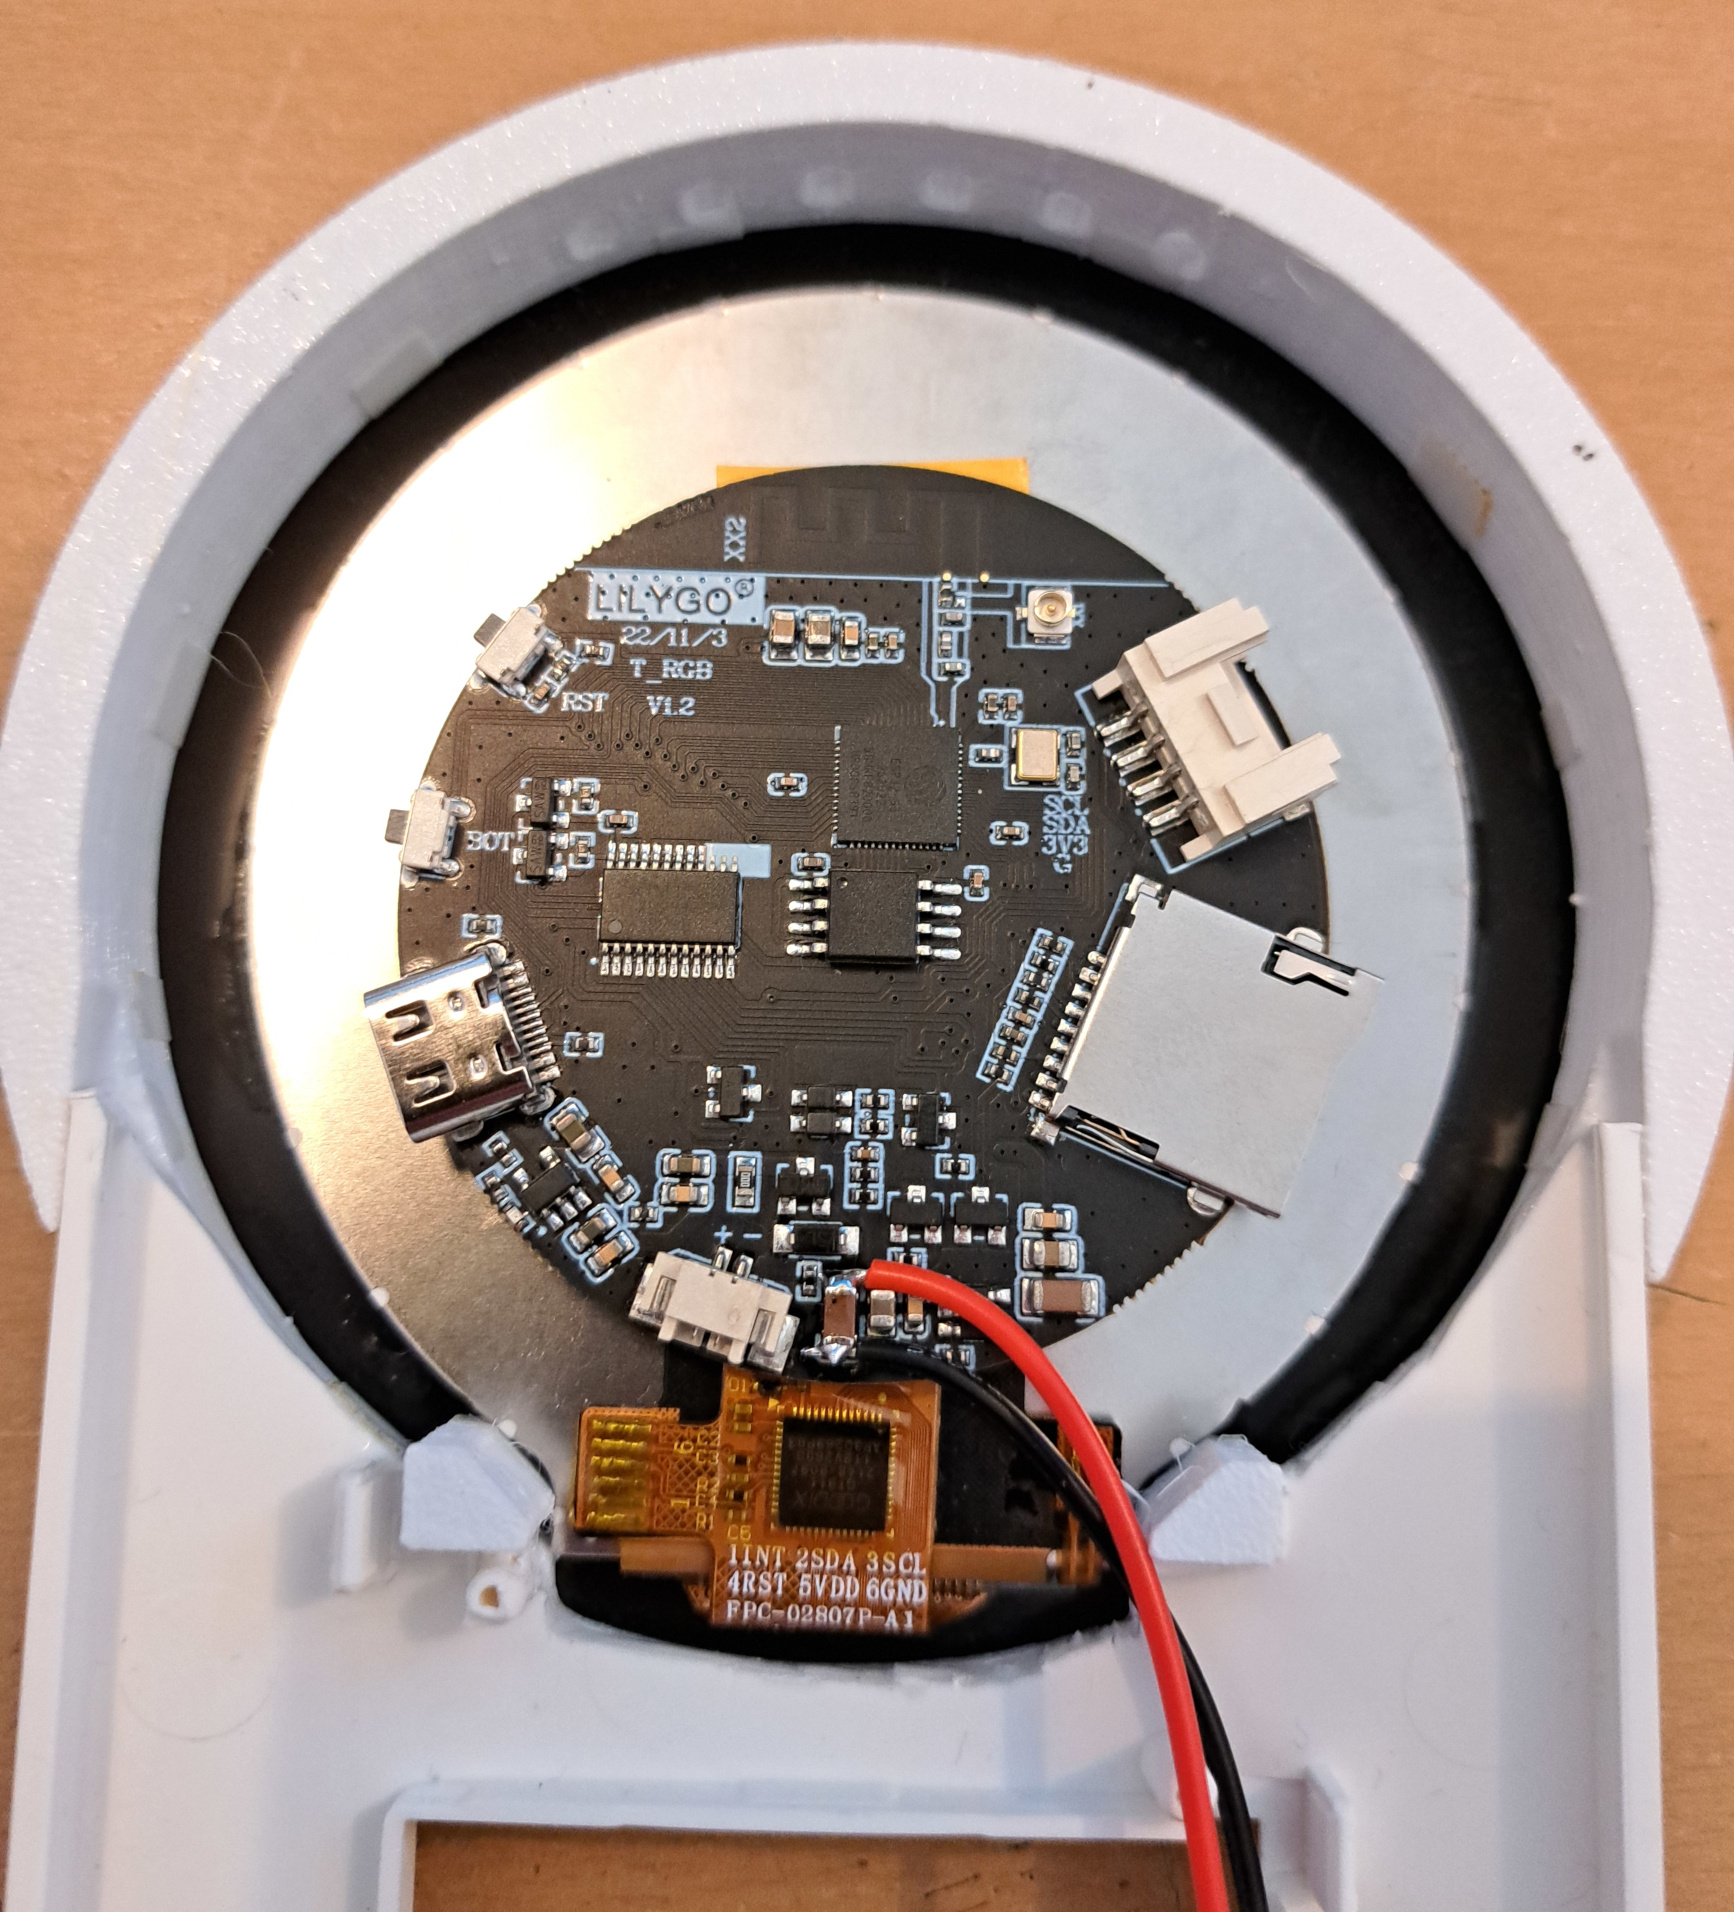
Next up is soldering power leads to the circuit board.
Pieces of double sided adhesive tape are placed around the inner edge of the saddle.
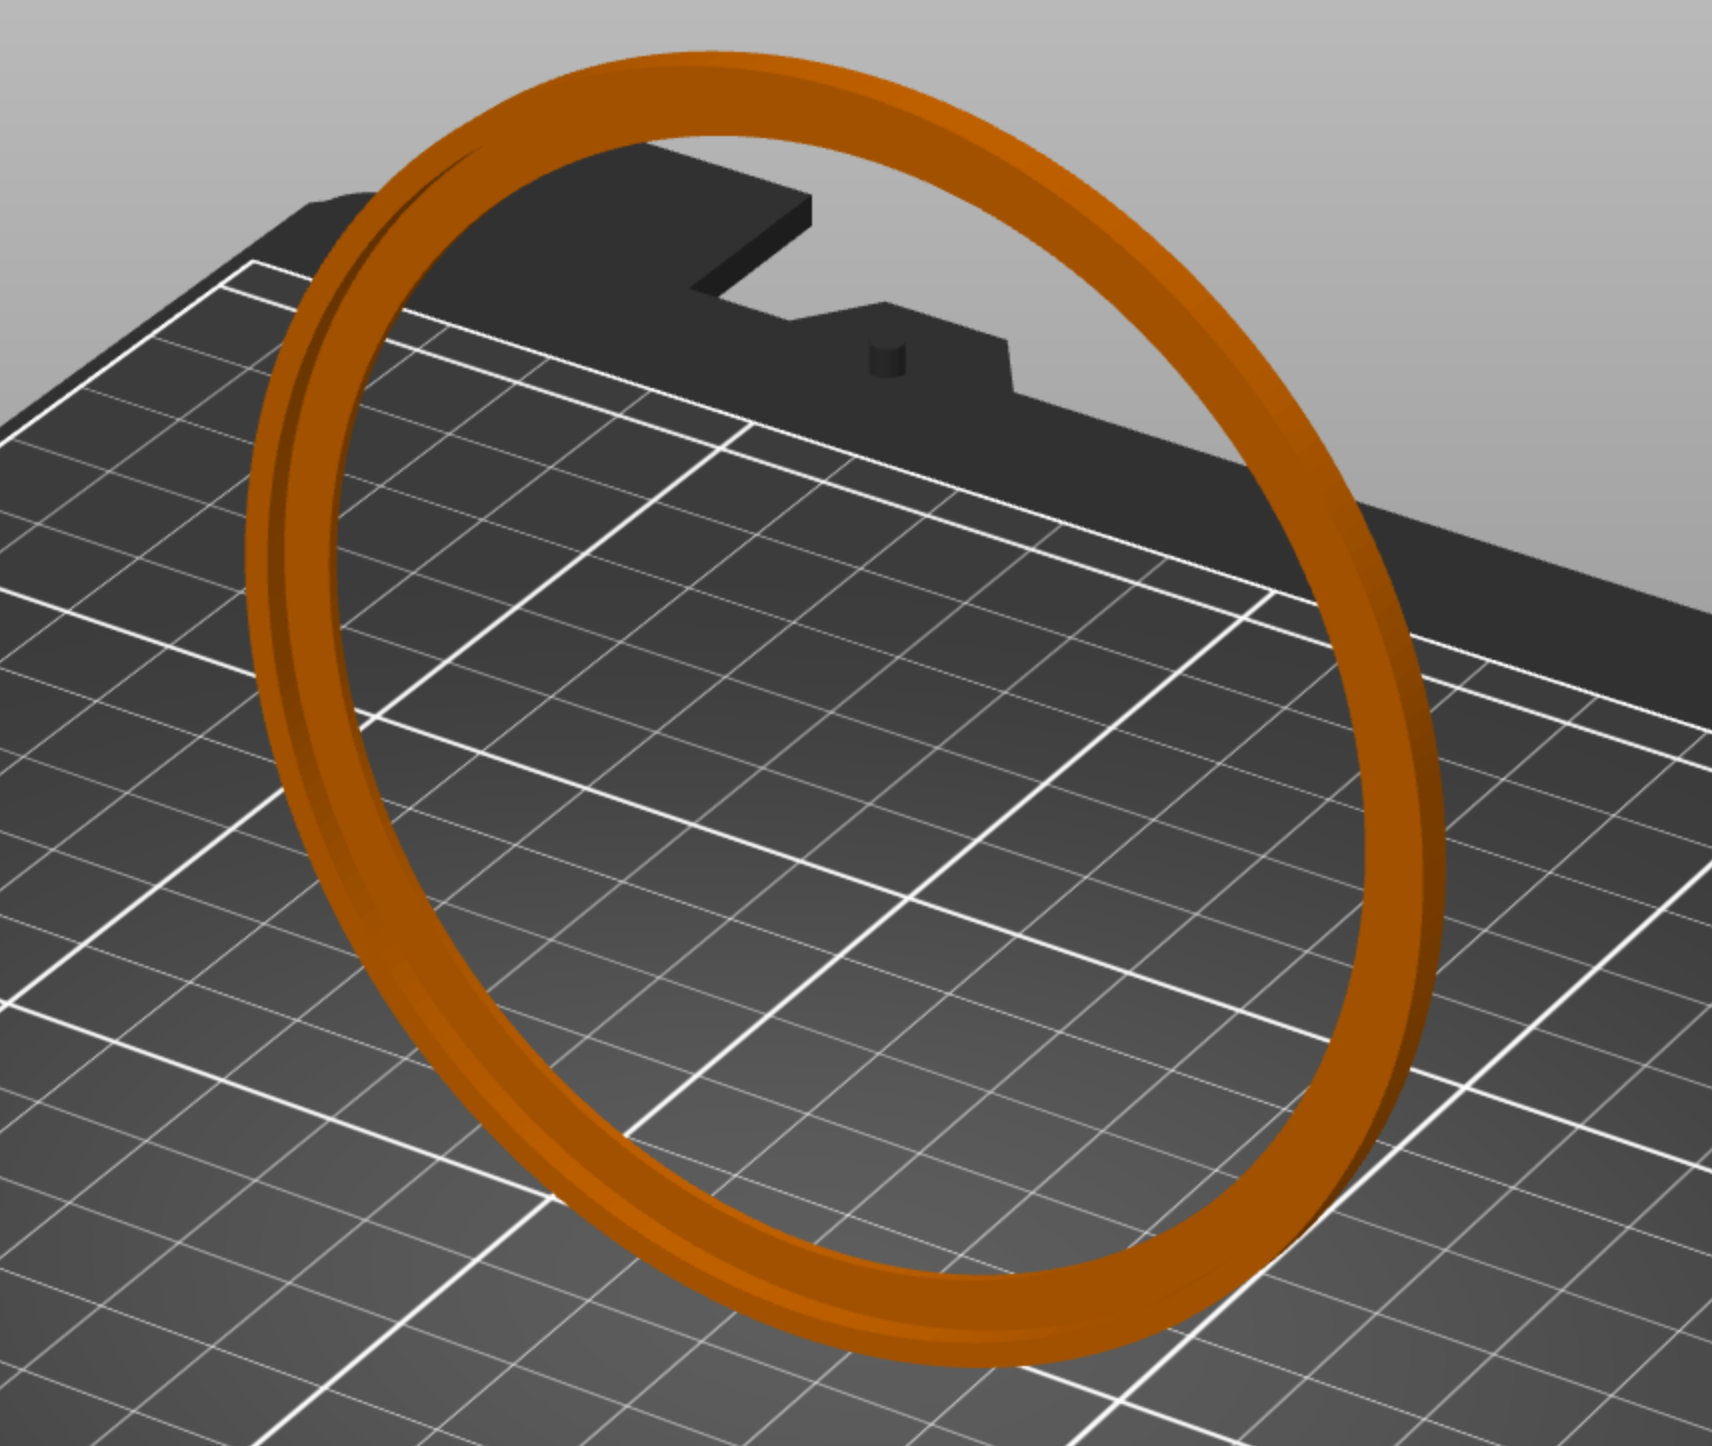
Assembly alignment jig.
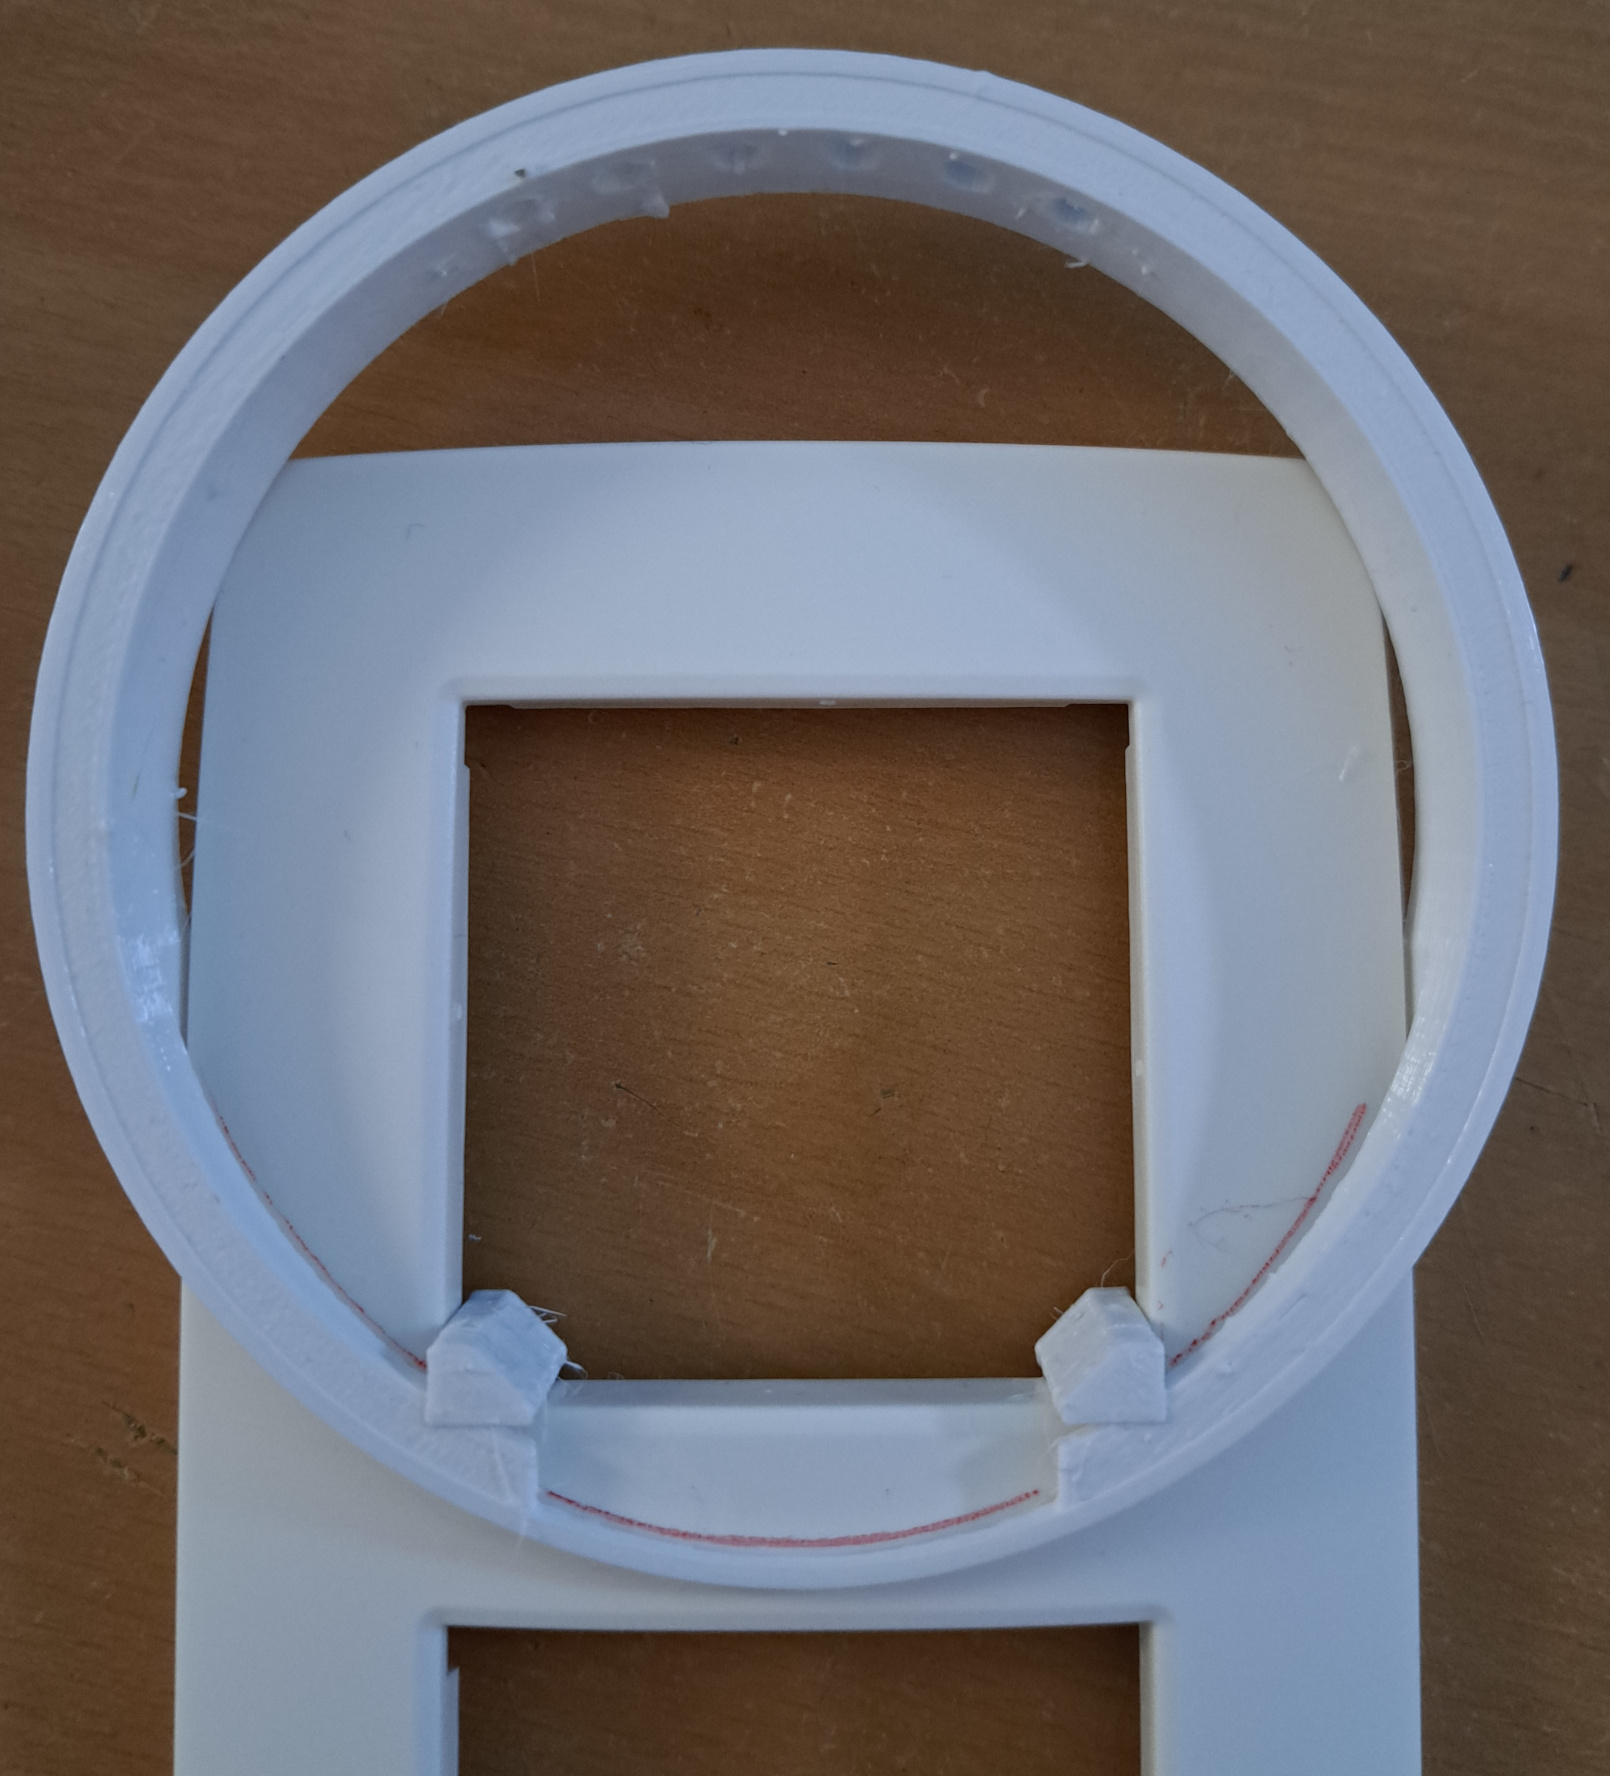
Mounting the display module
I designed this alignment ring to easily mount the display onto the saddle:
 aligner.scad aligner.scad
|
|
aligner.stl
|
The display is placed onto the alignment ring and the saddle will slide into the ring and stick to it when both pieces are mated together. The backlight cover will fit exactly between the alignment studs visible at the bottom, so that the alignment angle is also perfect.
display in place.
Installation
During installation onto the wall the power leads are connected to a 5V power supply behind the light switch. Next the switches are fixed back into the wall box. Some extra slack in the leads will allow the assembly to be dangling on the side while installing.
Once the lightswitches are back in place, the switch cover assembly is snap-pushed onto the switches. Easy!
Firmware
The display is being configured over I2C by bit banging I2C using SPI over an I2C port expander chip. It looks like a strange decision but the display is driven in a parallel configuration which requires a lot of pins. This leaves I2C as only free external interface, which still makes it possible to connect some sensors or other peripherals.
Other hardware is also doing this so porting OpenHASP to this board was a matter of adding the right register configuration values from the SDK examples.
OpenHASP design
I created a python script so I can generate the pages.jsonl file from a YAML file. YAML is more readable and you can use the merge key to reuse parts of the file. If you don't like long files you can still put your existing JSON lines in the YAML to start with, since JSON is valid YAML.
The conversion script allows me to do some pre-processing magic like aligning widgets on a circular path, and the merge key <<: is used to put YAML reference labels (&circlebutton) on duplicated blocks to copy and paste (*circlebutton) the content later on.
pages:
  1:
    comment: Home
    bg_color: "#0000000"
    swipe: 1
    circle_arrange:
      objects: [24, 25, 23, 30, 31, 32, 33, 34, 35]
      screen_diameter: 480
      edge_clearance: 20
      widget_diameter: 80
      text_font_size: 24
      offsets: [0,  -5]
    objects:
      10:
        obj: img
        src: L:/kids.png
        auto_size: 1
        swipe: 1
      24:
        <<: &circlebutton
          obj: btn
          w: 60
          h: 60
          bg_color: "#444444"
          border_color: "#FFFFFF"
          border_width: 2
          radius: 400
          text_font: 24
          text_color: "#FFFFFF"
          bg_opa: 128
        comment: power
        action: p2
        text: \uF40B
        x: 330
        y: 60
      25:
        <<: *circlebutton
        comment: music
        action: p4
        text: \uE75A
        x: 400
        y: 180
Note that OpenHASP supports 12 pages by default, add a higher value like -D HASP_NUM_PAGES=30 to your .ini file.
Home Assistant Automations
I have an automation that turns on the backlight of the display when the Siemens LOGO PLC reports the wired movement sensor detects movement.
AppDaemon Controls
At this point I have several controllers that I use to control Home Assistant via the OpenHASP panel:
- Thermostat control
- Media player control
- Power Arc control
- input select to dropdown box synchronizer
- Periodic chores checklist backed by Grocy data.
- Biggest power consumers visualizer
I should bundle these up in a repository and share them. Let me know if you are interested.
A bit more details on the Power Arc
Let's look at the code of one of the automations I made, the power arc.
This automation will update the length and color of arc lines like explained on my PowerGauge page.
To make the design a bit slicker, I use overlapping arcs indicating the power level of e.g. grid and solar power.
powerdial_round1_homepage:
  module: powerdial
  class: PowerDial
  lwt_topic: hasp/round1/LWT
  device_topic: round1
  page: 1
  arcs:
    - ids: [100]
      sensors:
      #FIXME: explicitly mention argument names instead of using a list
      - [sensor.total_power_consumption, 1, "#ffff00"]
    - ids: [101,102]
      sensors:
      - [sensor.solaredge_ac_power, 1, "#00ff00"]
      - [sensor.electricity_meter_power_consumption, 1000, "#ff0000"]
    - ids: [110, 111]
      complement: true
      sensors:
       -  [sensor.electricity_meter_power_production, 1000, "#ff00ff"]
       -  [sensor.car_solar_power_2, 1, "#1affff"]
  scale: 10000
The python code is fairly straightforward.
 1 @dataclass
 2 class Dial:
 3     entity_name: str
 4     multiplier: float
 5     color: str
 6     complement: bool
 7     scale: int
 8     value: float
 9     @property
10     def watts(self)->float:
11         return self.value * self.multiplier
12     @property
13     def widget_value(self)->str:
14         val = self.watts
15         if self.complement:
16             val = self.scale - val
17         return str(val)
18
19 @dataclass
20 class ArcWidget:
21     ids: List[int]
22     sensors: List[Dial]
23
24 class PowerDial(HassHaspWidget):
25     """
26     This layers multi color arcs on top of each other.
27     Suggested use:
28     The first is from left to right, and will show grid use and solar
29     The second is from right to left, and will show grid injection and battery charge power
30     of these pairs, the one with the smallest value will be in the foreground so at a glance
31     the power level of each entity can be estimated.
32     """
33     arcs: List[ArcWidget] = None
34
35     @property
36     def use_random_values(self):
37         return self.args.get('use_random_values',False)
38
39     def arc_color_topic(self, id_):
40         return f"hasp/{self.device_topic}/command/p{self.page}b{id_}.line_color10"
41
42     def arc_value_topic(self, id_):
43         return f"hasp/{self.device_topic}/command/p{self.page}b{id_}.val"
44
45     def recalculate(self):
46         """ Order the arcs so the shortest one rendered using the one in the foreground """
47         for arc in self.arcs:
48             arc.sensors.sort(key= lambda x: x.watts if x.complement else -x.watts)
49
50     def redraw(self):
51         for arc in self.arcs:
52             for widget_id, sensor in zip(arc.ids,arc.sensors):
53                 self.mqtt_publish(self.arc_value_topic(widget_id), sensor.widget_value)
54                 self.mqtt_publish(self.arc_color_topic(widget_id), sensor.color)
55
56     def mqtt_publish(self, topic, payload):
57         self.call_service("mqtt/publish", topic=topic, payload=payload)
58
59     def update(self, entity_name, attribute, old, new, cb_args):
60         for arc in self.arcs:
61             for sensor in arc.sensors:
62                 if sensor.entity_name == entity_name:
63                     sensor.value = float(new)
64                 if self.use_random_values:
65                     sensor.value = ((sensor.scale/10)+(sensor.scale/10)*random.random()) / sensor.multiplier
66         self.recalculate()
67         self.redraw()
68
69     def hass_subscribe(self):
70         for arc in self.arcs:
71             for sensor in arc.sensors:
72                 self.listen_state(self.update, sensor.entity_name)
73
74     def initialize(self):
75         HassHaspWidget.initialize(self)
76         scale = int(self.args['scale'])
77         self.arcs = []
78         for arc in self.args['arcs']:
79             complement = bool(arc.get('complement', False))
80             sensors = [
81                 Dial(
82                     entity_name = sensor[0],
83                     multiplier= float(sensor[1]),
84                     color= sensor[2],
85                     complement= complement,
86                     scale = scale,
87                     value = 0) \
88                 for sensor in arc['sensors']]
89             self.arcs += [ ArcWidget(arc['ids'], sensors)]
90
91         self.mqtt_subscribe()
92         self.hass_subscribe()
93         self.redraw()
Liked something? Worked on something similar? Let me know what you think on Mastodon!
You can use your Mastodon account to reply to this post.