Heater-on-light tracking using Home Assistant
Living in a house with Aterno resistive electric heating, I wanted to get a feel of how our thermostat settings and outside temperature impacts our electricity bill.
I did not want to change the electric installation to add invasive interfacing like current sensing, and hacked a ZigBee door sensor to report on the heater's status LED.
Hardware
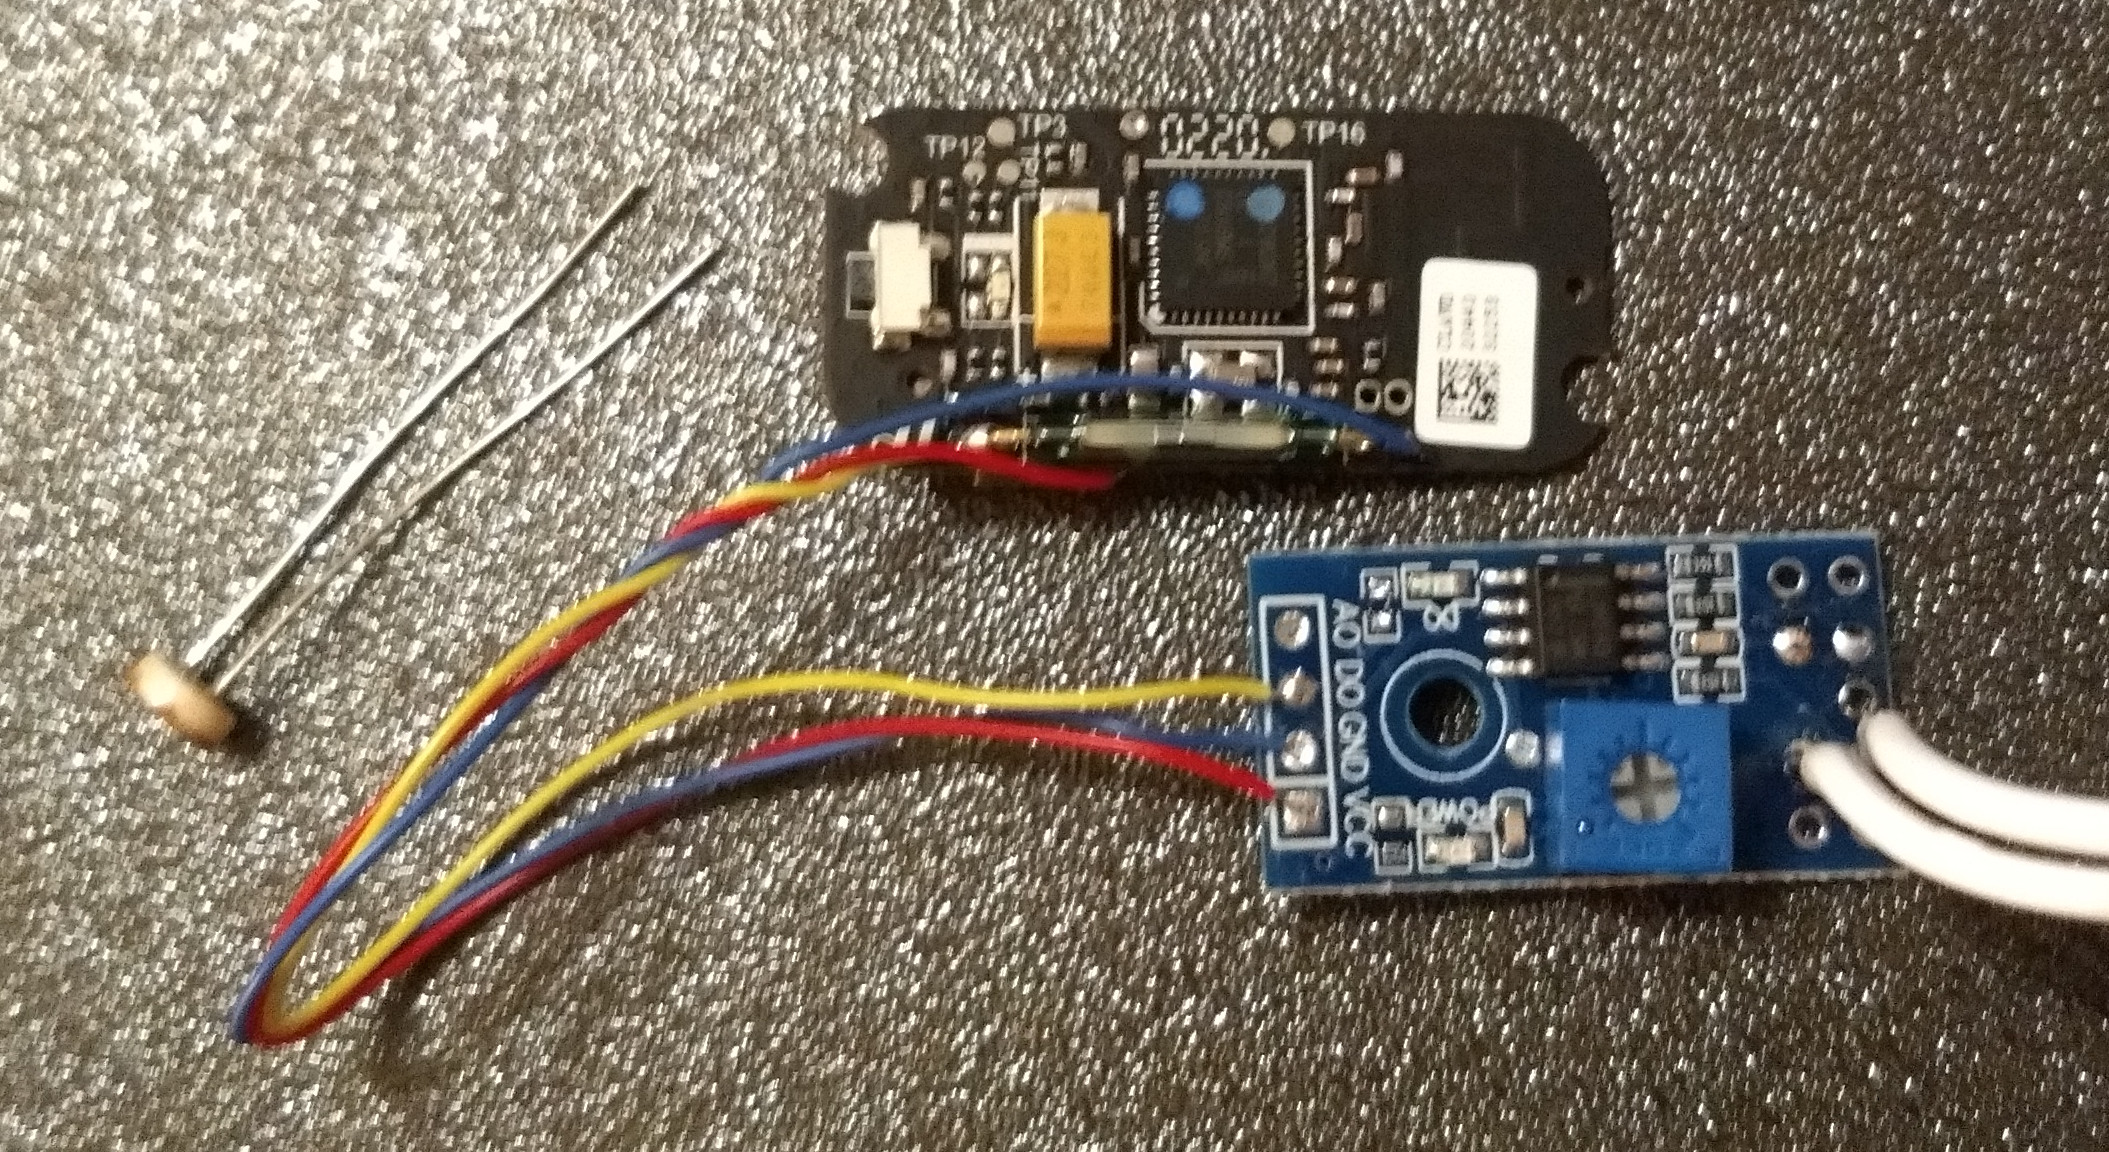
Prototype
I improvised a first version of the circuit with parts I had at hand:
- A light dependent resistor (LDR), which yields about 1.7kOhm when the LED hits it, and > 10kOhm in the relative dark.
- A Xiaomi Aqara 'zigbee' door & window contact sensor (MCCGQ11LM), of which I also use several to track doors and the doorbell.
- A TCRT5000 optical sensor module, typically used in educational line following robots.
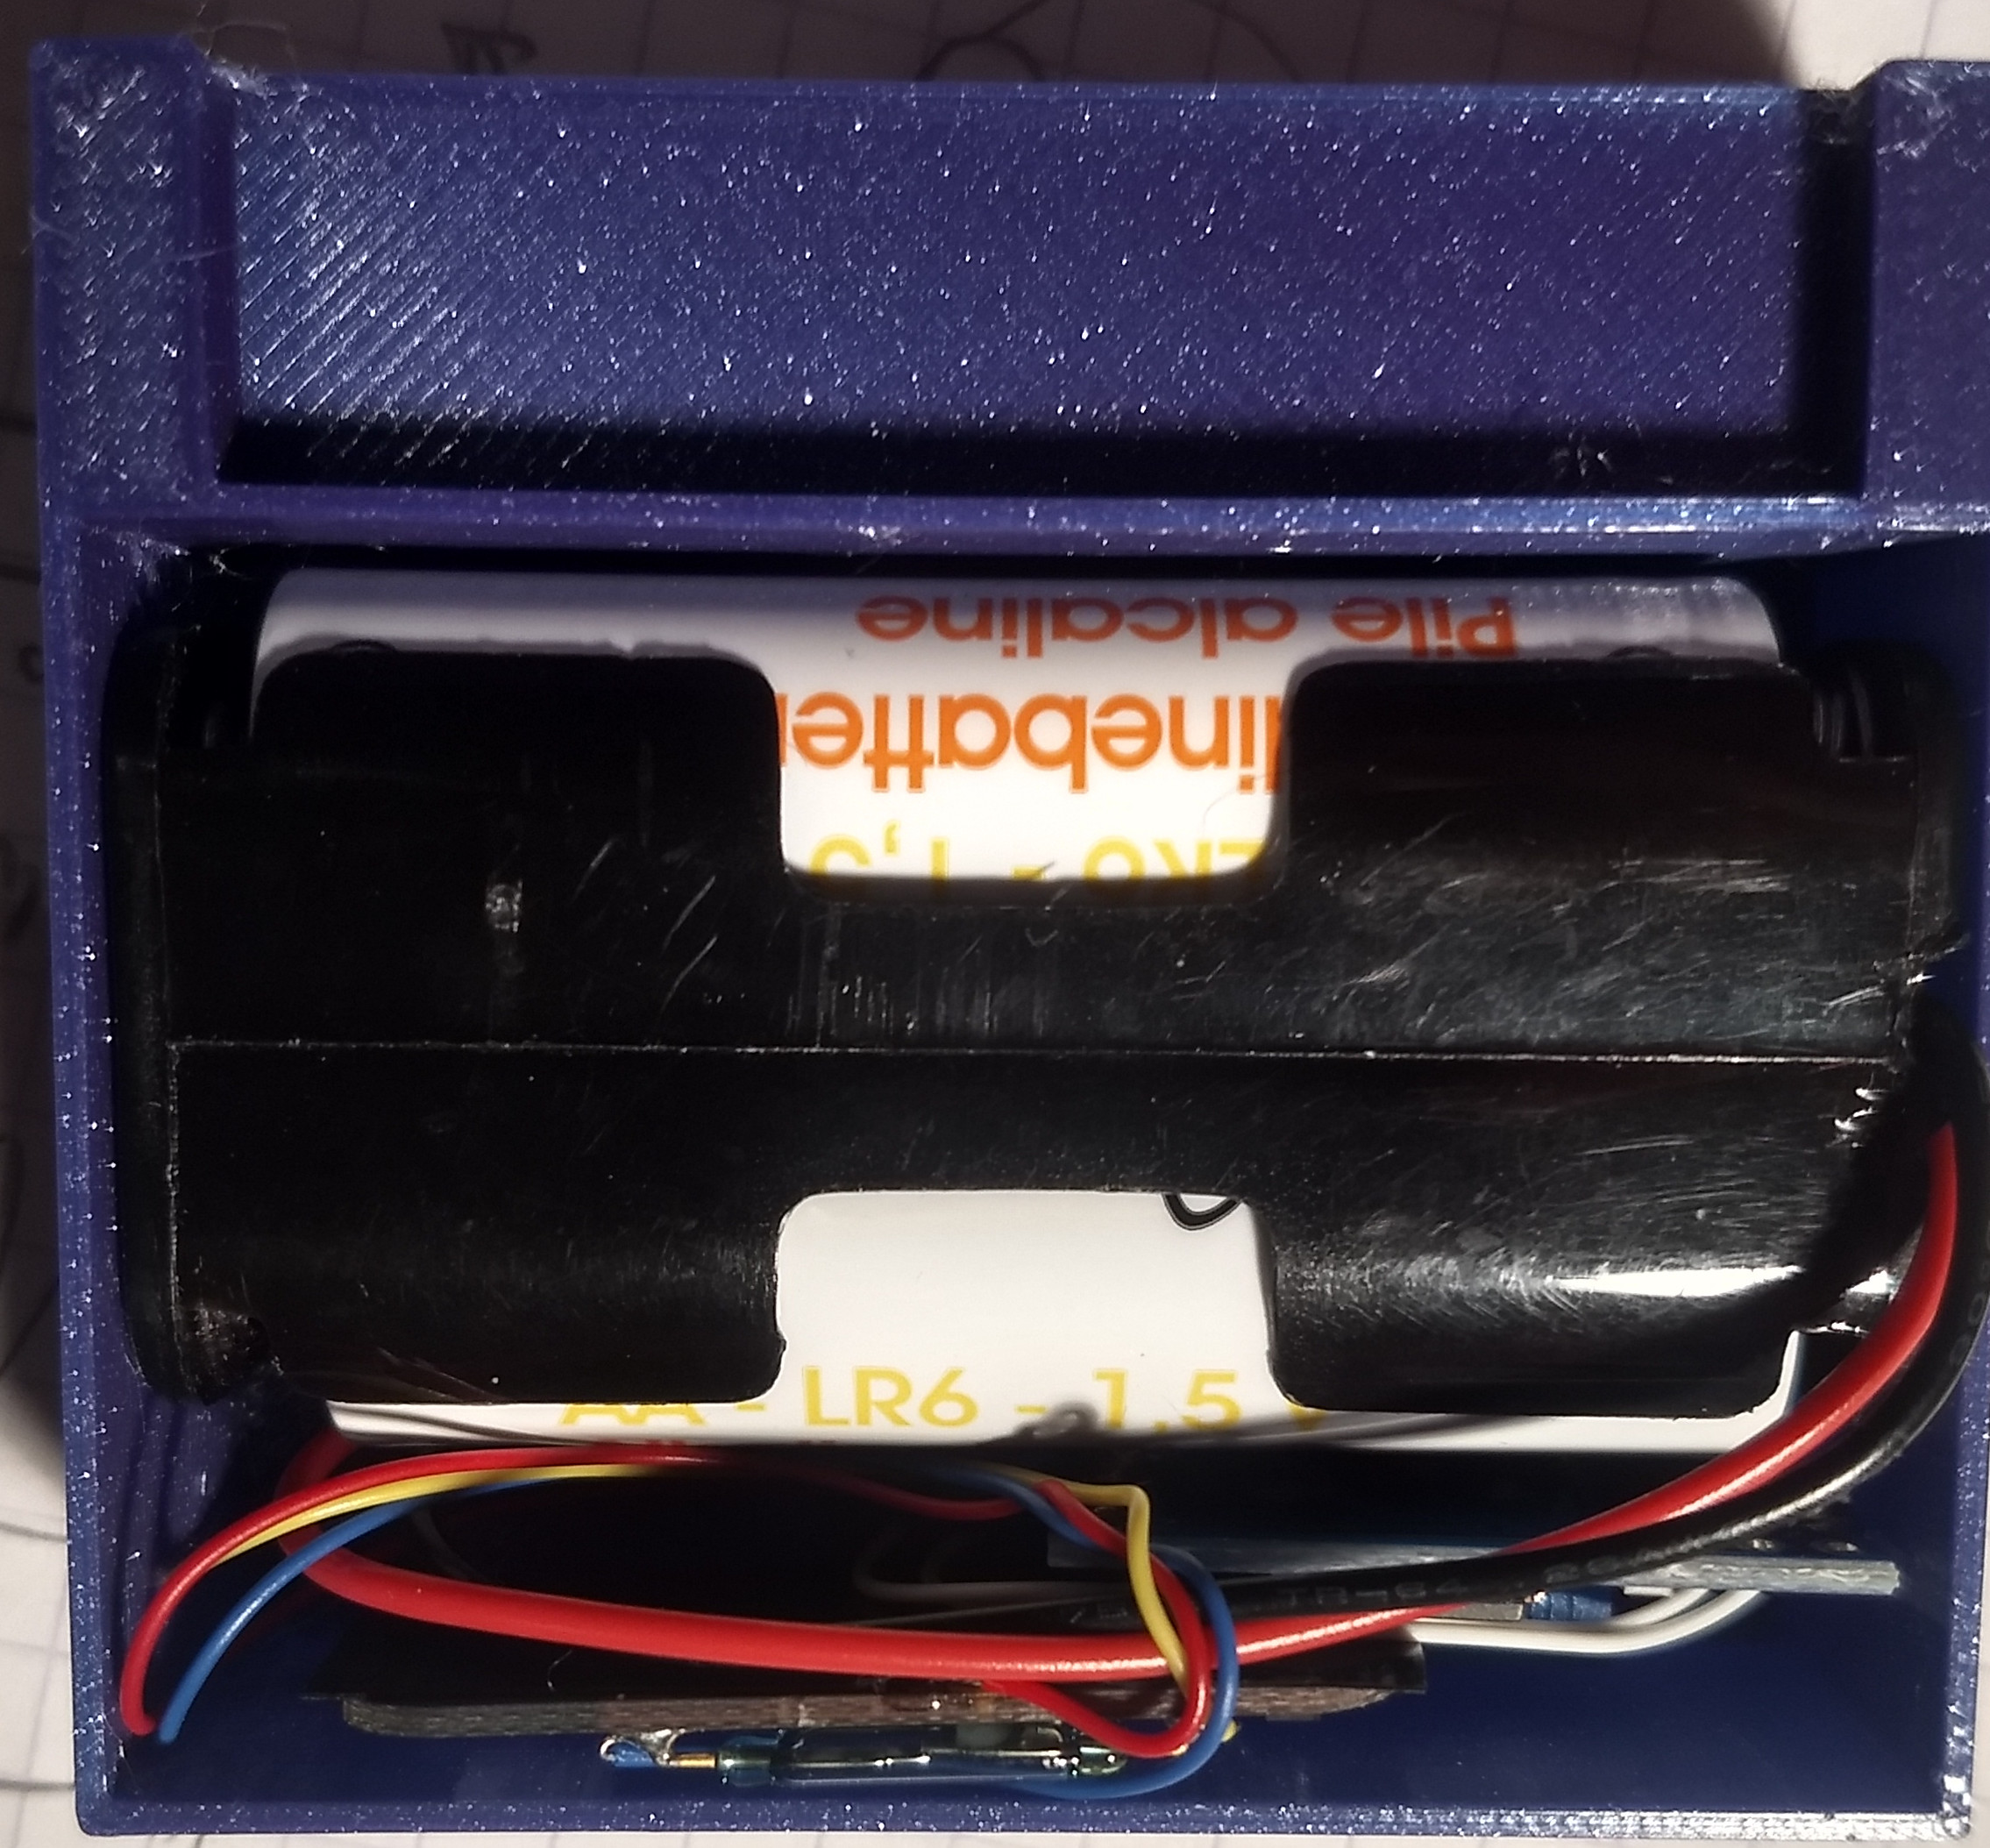
- Double AA battery holder with wires (to replace the 1620 coin cell)
Hooking up the LDR straight over the reed switch did not work, so I performed some experiments with using a LED as light sensor together with a Darlington transistor pair. The ZigBee module's input is quite sensitive, so I decided to try a comparator and ignore the circuit's battery life for now (the circuit draws 0.9mA, which could last 2.5months on LR6 AA batteries).
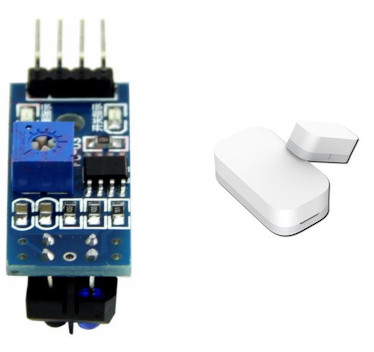
I had a TCRT5000 optical sensor module, which among other things had the required LM393 and a variable resistor on a small pcb. Perfect! I removed the sensor module's LEDS and replaced the phototransistor by the LDR, leaving only the LM393 comparator and some resistors and a cap.
The comparator compares the voltage over the LDR against a reference voltage produced by a potentiometer, and if the LDR's voltage drops below that, it pulls its output pin to ground. The door sensor's reed switch also shorts the ZigBee microcontroller's I/O pin to ground, so I simply had to connect the two.
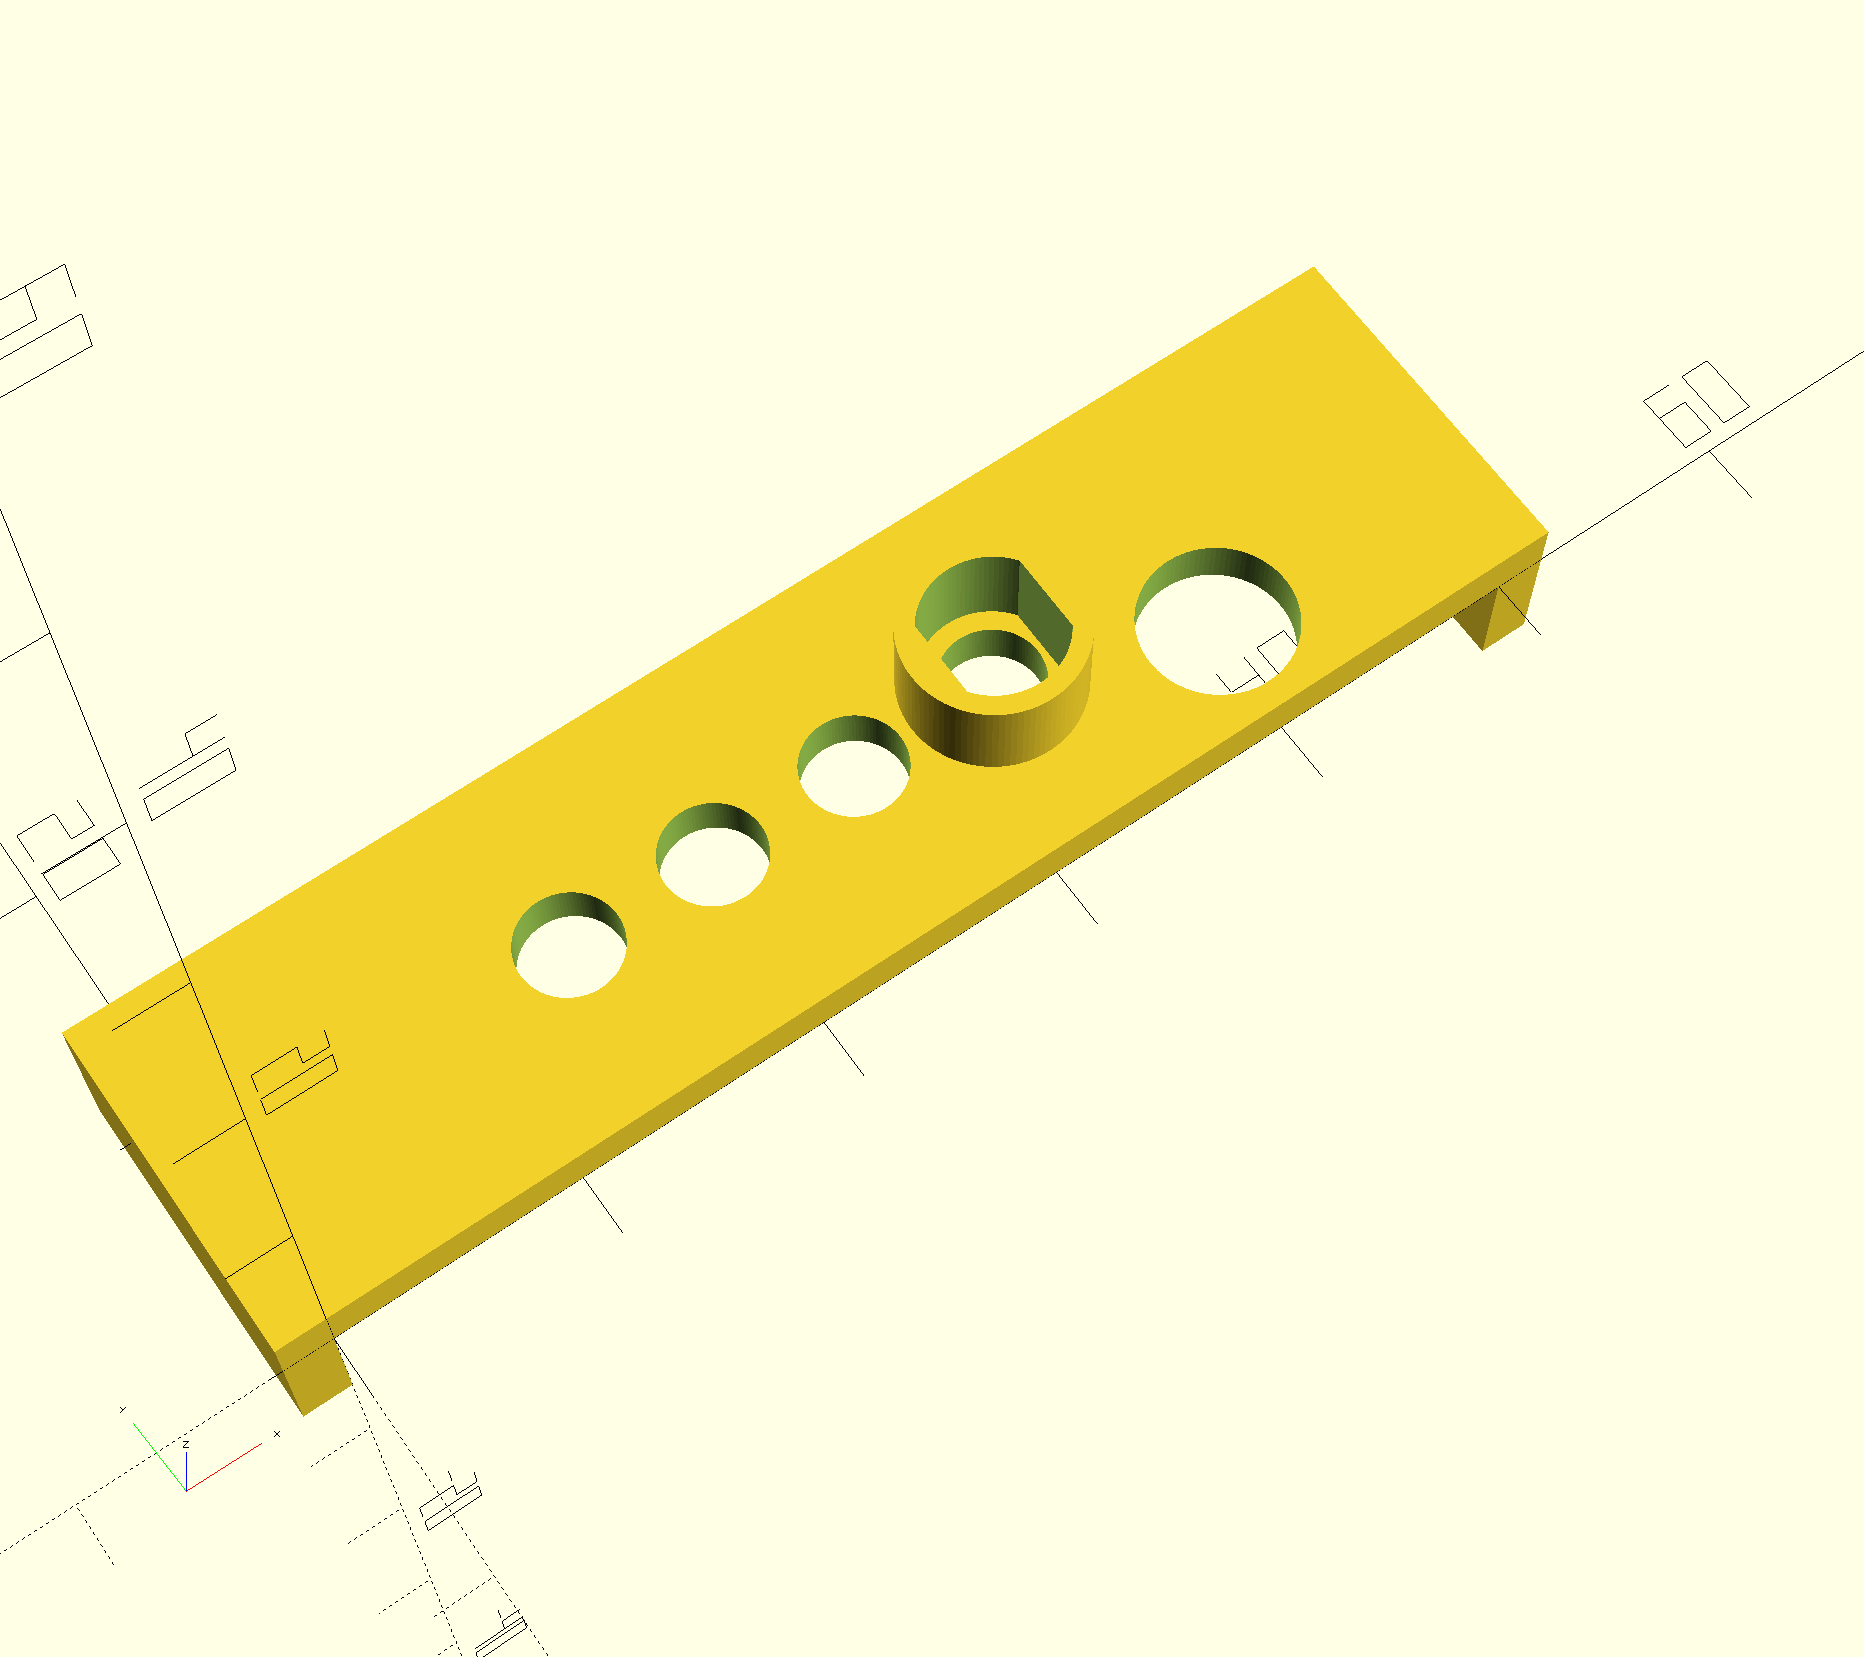
For testing purposes, I improvised a little fixture to align the LDR with the radiator's LED by reusing 3D printed scrap prototype cut to form, and fixed it using double sided tape to the radiator's control box. This proved to be very unreliable so I designed an alignment jig which I 3D printed:
The next step is to turn the alignment jig into an enclosure that holds the AA batteries and circuit boards.
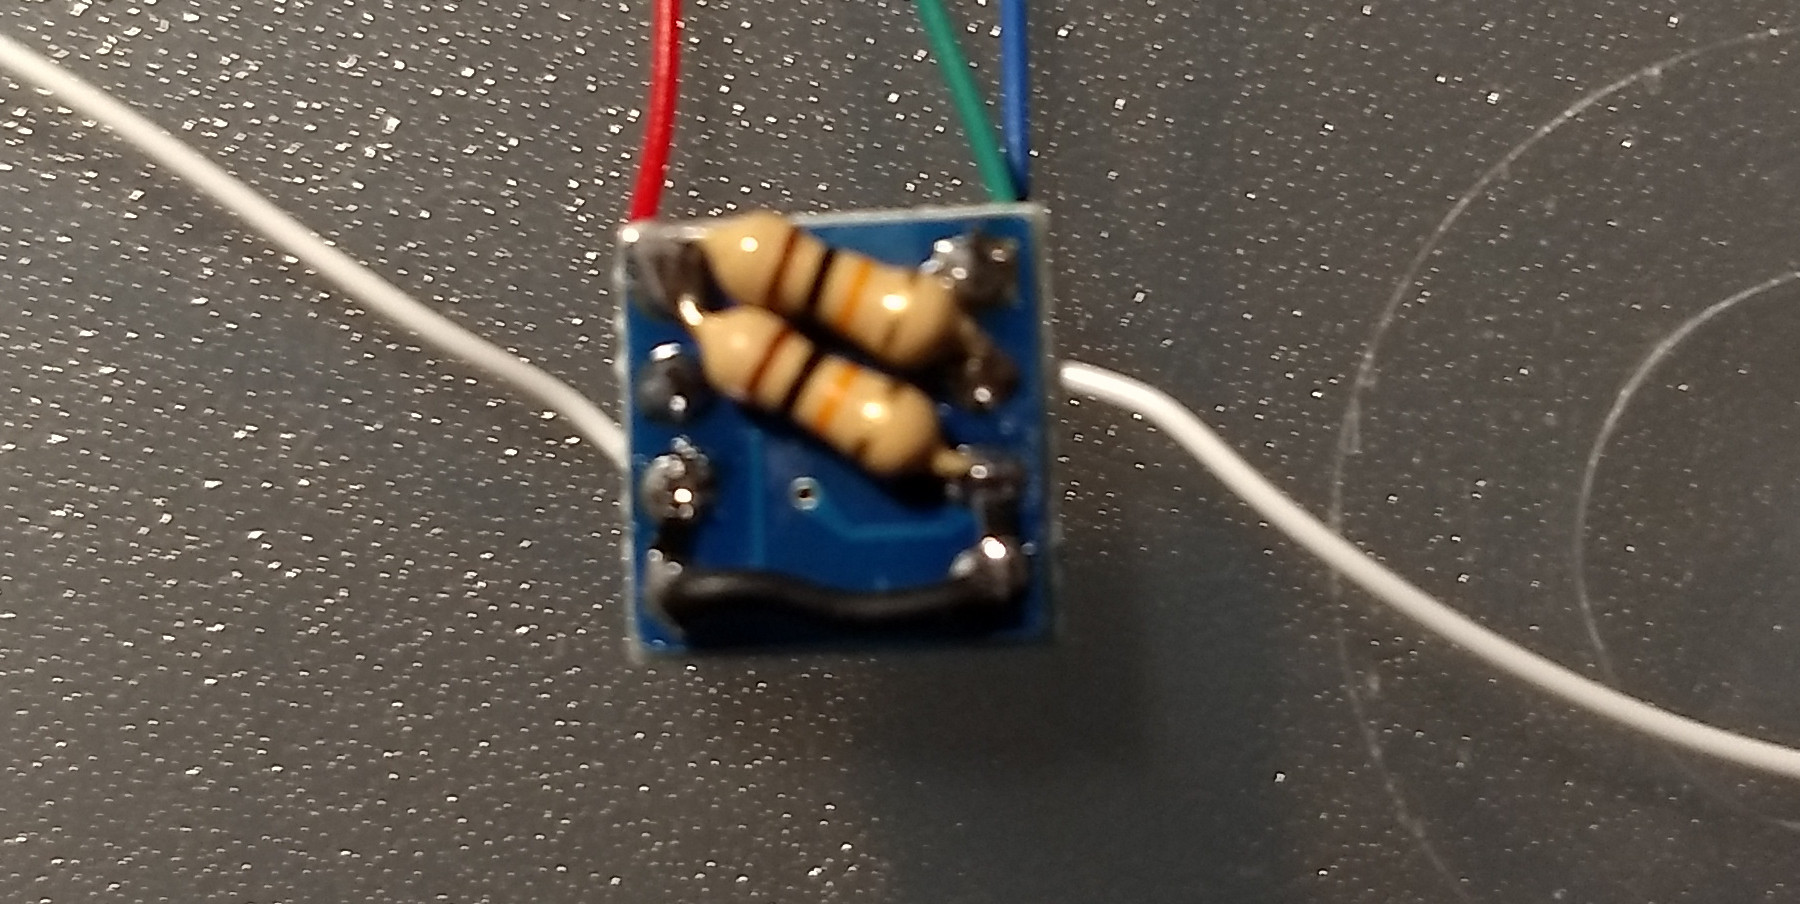
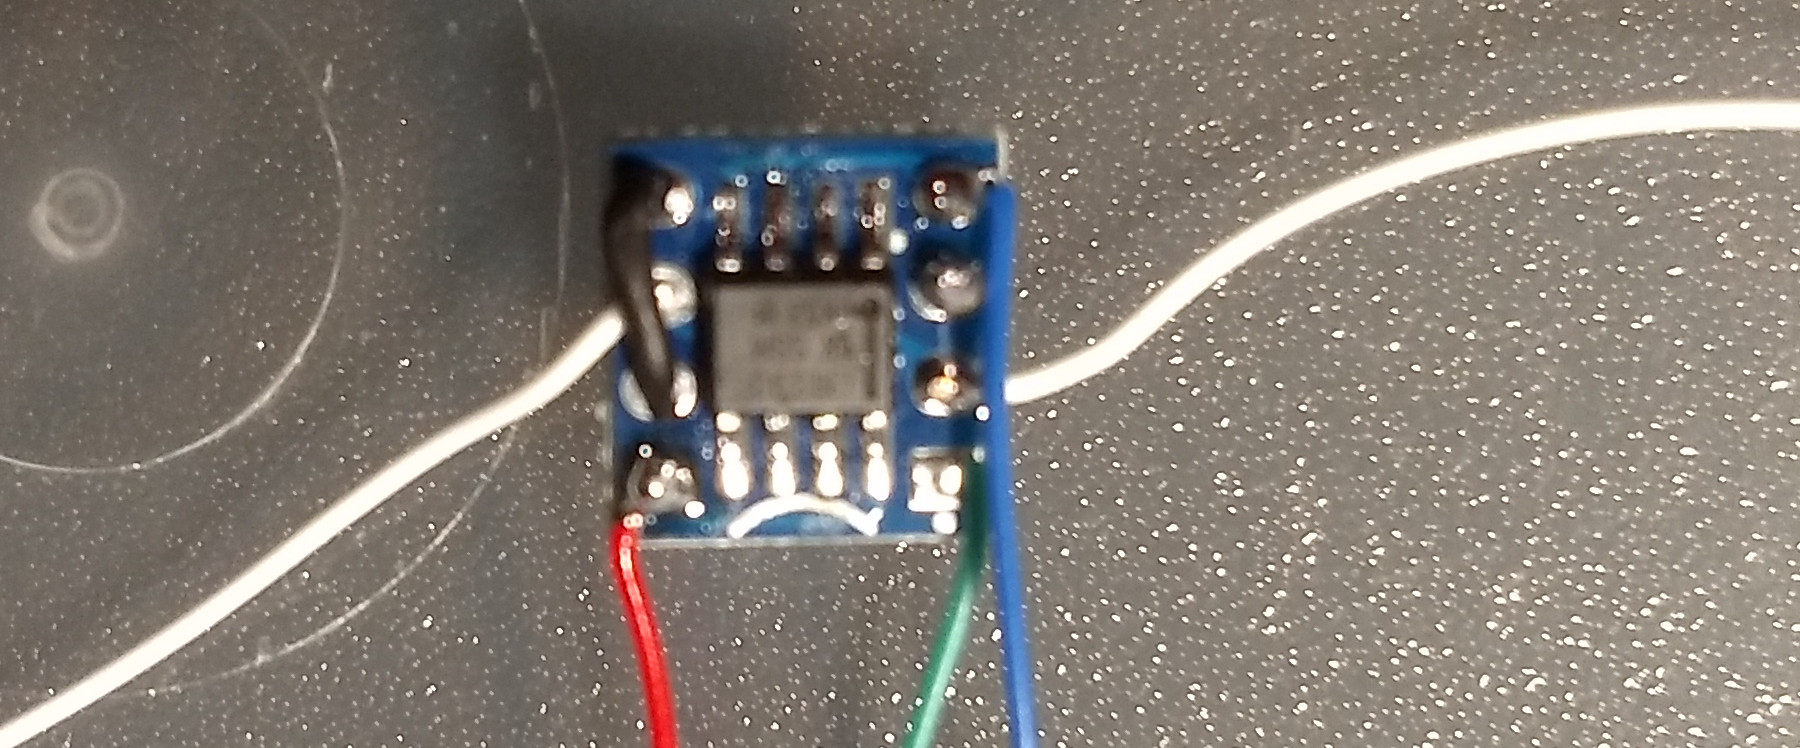
Definitive hardware
I used a SOP8 to DIP adapter PCB to break out the LM393 to a more workable footprint. I added through-hole and surface mount resistors to provide a fixed voltage divider. I also switched the positive and negative inputs of the comparator so no extra template entity to invert the signal is needed in Home Assistant.
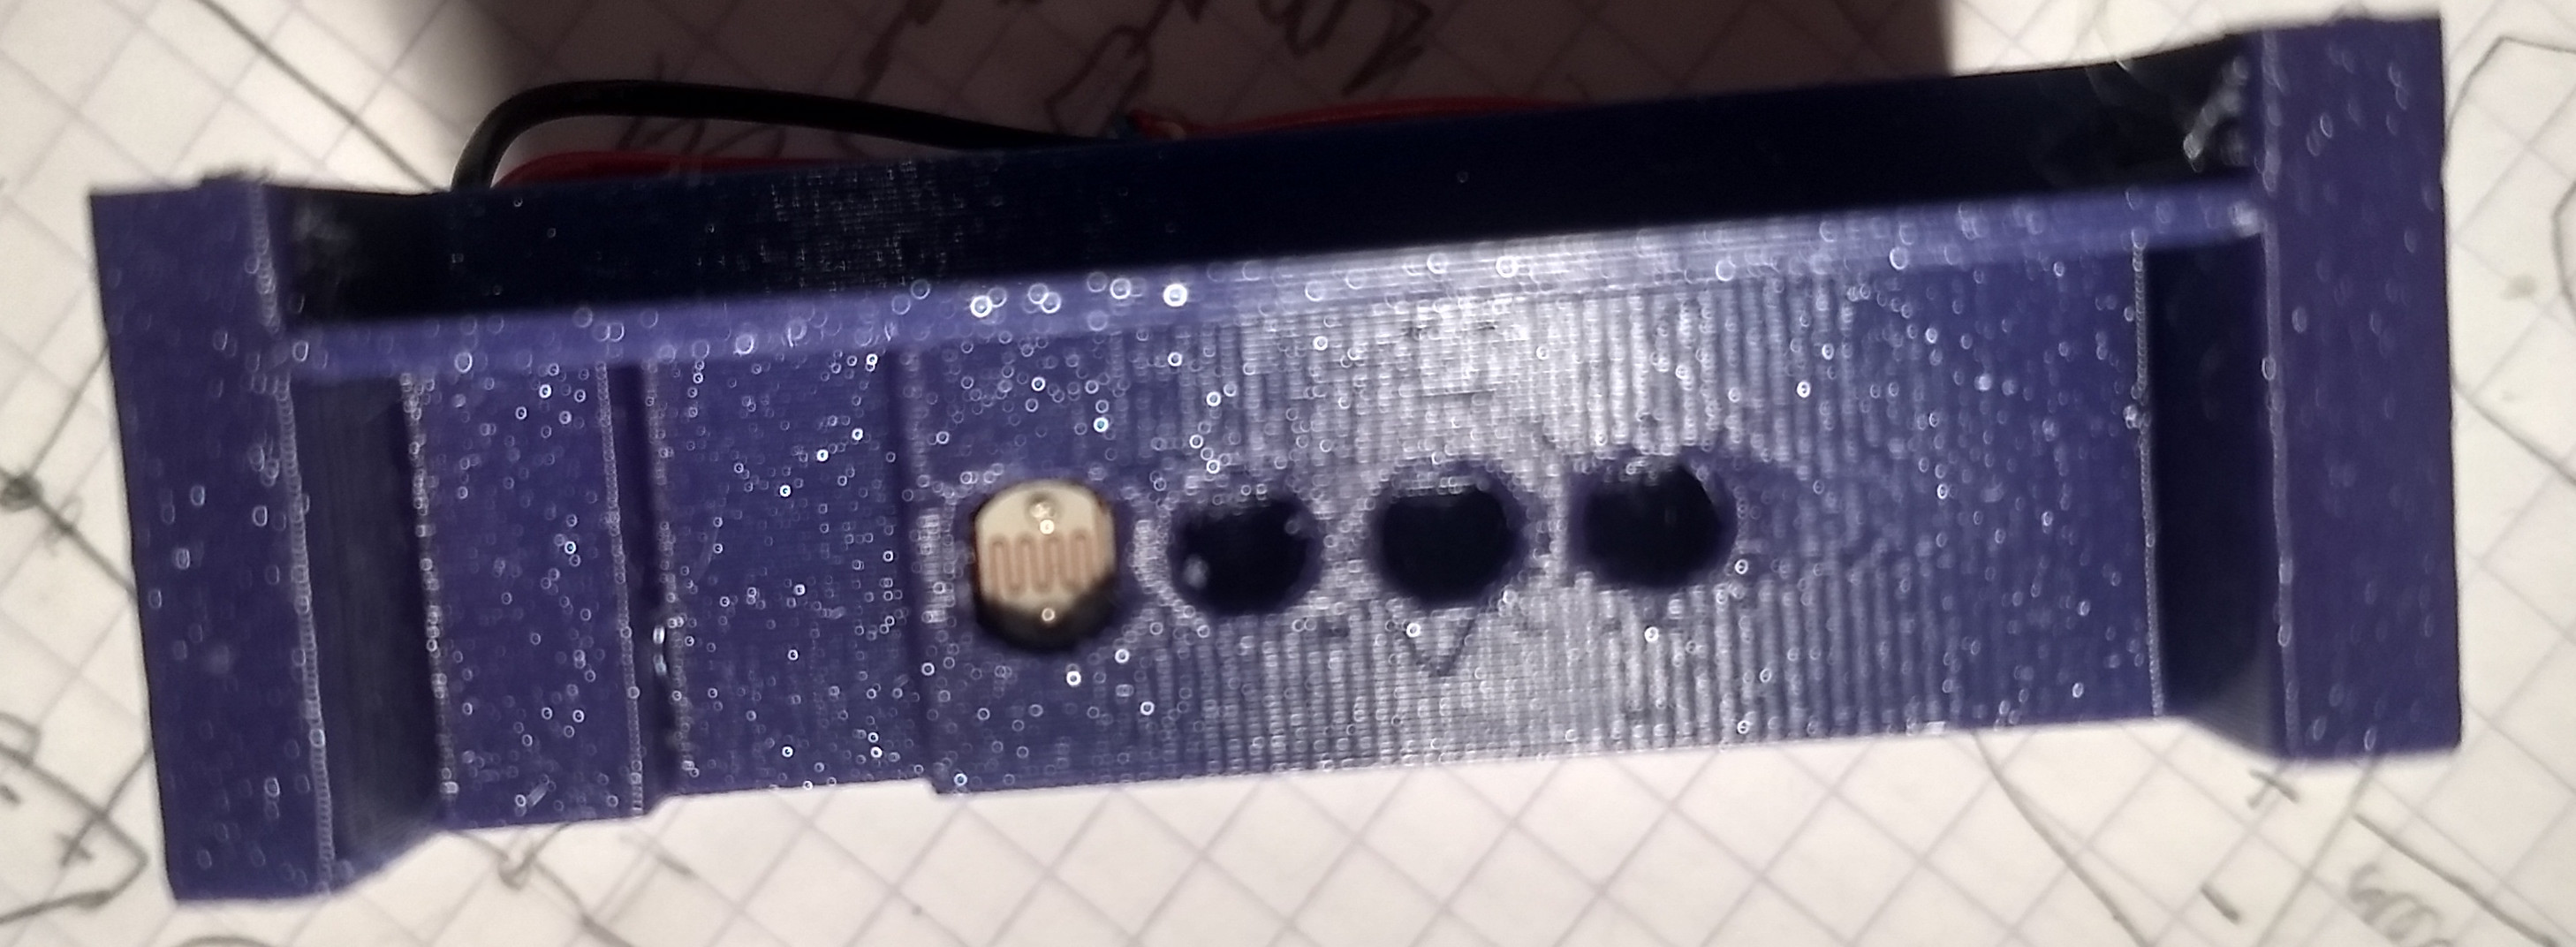
I designed an enclosure around the LED alignment jig I had made earlier.
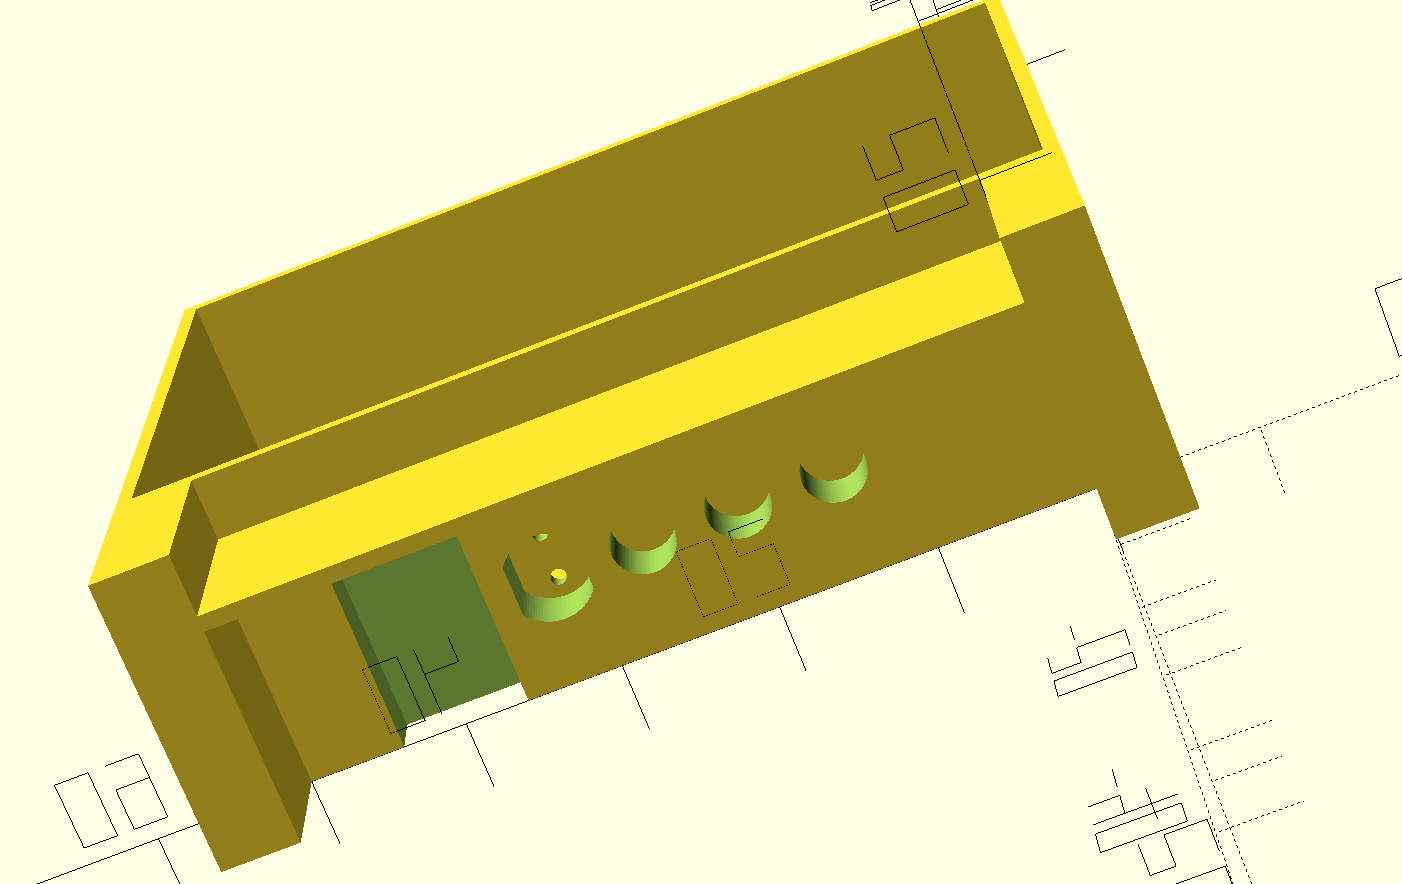
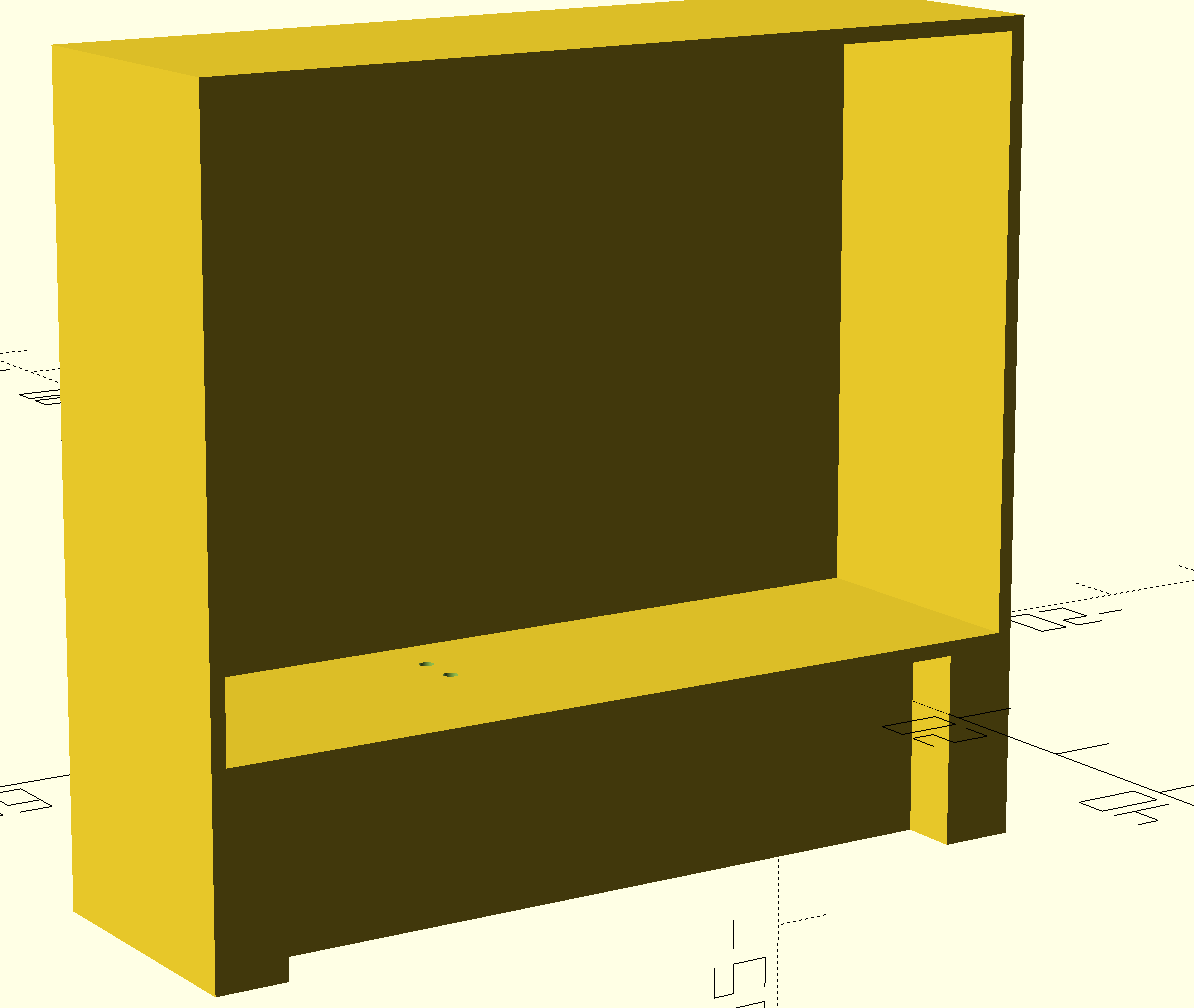
This has room for two AA batteries and the two circuit boards.
Home assistant configuration
Inverting the signal
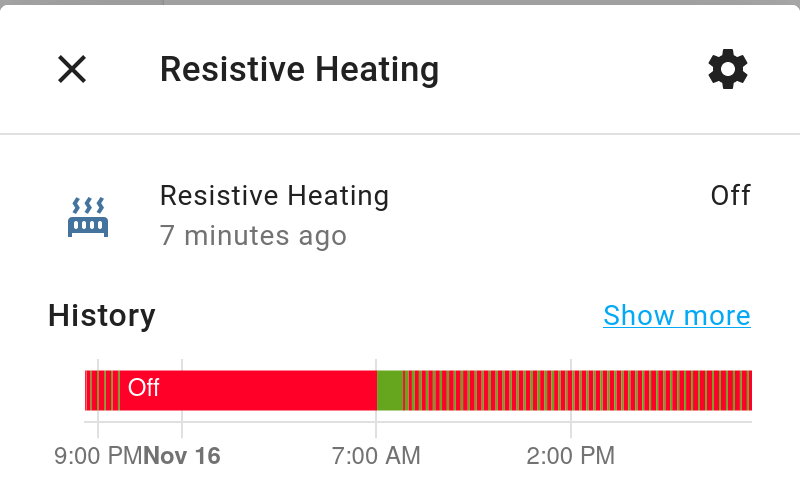
When the radiator is heating, the comparator shunts the reed switch, resulting in a 'closed' door. Since that is the idle state of the binary sensor, I invert it with a template sensor in binary_sensors.yaml:
- platform: template
  sensors:
    heaterliving_contact_inverted:
      friendly_name: 'Resistive Heating'
      value_template: >-
          {{ is_state('binary_sensor.heaterliving_contact','off') }}
      icon_template: 'mdi:radiator'
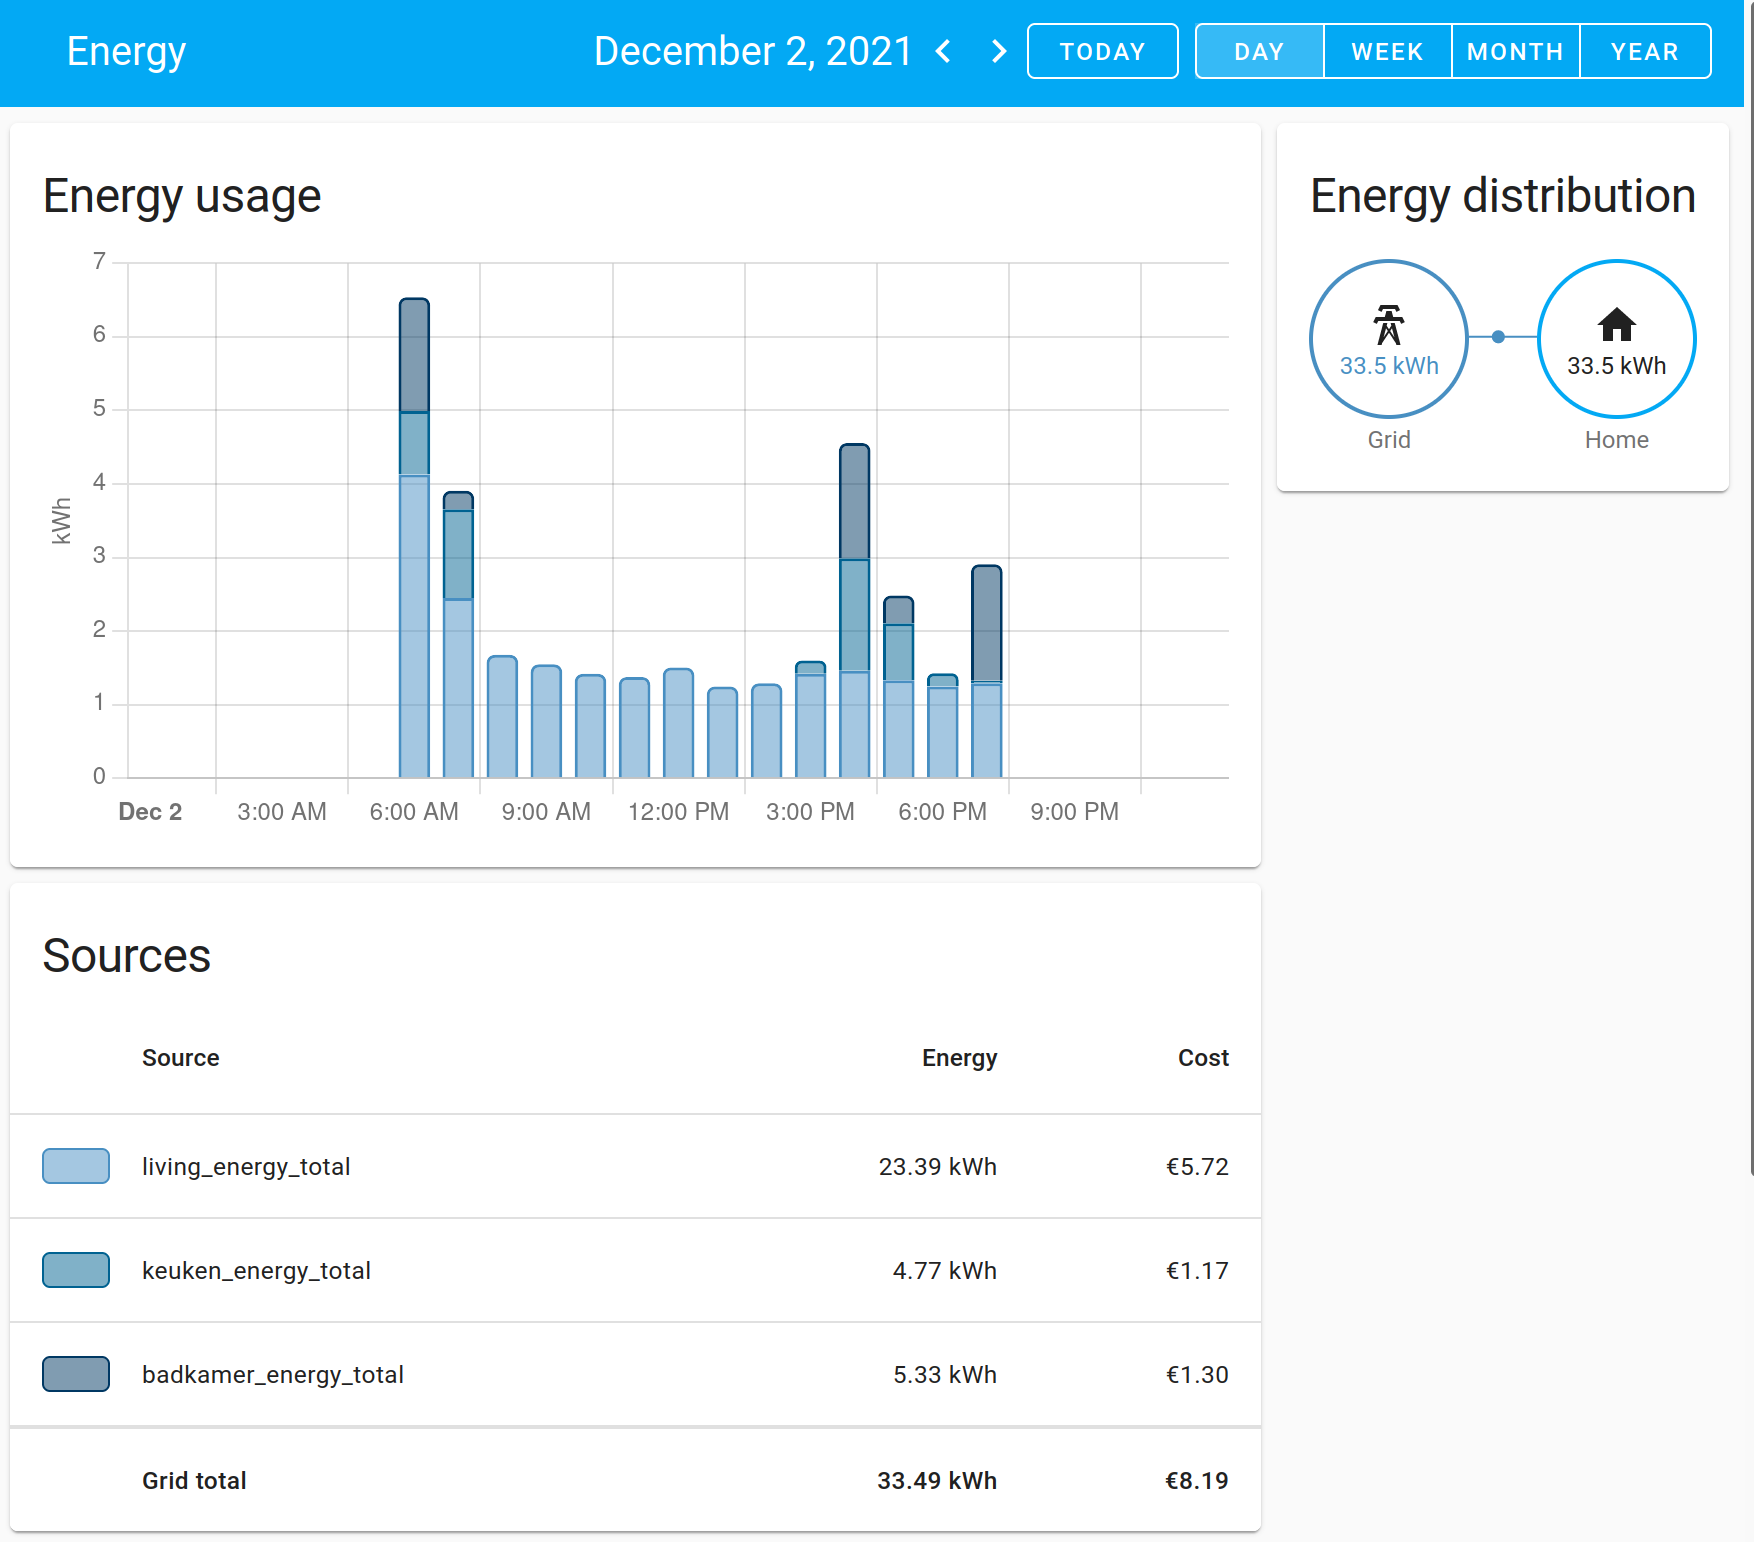
This creates a nice entity in home assistant:
Integrating over time
A new history_stats integration is set up in sensors.yaml to track the total on time:
- platform: history_stats
  name: Heatingtime
  entity_id: binary_sensor.heaterliving_contact_inverted
  state: 'on'
  type: time
  start: '{{ now().replace(hour=0, minute=0, second=0) }}'
  end: '{{ now() }}'
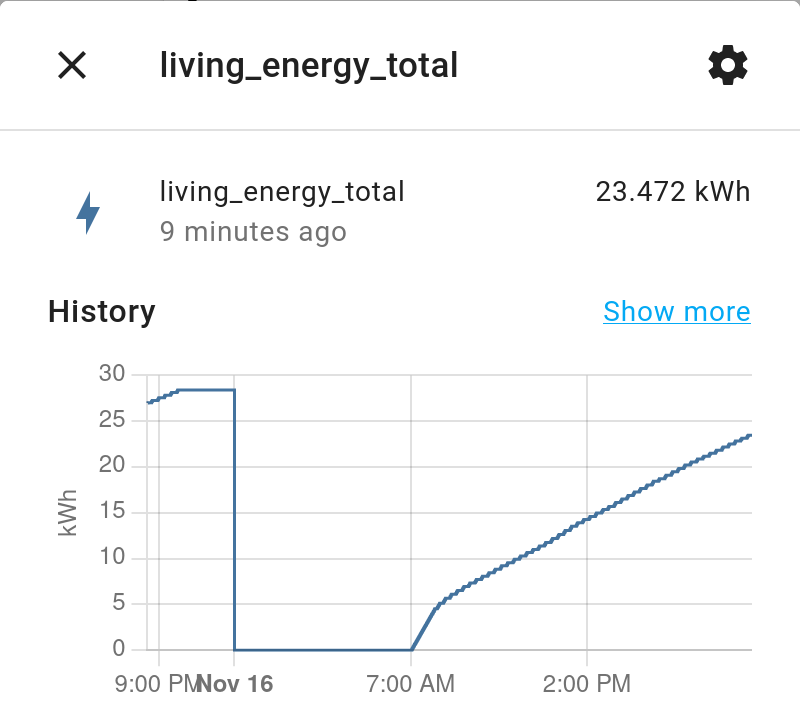
Applying power usage of the heater
Energy is time x power, so we need to multiply the heating-time-sensor's value (in hours) with the radiators average 4.8kW (actually two radiators of 3kW and 1,8kW). To get a more accurate value, the actual power the radiator draws should be determined. This is done using yet another template sensor, in sensors.yaml:
- platform: template
  sensors:
    living_energy_total:
       device_class: energy
       unit_of_measurement: kWh
       value_template: >
         {% if is_number(states('sensor.Heatingtime')) %}
         {{ states('sensor.Heatingtime')|float * 4.8  }}
         {% else %}
         None
         {% endif %}
   attribute_templates:
       last_reset: '{{ now().replace(hour=0, minute=0, second=0) }}'
       state_class: 'total_increasing'
Liked something? Worked on something similar? Let me know what you think on Mastodon!
You can use your Mastodon account to reply to this post.