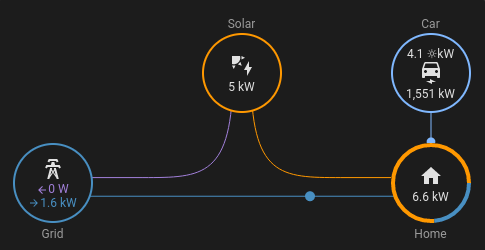
I want to keep counters for how much solar panel energy and grid energy my car uses.
I have power meters for the Solar, Grid and the car. The power the rest of the house
uses is however unknown, and measured by the grid meter.
Determining the car's part of grid and solar power requires some calculations.
I created home assistant template sensors to come up with these power numbers, and
added integrators to obtain energy meters. The energy flow plus card can show these
in real time on the Home assistant dashboard.
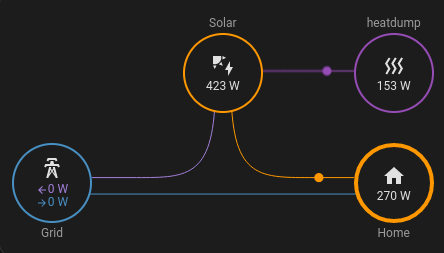
A heater power-controlled to consume all excess solar production!
I built a prototype test setup that makes sure every Watt produced by our
solar panels is used by an electric heater. It uses an industrial power
controller and some code to match the heater's power usage to
whatever power is not used by the house.
This would make it possible to maximize our solar self consumption, which is
required to get a decent return on your solar investment.
For us, injecting to the electricity grid is giving away power,
we have to pay about 6x as much compared to what the utility pays us for returning energy to the grid.
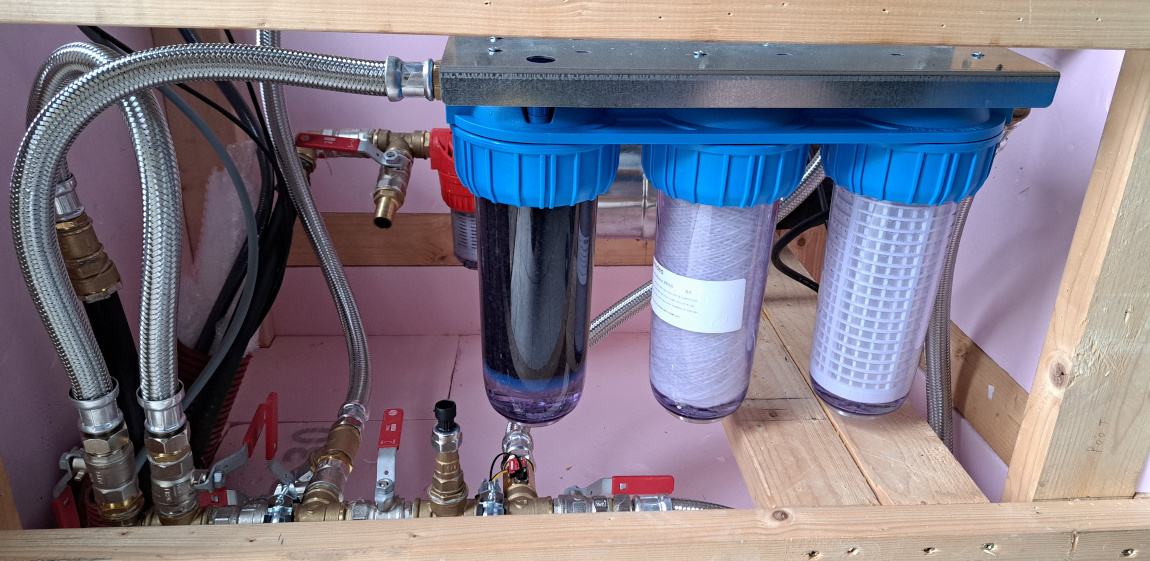
I chose to place our our rainwater tank's pump and filter in the garden shed
slightly away from the main house. This allowed for a cheaper
pump outside the tank and minimizes in-house technical equipment and noise.
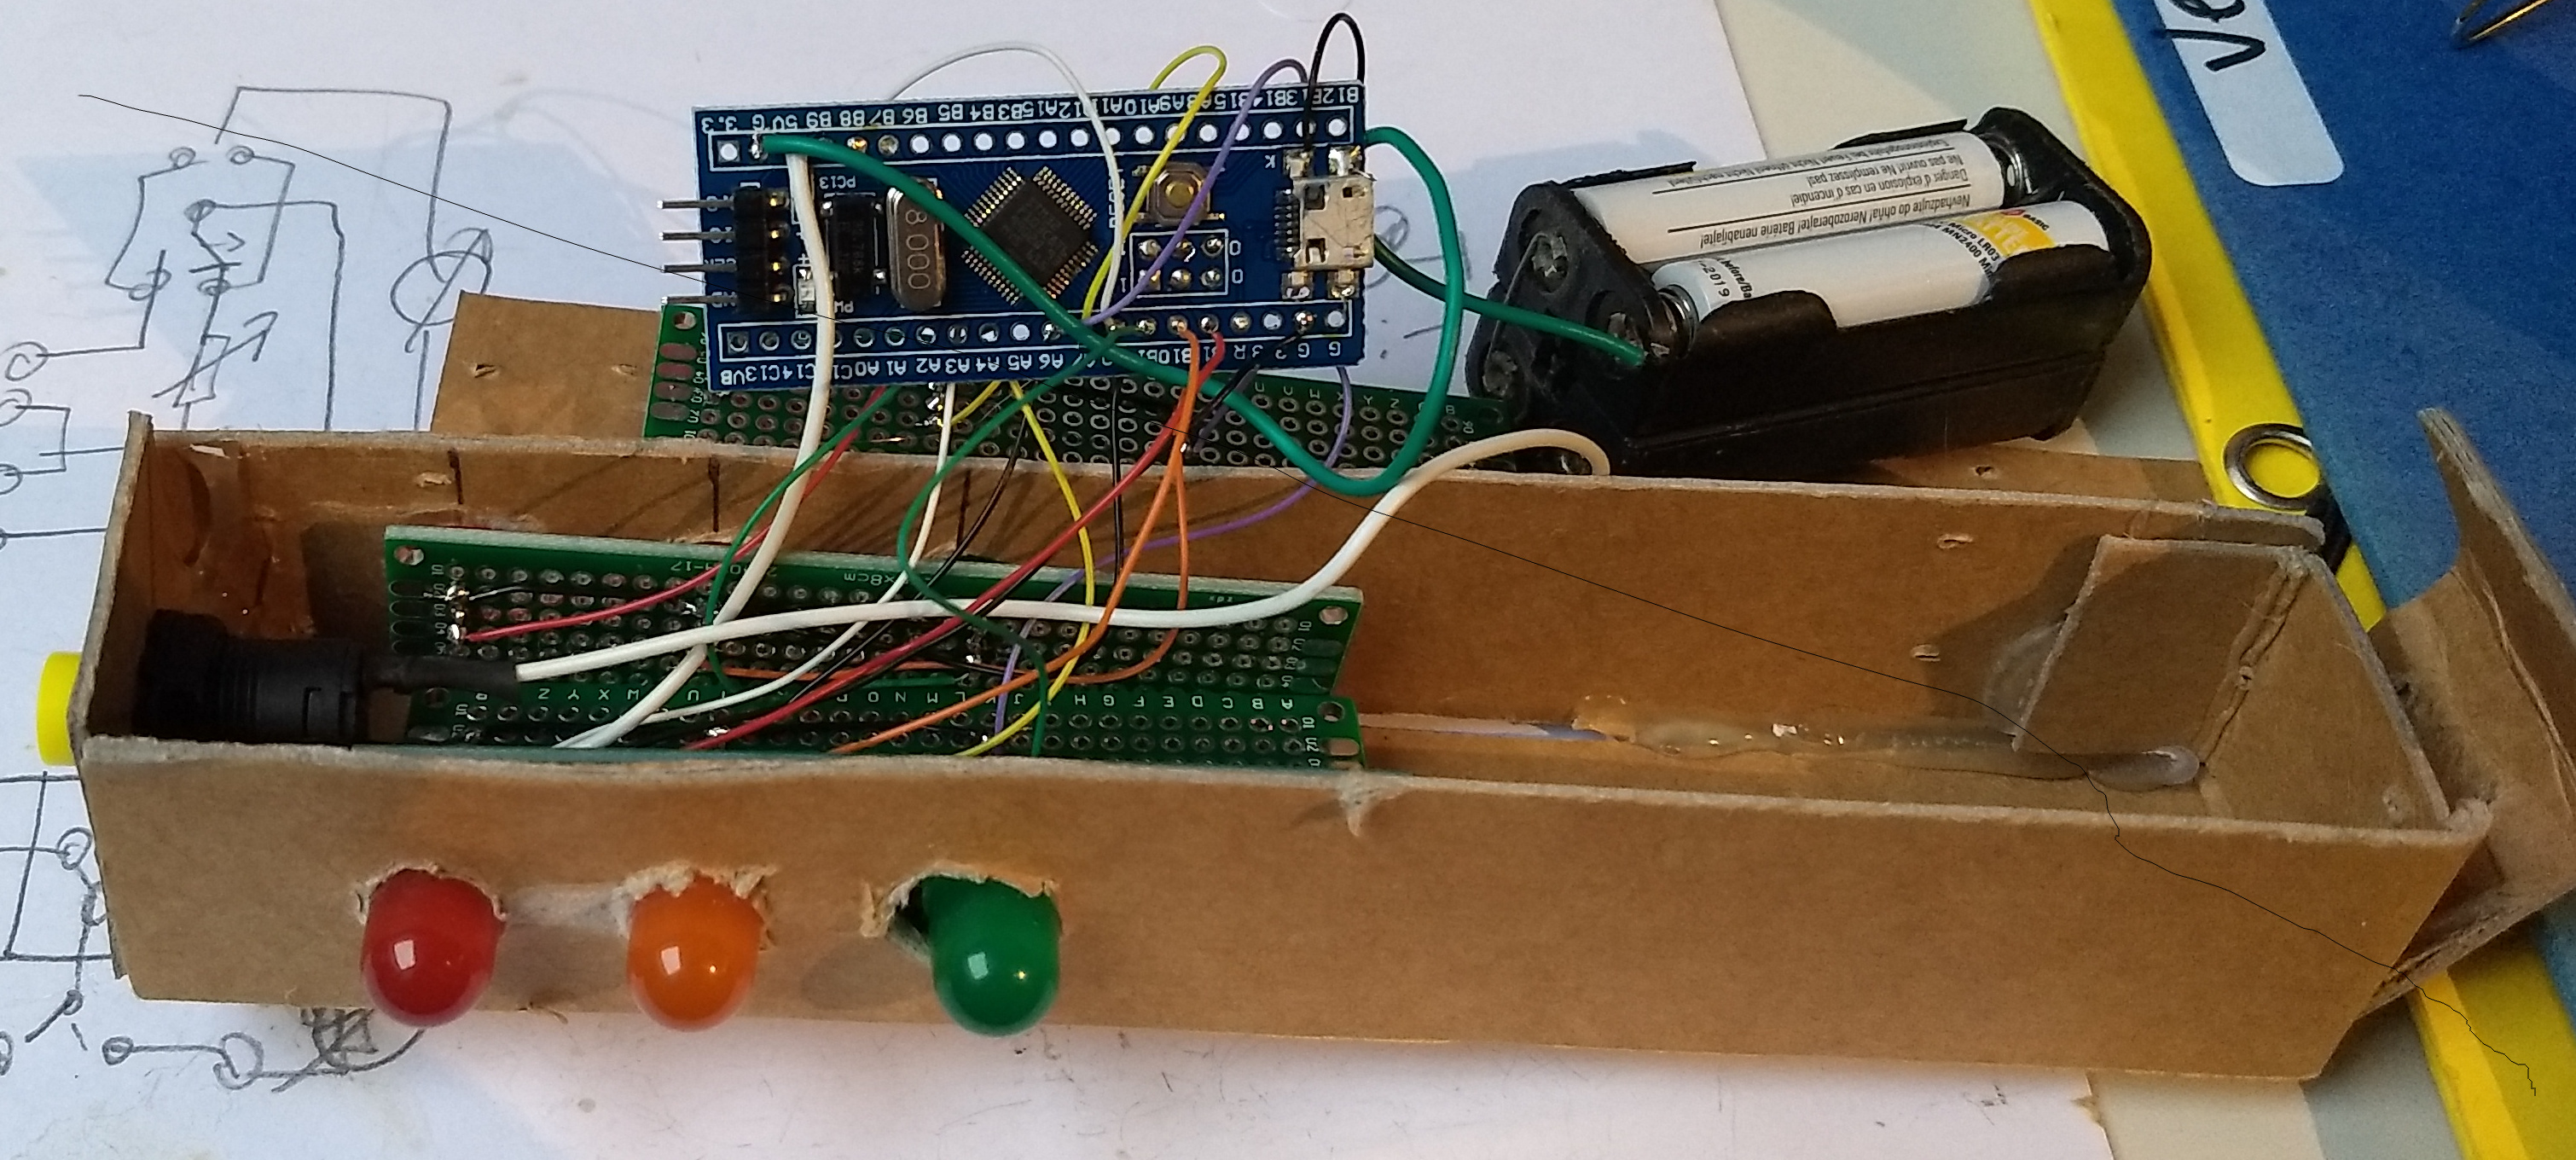
A stm32 based traffic light I built for fun (and my kids) years ago
Since the Rust programming language is all the rage, I started exploring
this programming language during the summer. These are my notes on what I needed
to do to set up a working development environment using the hardware I
already had in my lab.
The first (crude) prototype with sloppy veneer edges
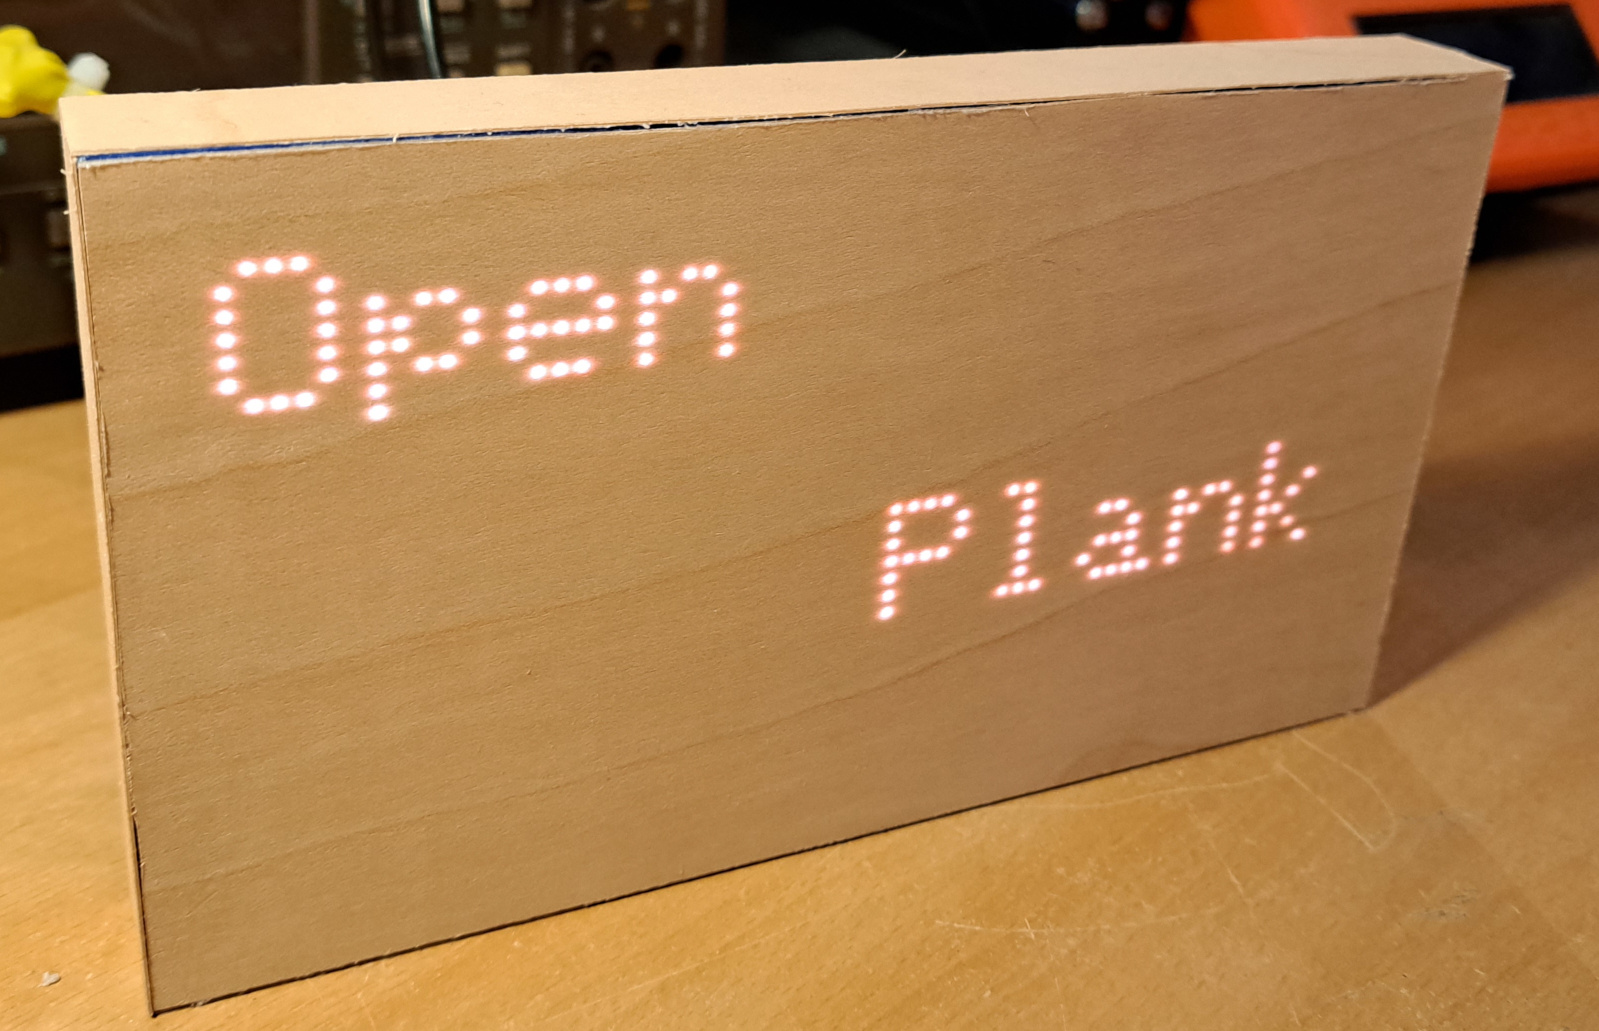
In November I saw a cool device at an event.
The device was presented as an unobtrusive way to interact with technology.
Unlike usual touch screen devices, it looks like a wooden plank
that is sensitive to touch and uses a LED pixel matrix behind the wood to visualize icons and text.
Since the device wasn't available for sale, I wondered how easy it would be to
DIY a (much) simpler version that I could use for some of the same tasks.
I worked on this for a few hours each week, and by the end of December I had
this simple proof of concept, making use of cheap parts and easy to assemble.
After having the rainwater tank installed and connected to the roof,
there was still quite some plumbing missing. The filter and calmed inlet
add up to hundreds of euros. In my case the way the tubes were
connected to the tank made off the shelve filters unusable, so I opted
to DIY everything.
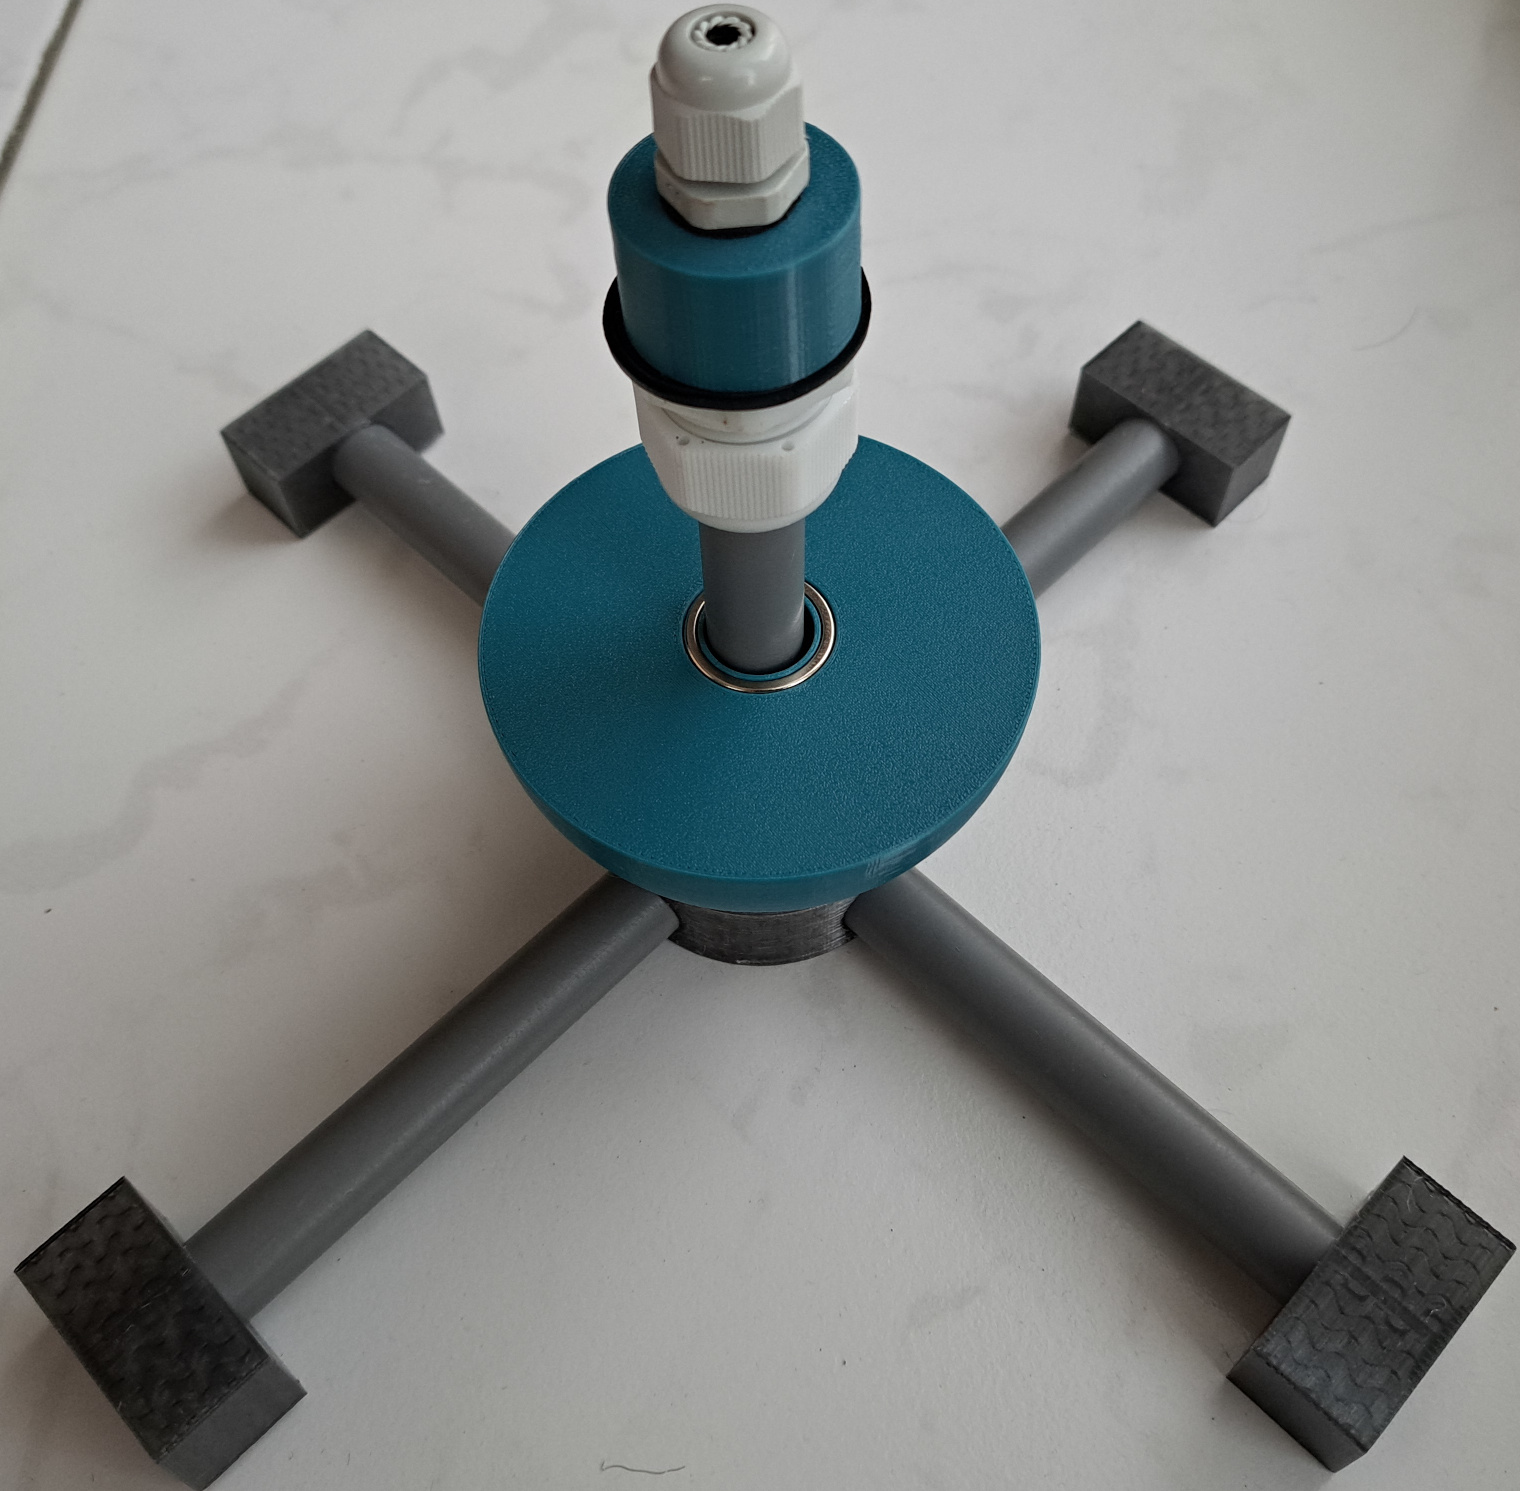
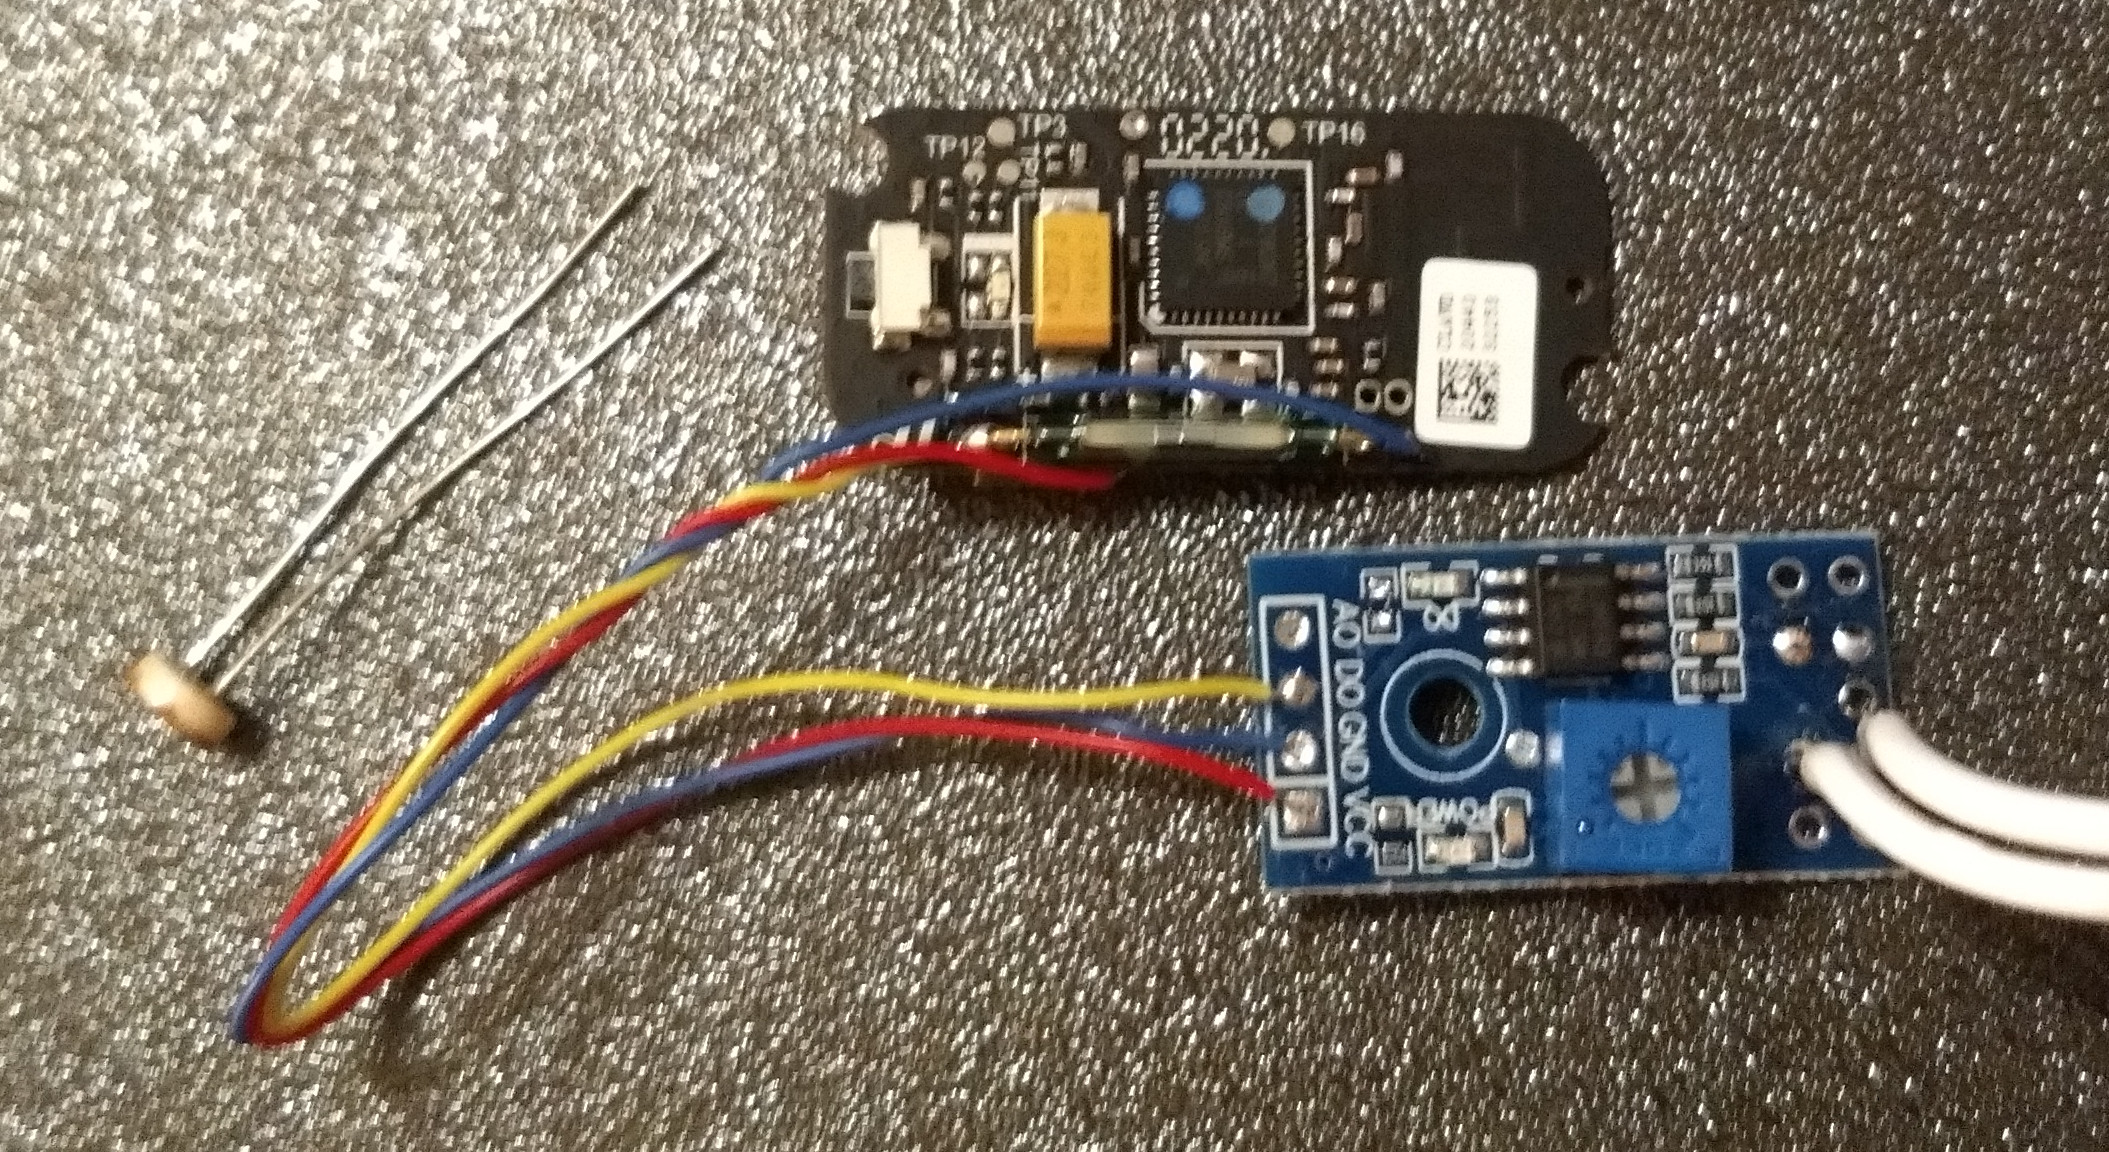
Mechanical sensor parts assembled with a very short sensor tube to fit the picture.
This project idea scored 3/3 stars, combining electronics, water and
creating something from scratch.
I couldn't resist building my own reed switch array water level sensor.
This kind of sensor has a floating part moving up and down a sensor tube.
It's not an off the shelve solution to sensing water levels,
buying a water pressure sensor or an ultrasonic level sensor would probably
be easier, but DIY is fun!
My goal was to do some electronics and 3D design, 3D print, experiment and
get a circuit board fabricated.
I'd build a sensor using easily obtainable parts whenever possible.
The electronics should be easy to build at home.
I will use it to monitor and log the water level in Home Assistant.
Getting to automate the adding of a minimal amount of tap water
to the tank during the summer will be a useful feature.
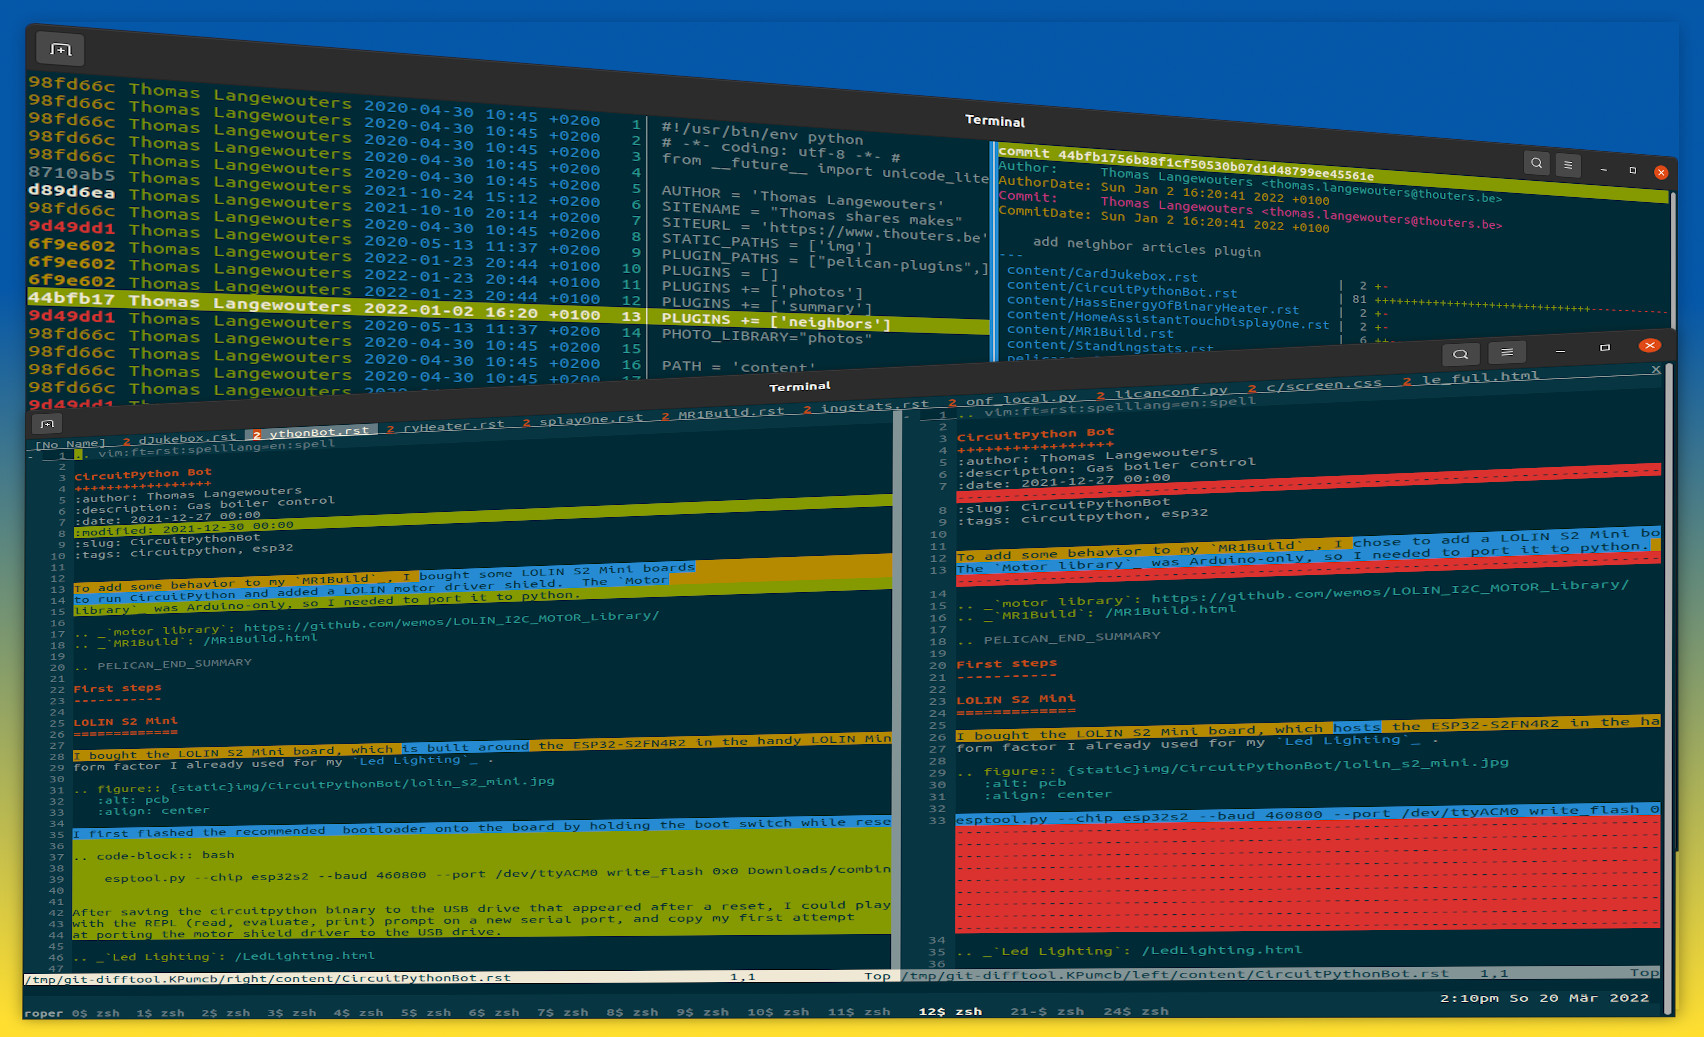
Tig blame + VIM showing all files of a GIT commit in diff-tabs using dirvimdiff
I configured GIT's difftool command to show the changed files as diff-split file tabs I can easily cycle through
by pressing gt.
This makes for a good terminal-based meld/beyond compare/... alternative.
Combined with Tig, it allows to quickly inspect a GIT commit's modifications in file context,
let's take a look at the quick and simple steps to set it up.
My favorite radio show airs on Sunday afternoon, and often can't listen to it live.
Fortunately the radio station offers a podcast feed so I can catch up and listen
to old shows.
I set up a systemd user timer (cronjob) on my Linux computer that runs
getpodcast to download updates.
Living in a house with Aterno resistive electric heating, I wanted to get a feel
of how our thermostat settings and outside temperature impacts our electricity bill.
I did not want to change the electric installation to add invasive interfacing
like current sensing, and hacked a ZigBee door sensor to report on the heater's
status LED.
I use a Raspberry Pi to drive two sets of speakers using Snapcast.
To maximize the range of my Bluetooth speaker, I bought a Realtek
RTL8761B-based USB Bluetooth dongle with a large antenna.
To get the Bluetooth dongle to work with the latest kernel drivers and
bluez-alsa, I had to abandon Raspbian Linux and use the latest Debian Linux
instead.
I was able to cook up a fun audio setup controlled and automated with Home Assistant!
It features
Multiple room synchronised audio speakers (fixed/analog, portable Bluetooth devices and via app on phone or tablet)
Playback of internet radio, Spotify streaming and local audio files.
Sound notifications for Doorbell, garden gate and other sensors and home alarm events.
In my setup, a docker container running on the Home Assistant machine takes
care of retrieving audio from Spotify, internet radio streams and local
storage.
Physical devices like raspberry pi's or an Android phone/tablet use a snapcast
client to use drive speakers.
I discovered openHASP while I was searching for projects
integrating touch interfaces with Home Assistant.
It's easy to wire up a cheap ESP microcontroller board and TFT display module,
and by loading this opensource firmware you can turn it into a network
connected touch control panel and control devices and display things.
Lilygo twatch 2020 running simple lighting scene (mood) control proof of concept
I discovered a lovely smart watch development platform; the Lilygo t-watch 2020.
It's an ESP32 based hackable watch, with a small capacitive touch display.
I had already played with the idea of building a small home automation control
and status display that fits into the existing switch cover plate, so clicked
the order button and leveraged the open source watch firmware to quickly hack
together a proof of concept.
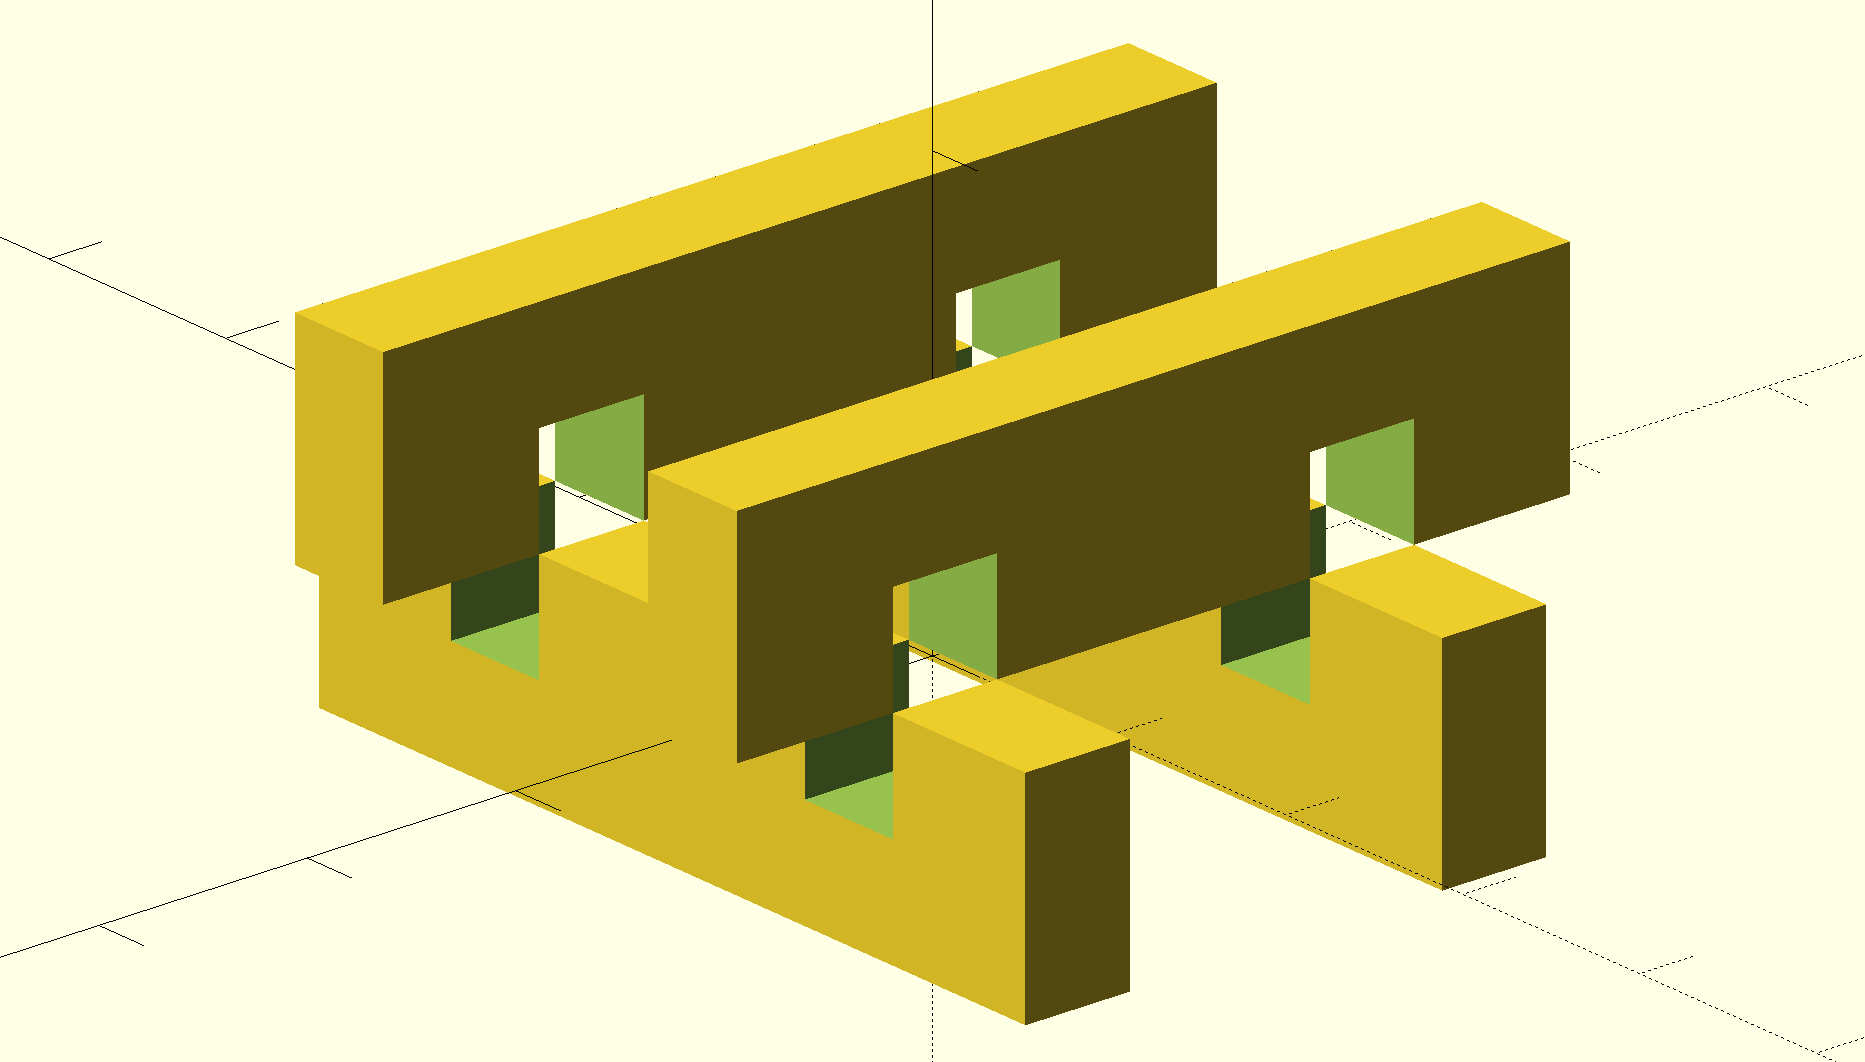
While designing a screw-drive based RC tank (perhaps more on that later), I wanted to create a large easily customisable support structure out of a minimal amount of plastic.
I started prototyping an interlocking structure in the shape of a octothorpe (#).
This turned out to be a lot of ugly code, and so I got sucked into rabit hole of optimising my openscad model and found a cleaner solution.
At one point I wanted a basic home security system (burglar alarm) to offer me some peace of mind at night.
My Home Assistant instance has enough sensors to figure out what we are up to,
so it was possible to create an alarm system that works autonomously.
The system automatically arms and disarms while we sleep during
the night and when we leave and return to the house during the day.
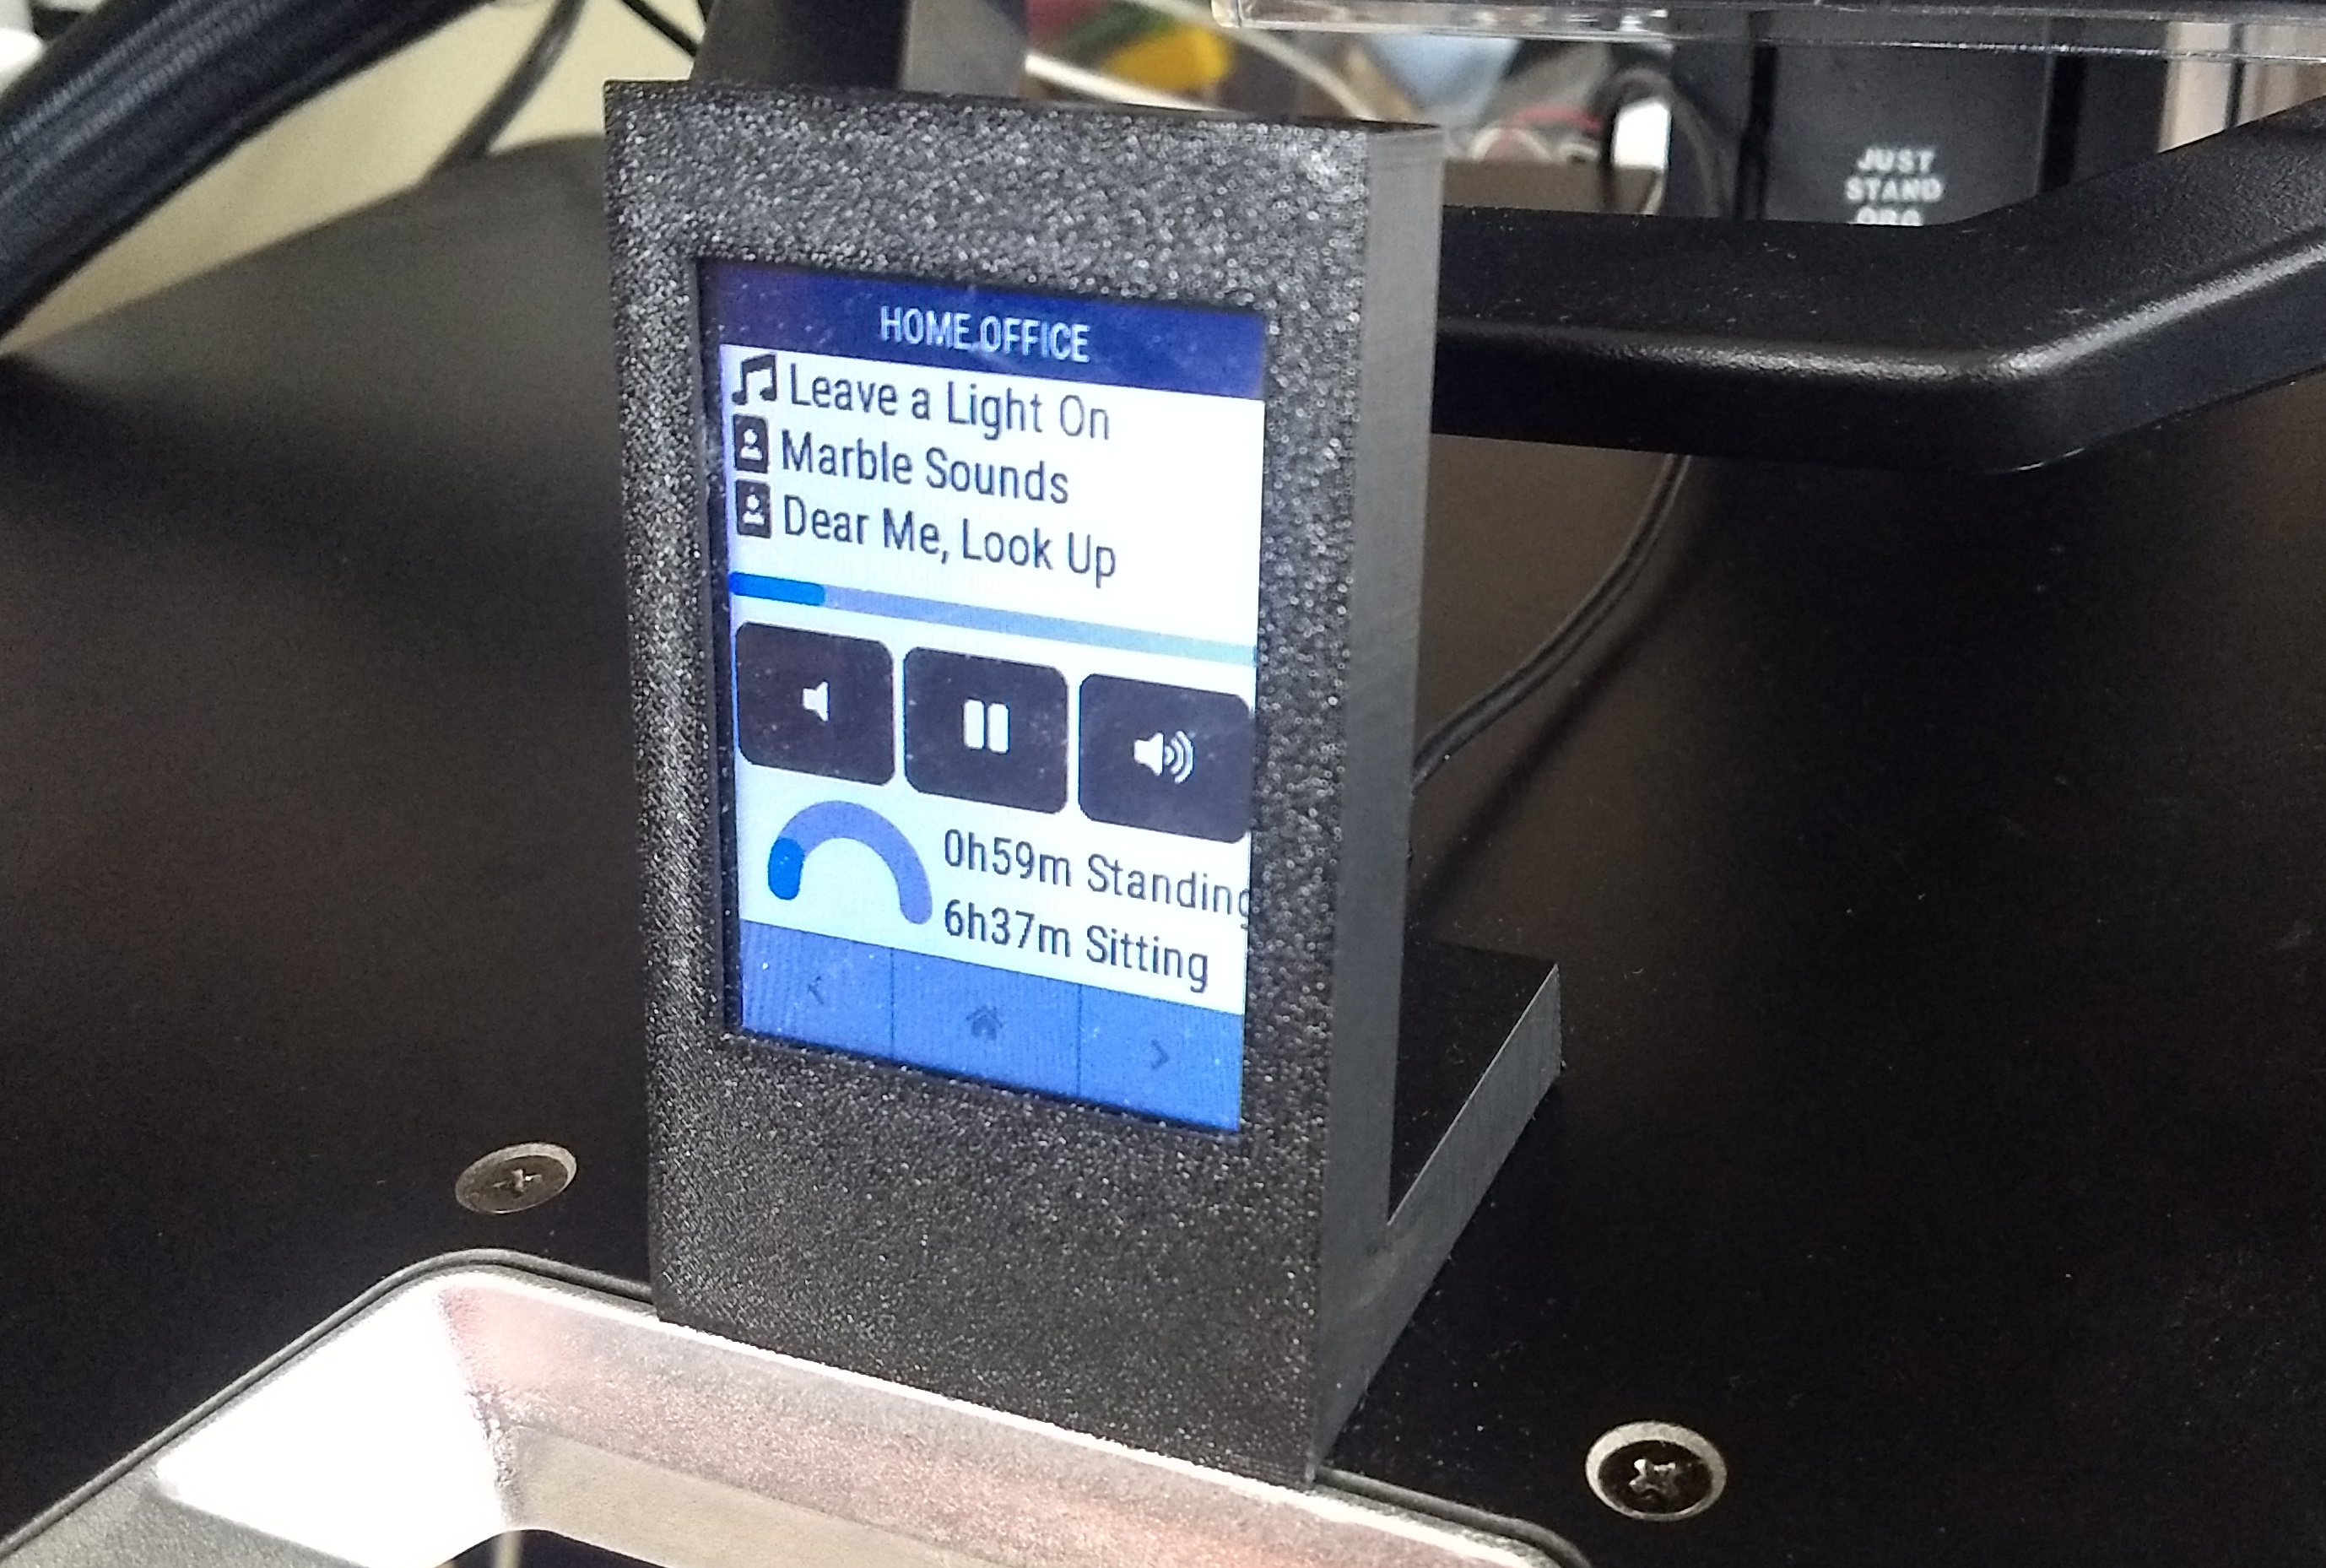
I have used an Ergotron standing desk for 5 years, then it broke, right out of
warranty. Several years ago I started building a sensor device to track how
much time I spend standing up versus sitting down in my chair. The hardware
prototype finished, it got shelved since I found other fun things to do with my
limited hobby-time.
Later I noticed that I was sitting down 99% of the time when working from home.
To revive my healthy habit of working upright part of the time, I decided to
pick up my parked project by re-printing the enclosure I made on my own printer
and leveraging the power of esphome on and home assistant to finish the project
after all.
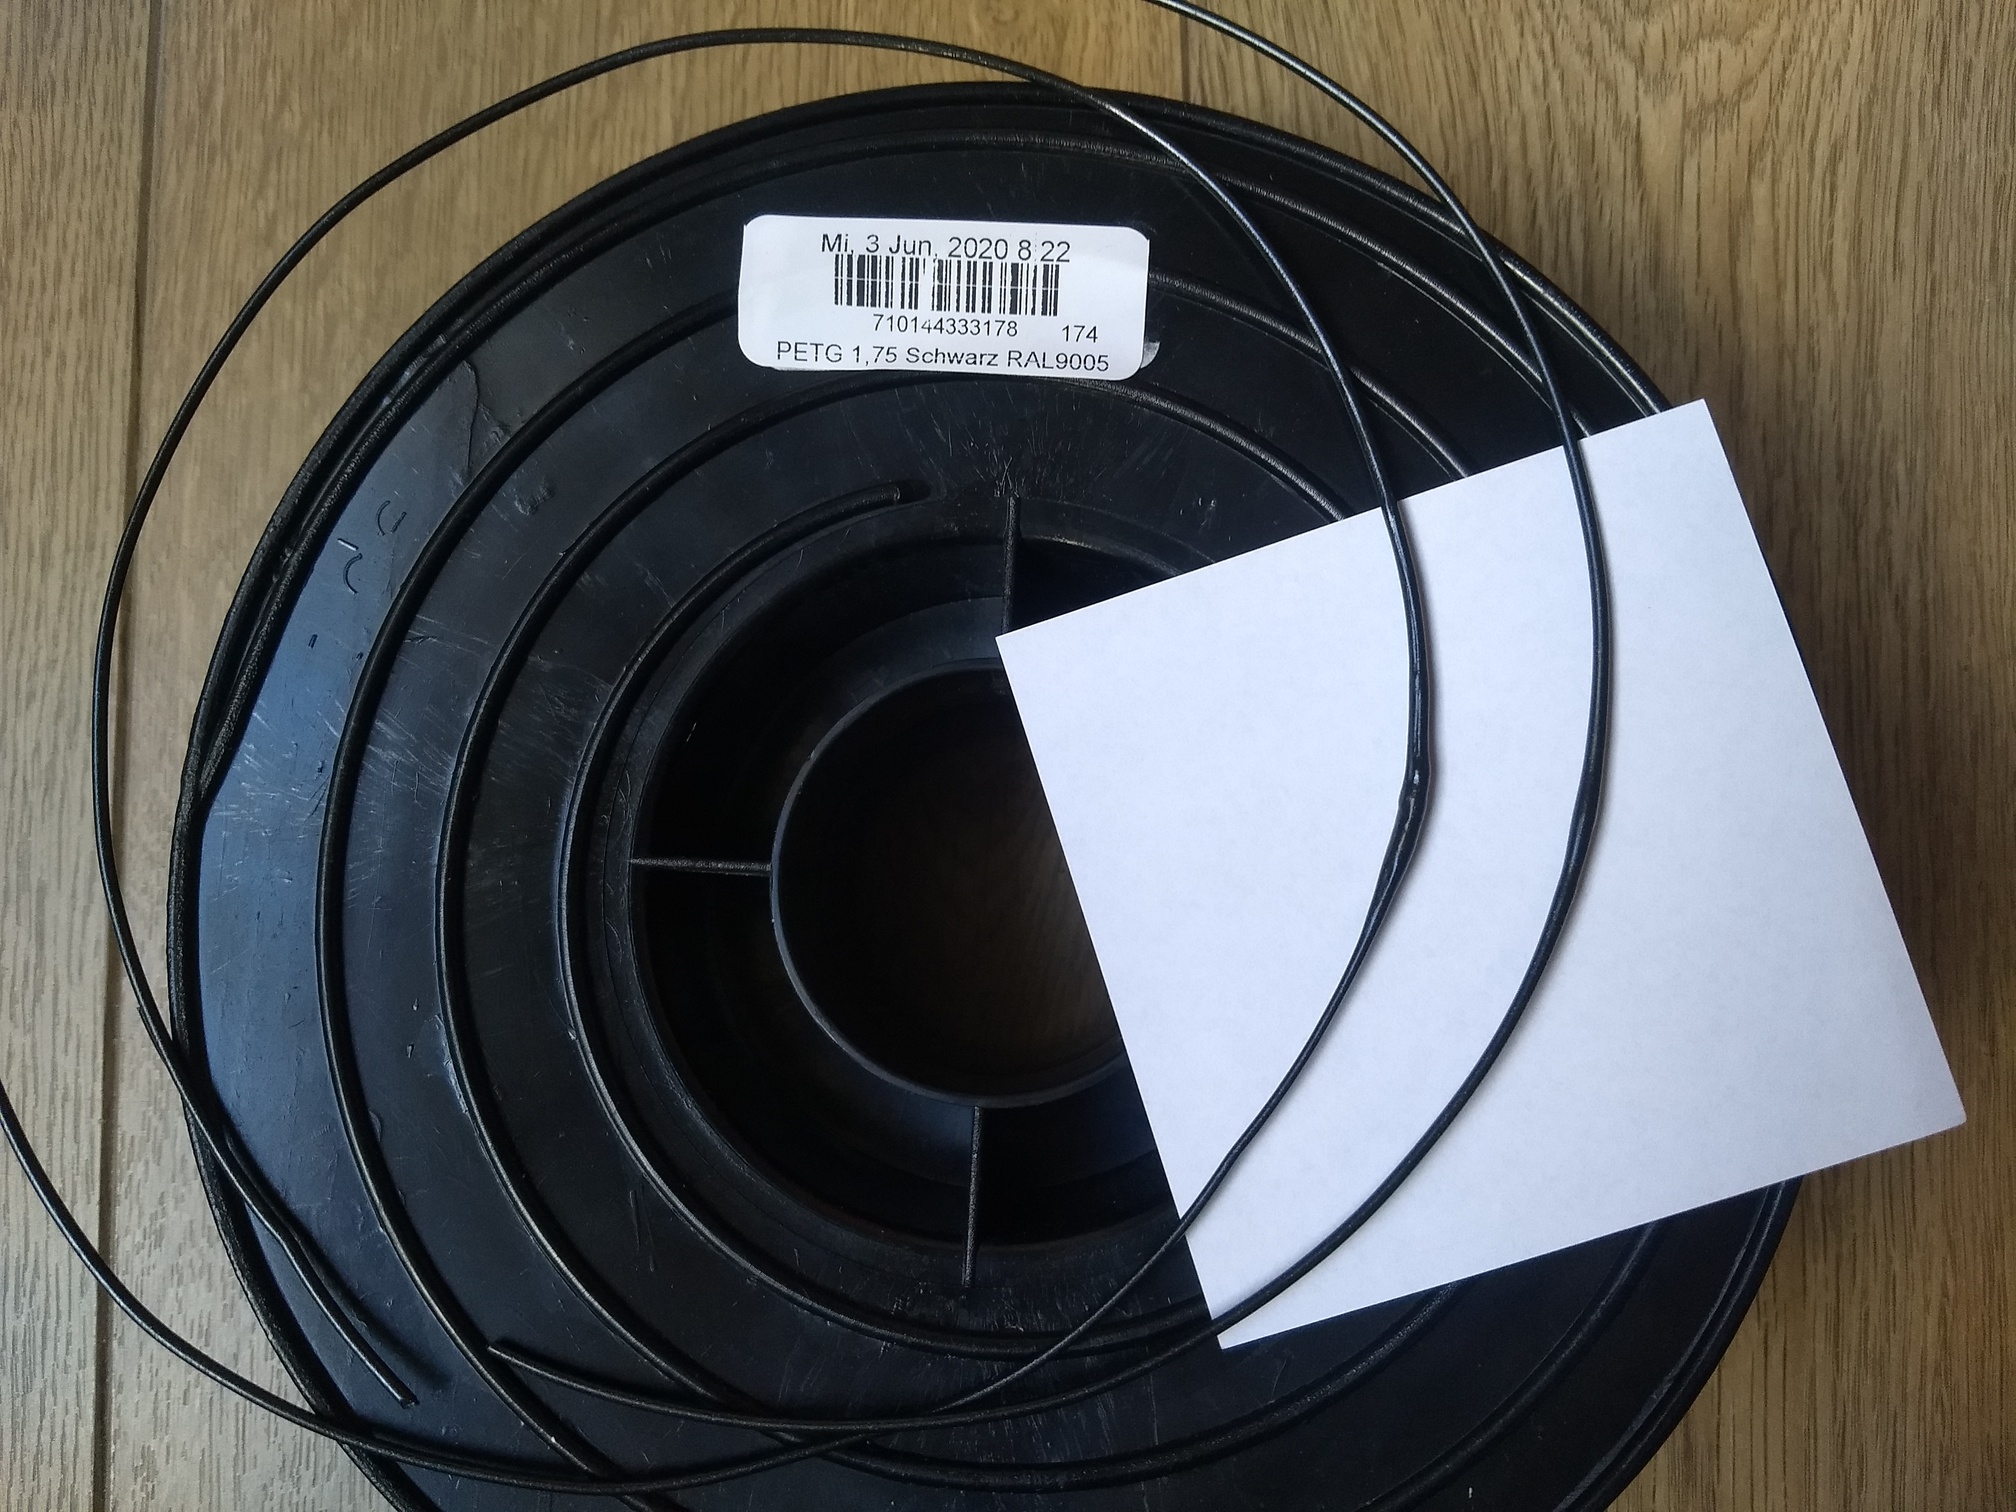
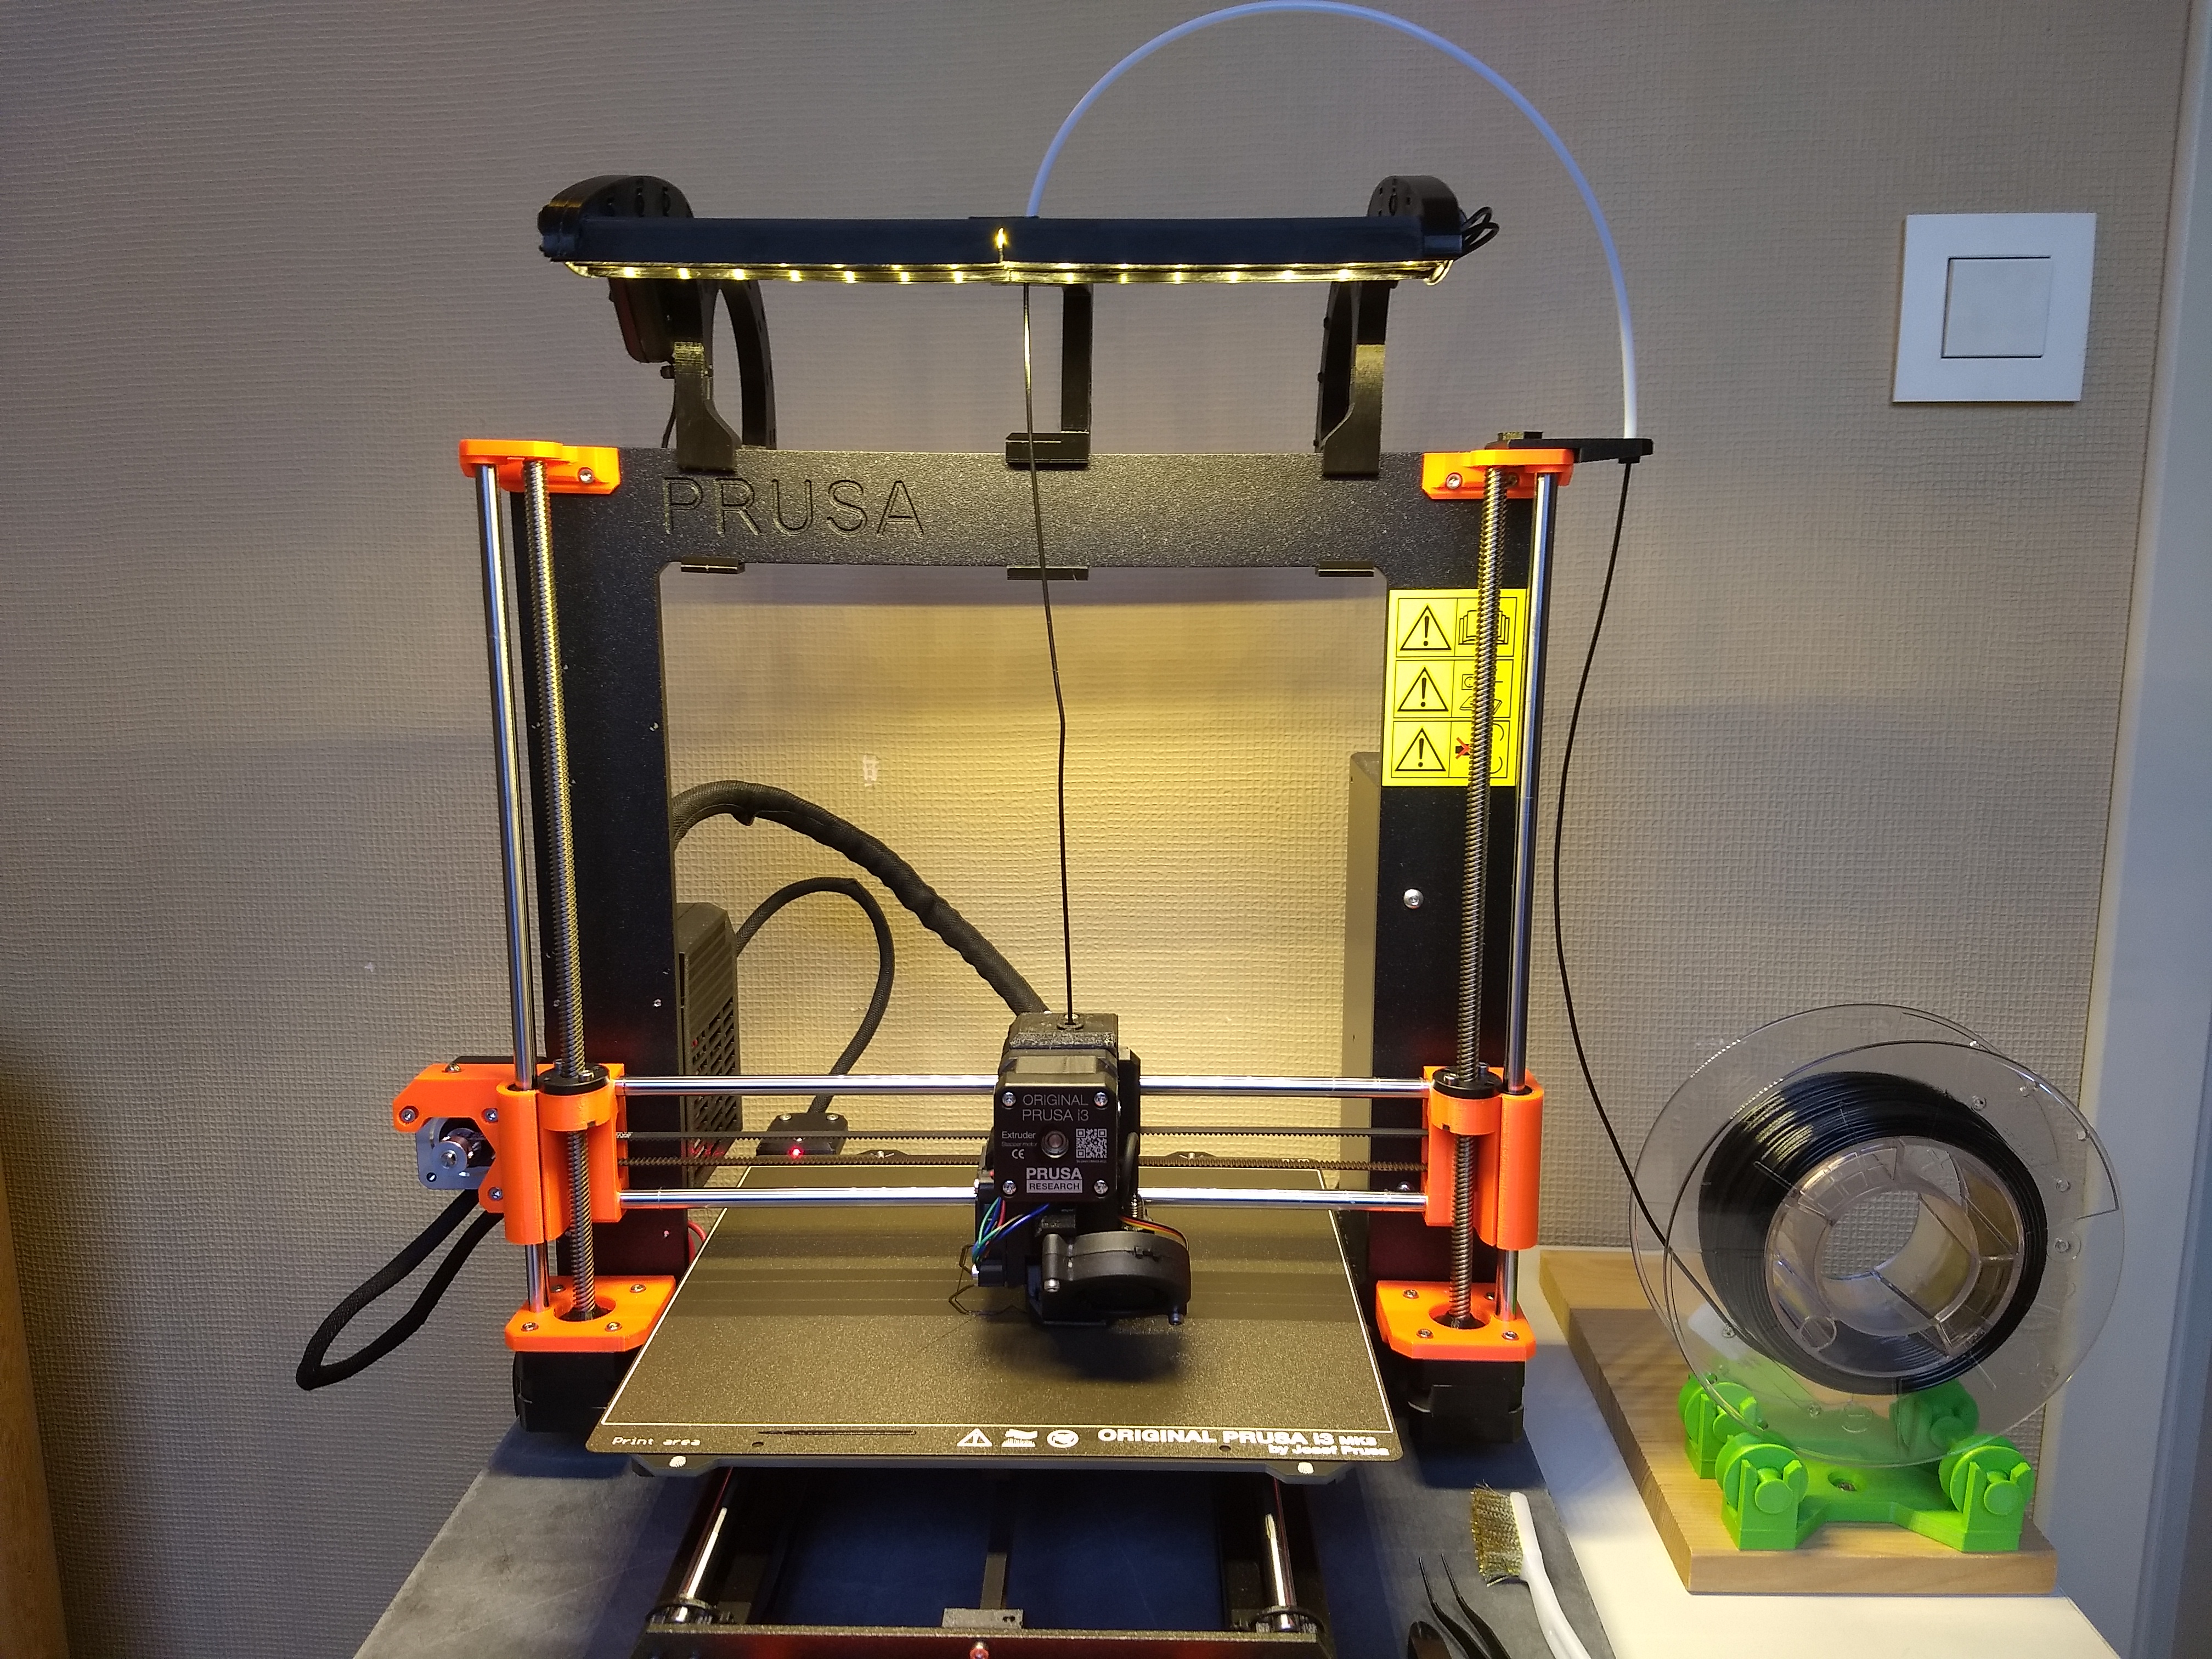
I already had a limited set of PETG spools in nice colors and was interested in
some cheaper spools for prototyping purposes. The price was 'cheap' indeed,
read along to see how this manufacturer's quality turned out to be...
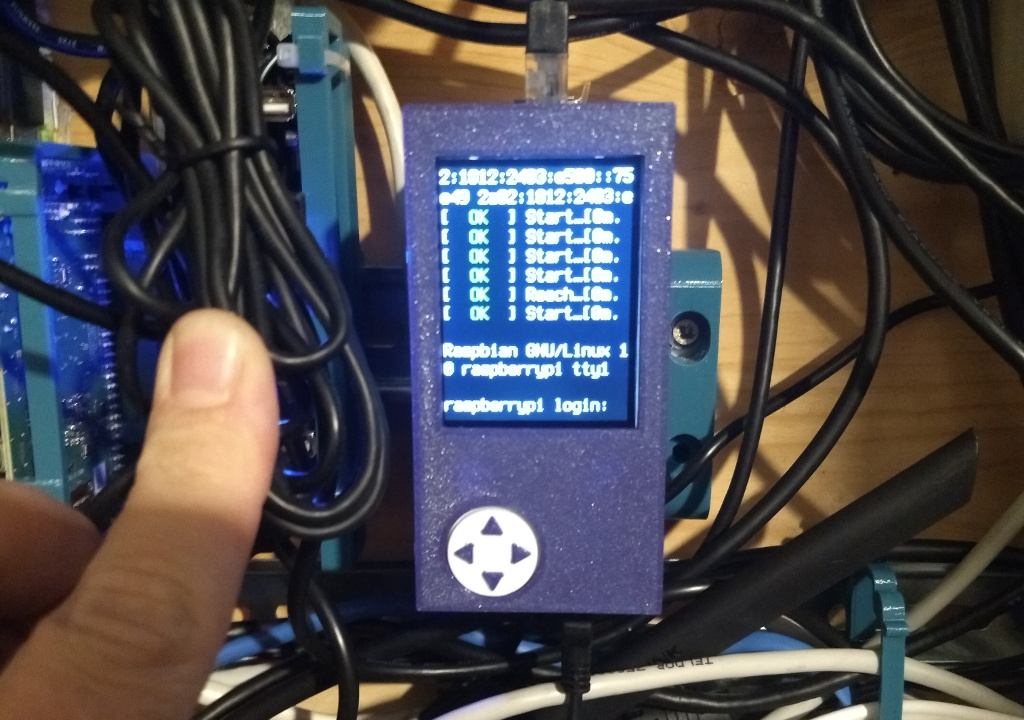
I've been running network services on embedded arm platforms for for more than
8 years now, and when things go wrong, had to drag around HDMI monitors to hook
up. For the last years I had a pi connected to the serial console to avoid
that.
I have been mounting all my networking and smarthome devices on a
DIN rail, and I had some small 2.2" TFT displays around for a different project.
I thought it would be nice to create a raspberry pi enclosure that included
such a display so there's a real video console on the device that can also be
used as status display.
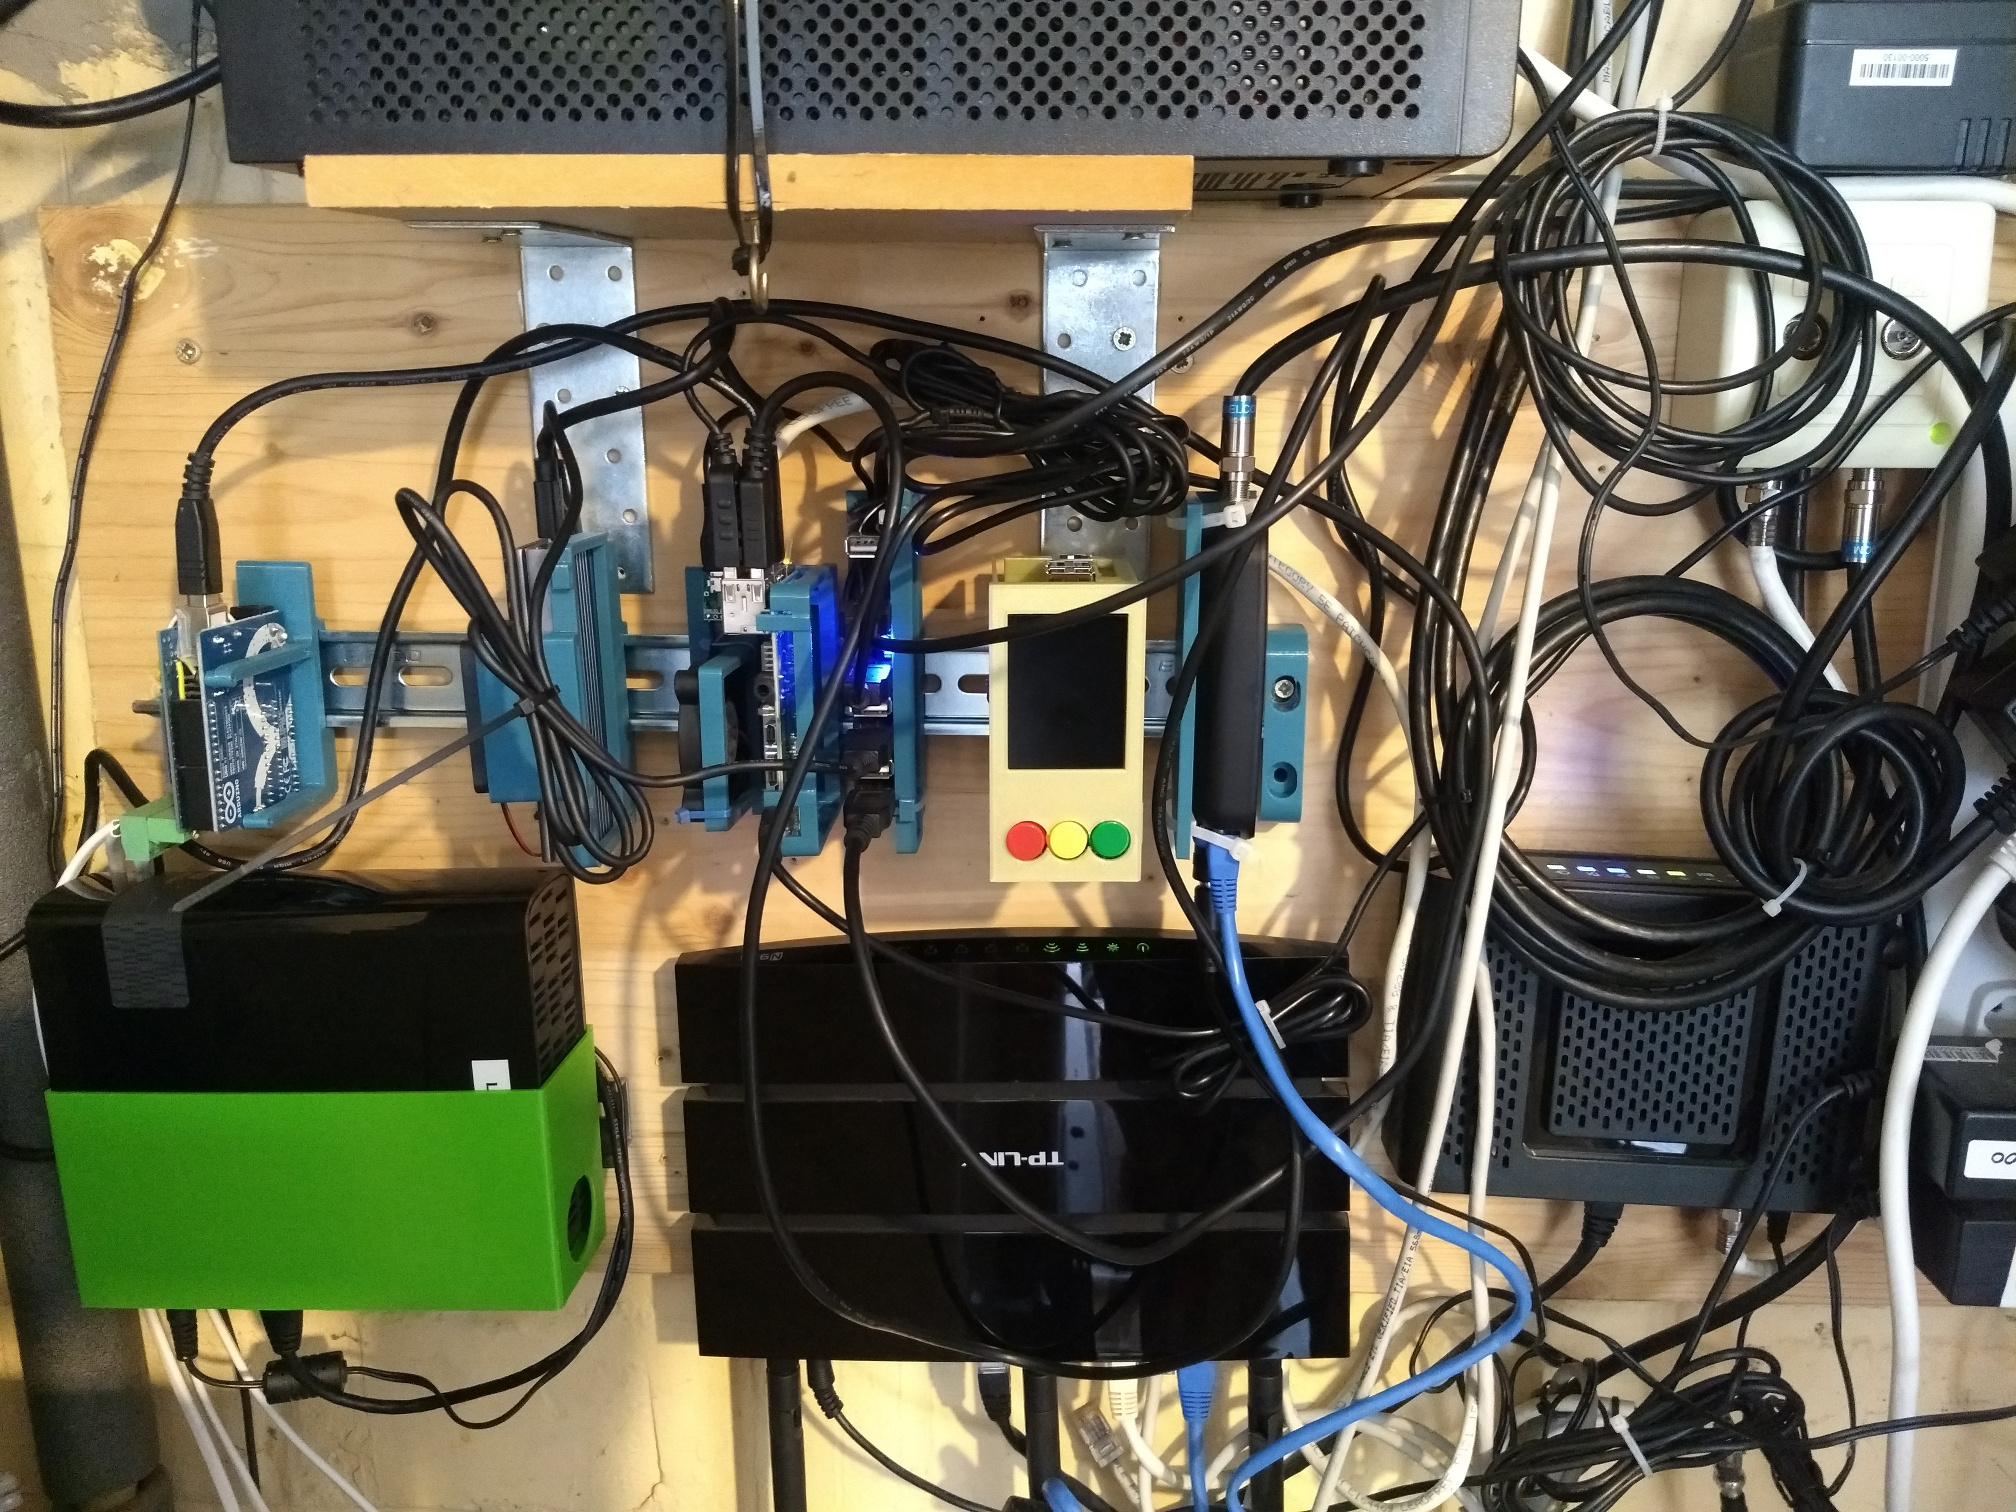
I have a technical wall with several pieces of electronics mounted onto it.
It started to look a bit disorganized, with all these things mounted
at random places on the wooden board and cables running all over the place.
So I wanted to clean it up a bit...
I stumbled upon a DIN-rail mount on Thingiverse, and remembered I had a piece of
DIN rail in a box. Time to remix a bit and mount everything on DIN rail!
I have a USB connected flatbed scanner, a Canon CanoScan LiDE 110.
I need to use it more frequently these days, and figured it would be
handy if I connect it to my office-rpi and use it over the network.
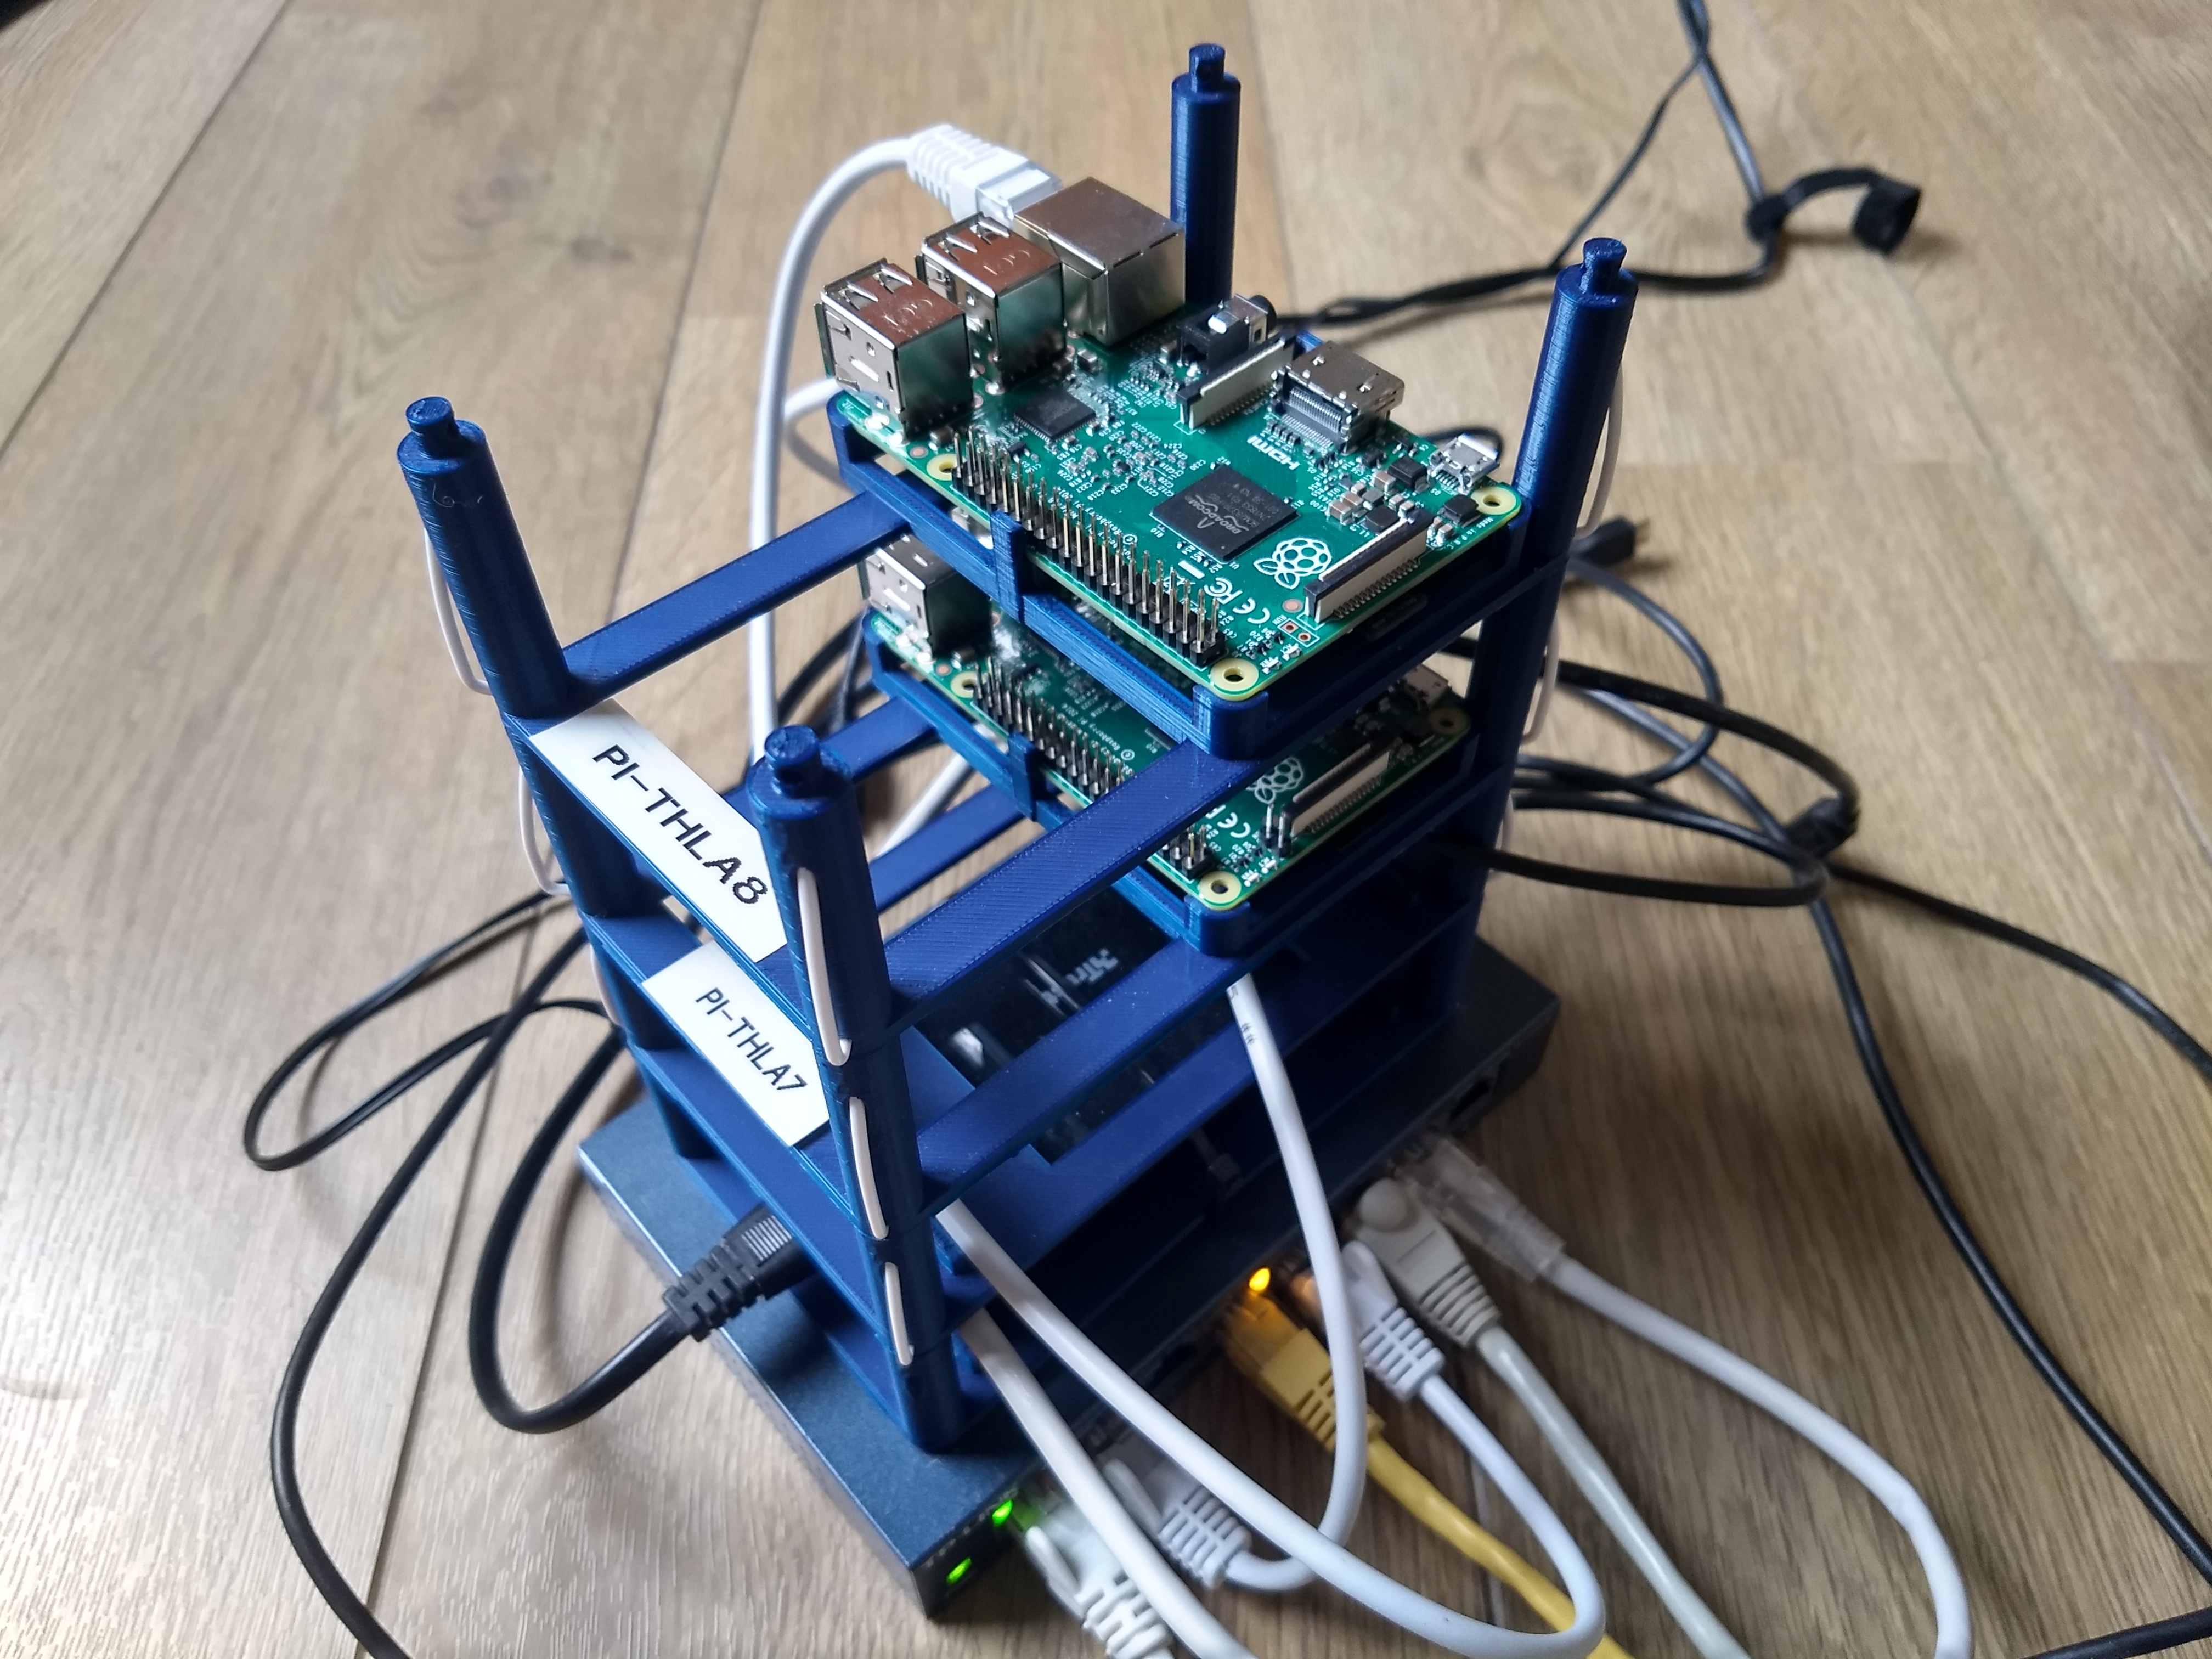
At home and at work, I always tend to have around 5 small development boards on my desk.
In a fixed setup with identical boards, metal or plastic standoffs can be a nice solution
to build a stack that reduces the footprint on desk and avoid a spiderweb of cables.
In reality, the boards are of different sizes, and standoffs still cost a few euro's each.
I knew I could do better, using a 3D printer and some parametric CAD modeling.
During COVID19 lockdown, the kids were running around the living room a lot
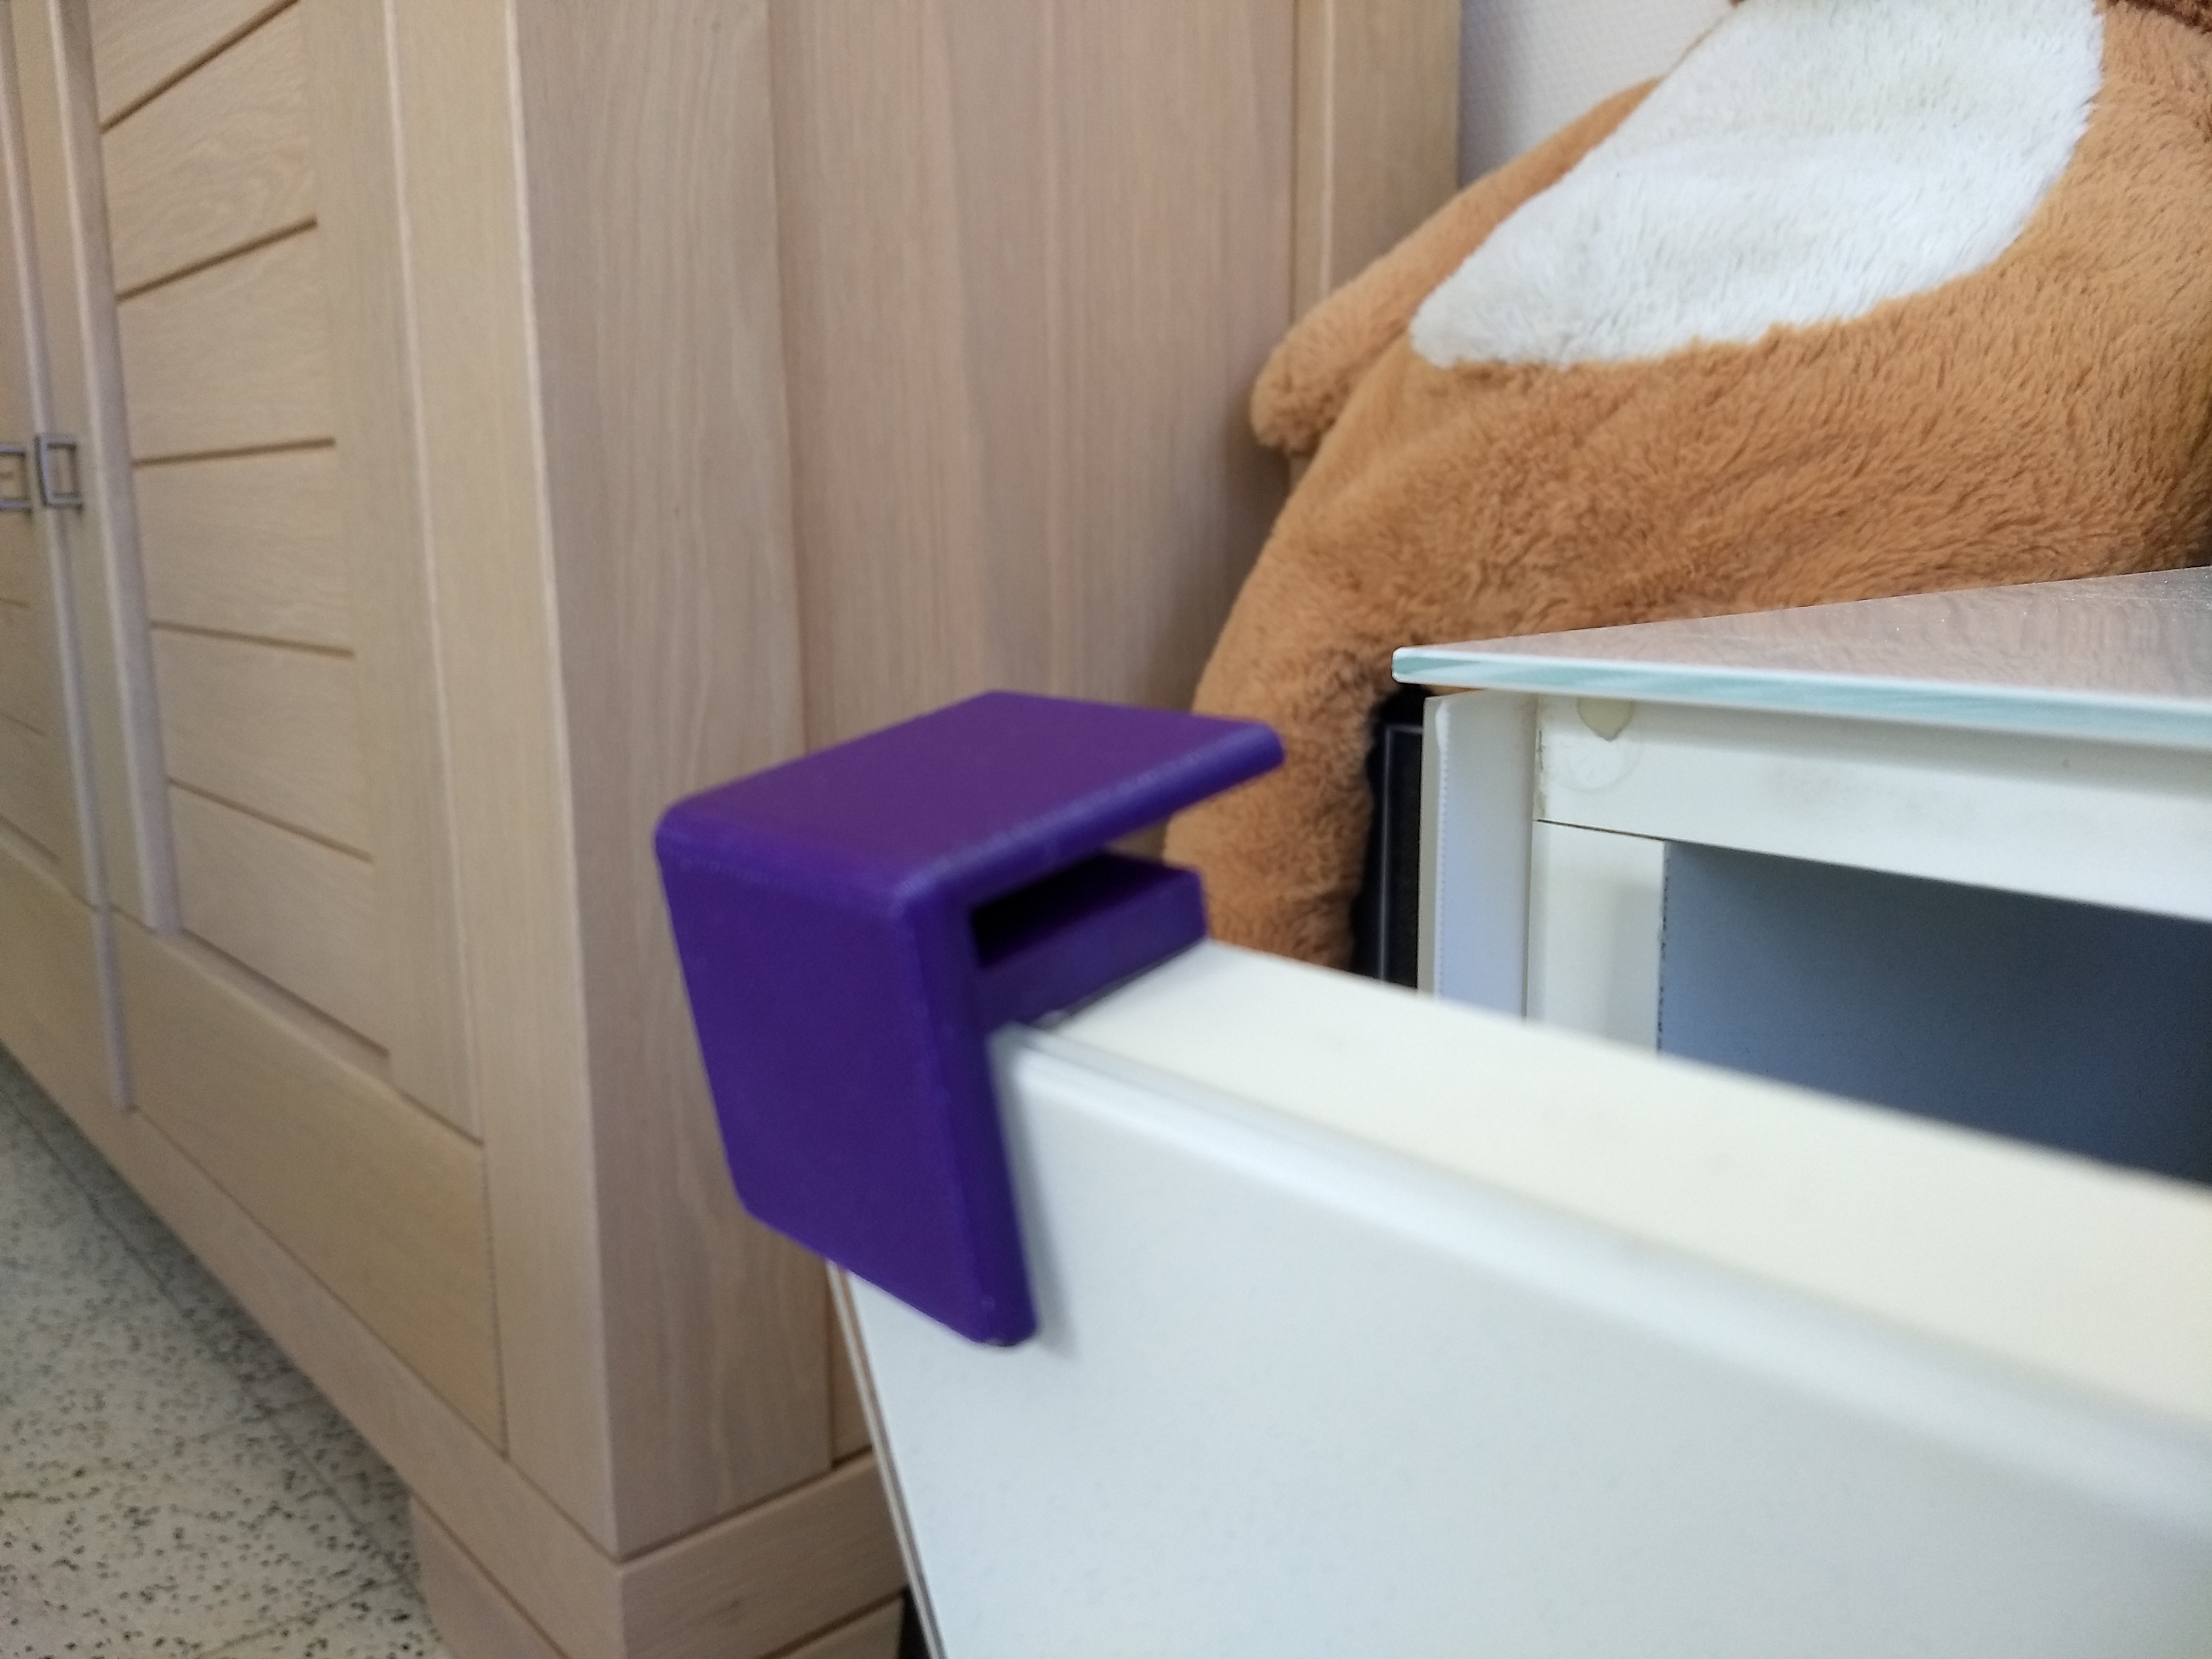
more, and a lot more reckless. Our TV console is covered with glass plates.
These have chamfered corners (45 degree cut off), but still it's a hard, glass
corner, and I could imagine painful or catastrophic injuries and trips to the
ER.
I decided to create a quick and dirty cover that, once installed, would provide
safer plastic, rounded corners.
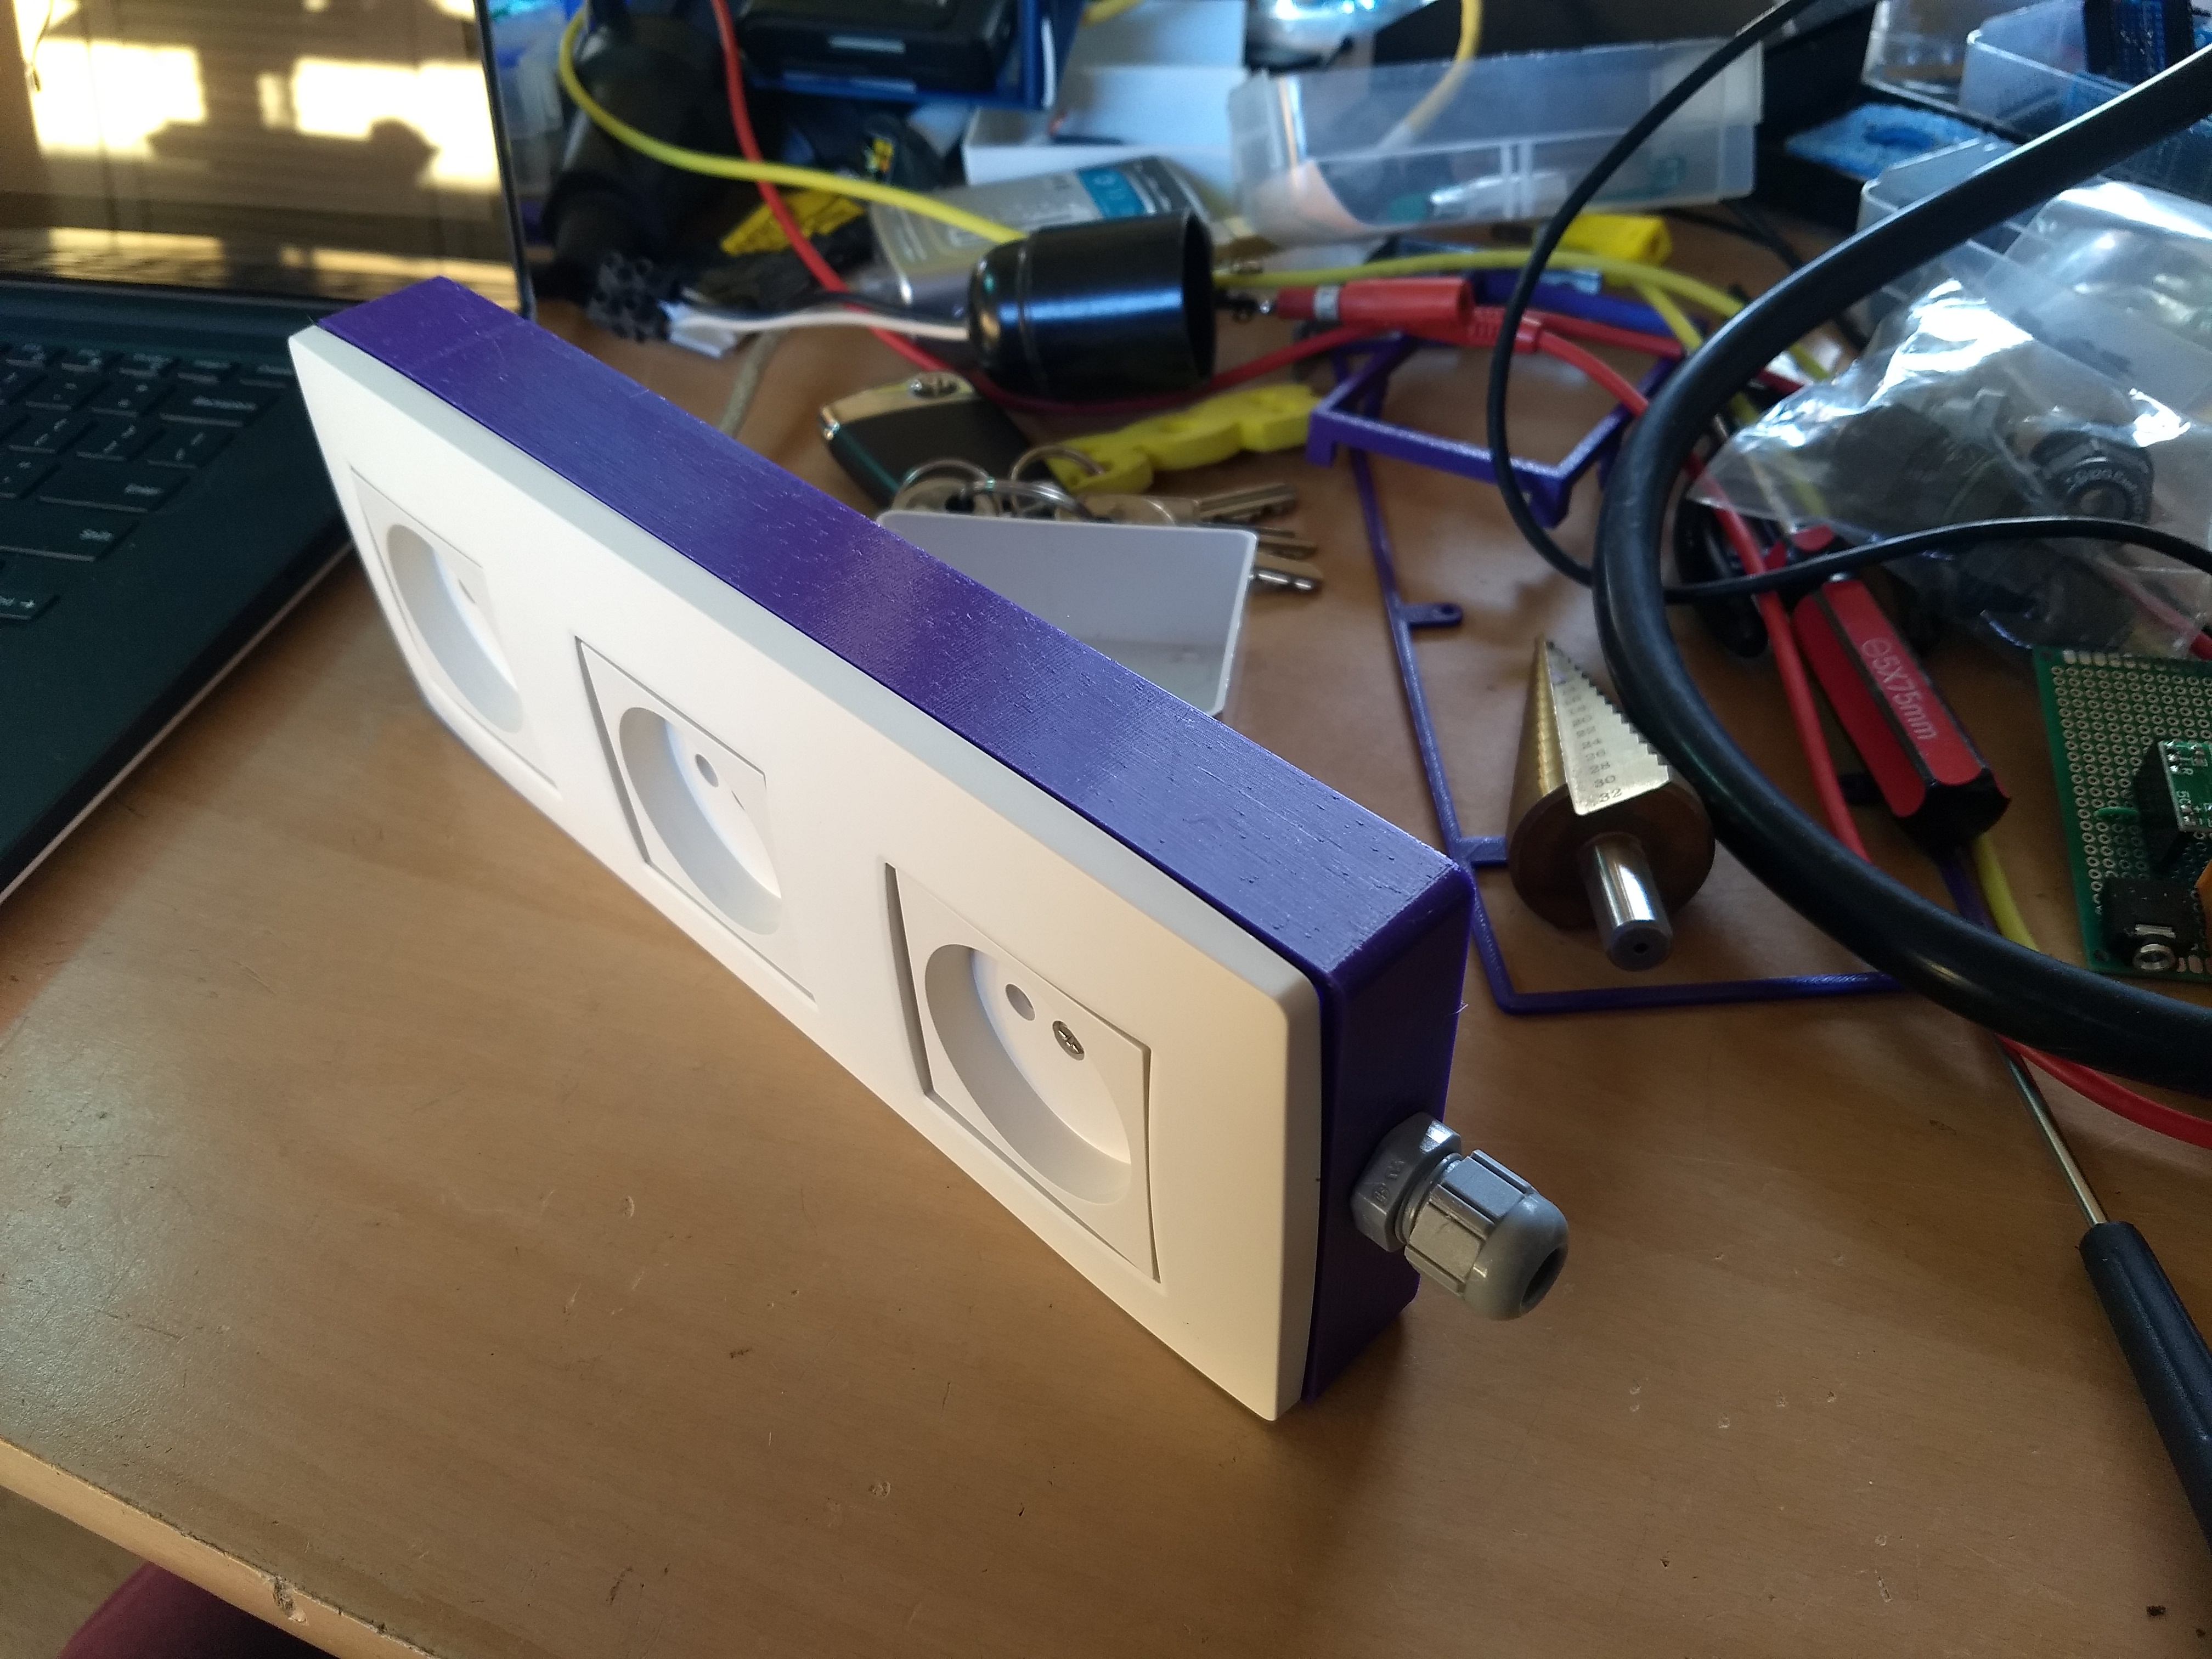
During COVID19 lockdown, I found myself struggling with cheap extension blocks,
in fact I find most extension blocks horrible, and most power supply blocks
can't fit next to each other.
I still had three brand new, wall sockets left over from electricity
renovations (I opted to place earth wire so installed appropriate sockets).
These are Niko brand, the finest EU/BE sockets available, and are lovely
to use in every way possible. I already considered making larger extension
blocks this way.
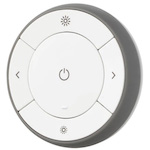
When I started working in my home office full-time during COVID-19 lock down,
I wanted a remote control to easily pause my music whenever a Teams call or meeting
started.
I had an IKEA 'hockeypuck' ZigBee control laying around that could easily be
commissioned onto my home assistant setup, which …
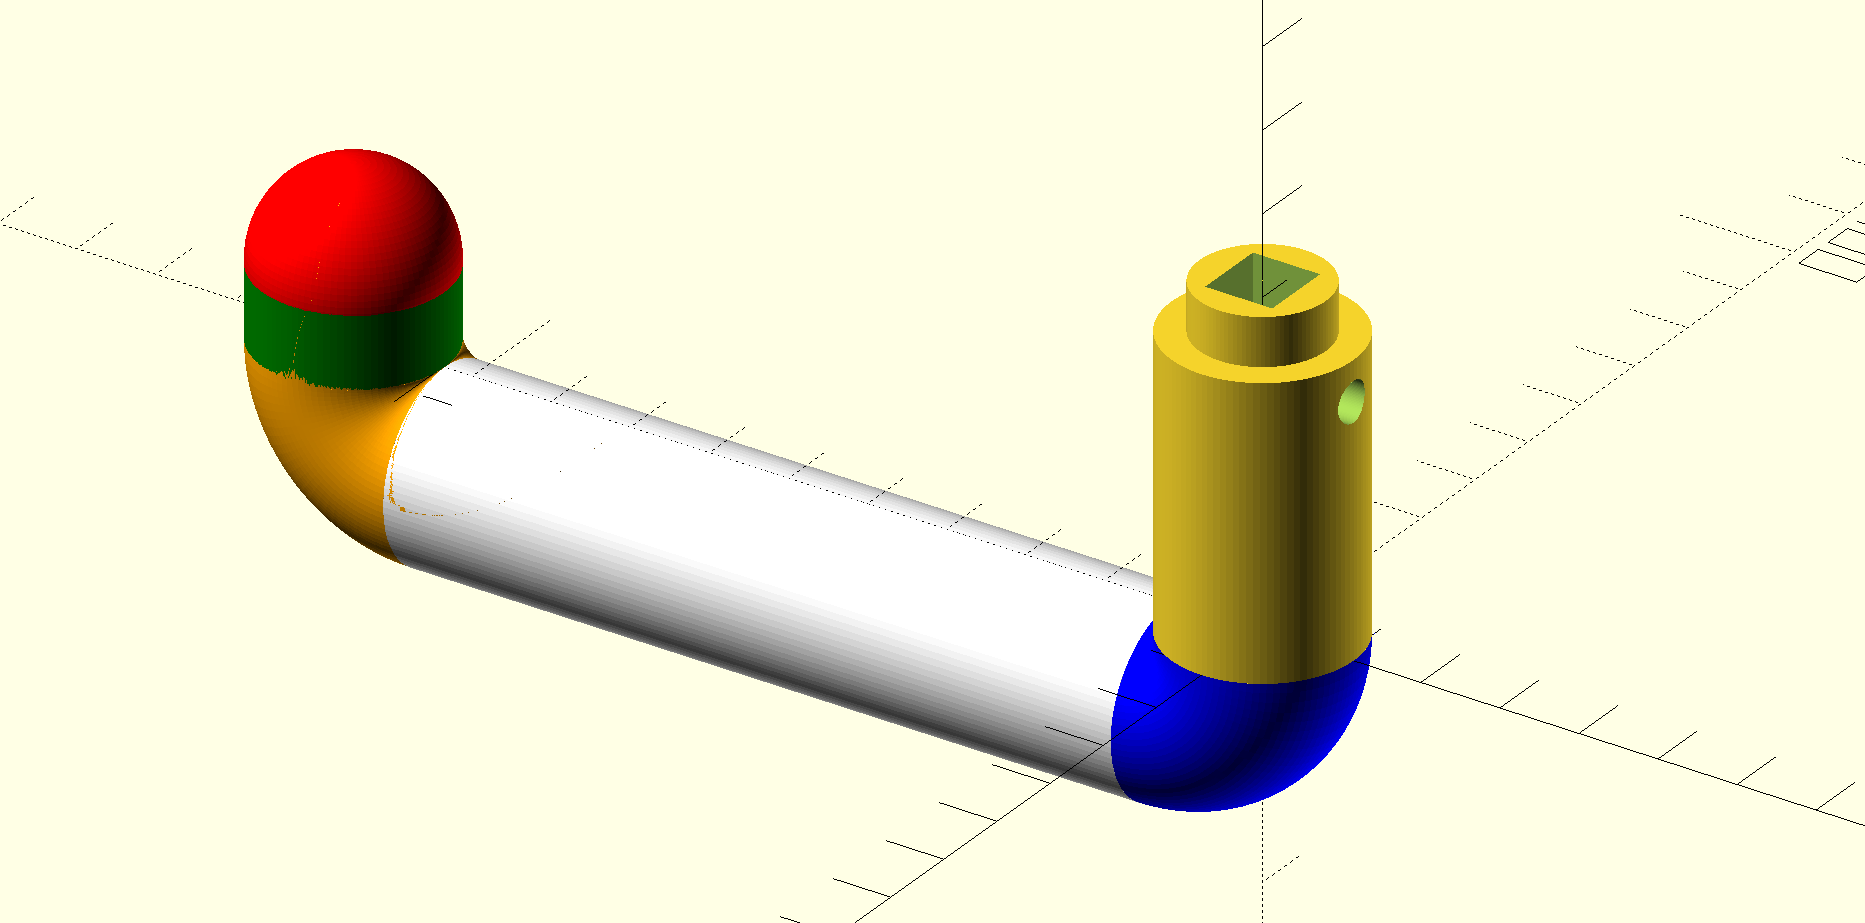
I designed a simple door handle during COVID-19 lock down. After my kids slammed
the kitchen door against the radiator a few times, I had to glue the existing
handle again and again. I didn't feel like installing a door stop (also, shops
were closed) for this old door that will be replaced at one point in the
coming years. I did feel like modelling a replacement object...
I have Raspberry Pi's in different rooms, and one thing I use them for is to
play music to speakers.
Each of them has two music player services on it (MPD, Spotify), and it's a bit
annoying that I have to stop a player when I want to listen to the other one.
Since I'm running home assistant as an automation hub, I wrote two short
automations that stop the already playing service when the second one kicks in.